Author

Designer

Browsing

Lemon Chicken Orzo Soup
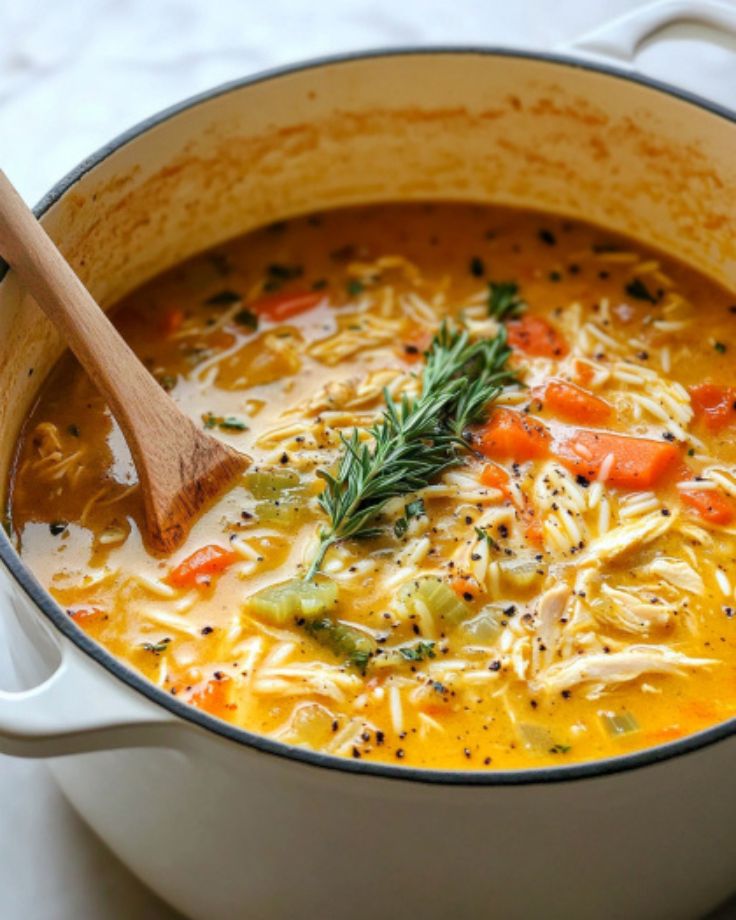
This Lemon Chicken Orzo Soup is your new go-to for those nights when you want something light yet comforting.

Made with simple ingredients and a punch of citrusy flavor, it’s the kind of easy soup you’ll find yourself craving on repeat.

Healthy, cozy, and quick to make — what’s not to love?

If you’re after a meal that’s as satisfying as it is easy, this one’s for you!

For Lemon Chicken Orzo Soup

  • Celery – Adds a crisp texture and fresh flavor to the soup.
  • Carrots – A sweet, earthy flavor that pairs beautifully with the other vegetables.
  • Onion – Adds a savory depth to the soup base.
  • Butter & Olive Oil – Used for sautéing the vegetables, giving a rich, smooth foundation to the soup.
  • Garlic – Provides aromatic warmth and depth of flavor.
  • Flour – Helps thicken the soup slightly and bind the ingredients together.
  • Chicken Broth – The base of the soup, adding rich, savory flavor.
  • Italian Seasoning – A blend of herbs that enhances the flavor profile with a savory, slightly earthy note.
  • Chicken Breasts – The main protein in the soup, providing lean meat that absorbs the flavor of the broth.
  • Orzo – Adds texture and makes the soup more filling.
  • Lemon Juice – Adds a refreshing, zesty tang to balance the richness of the soup.
  • Fresh Parsley – Offers a burst of freshness and color, enhancing both flavor and presentation.
  • Salt & Pepper – To taste, for seasoning the soup and bringing out all the flavors.
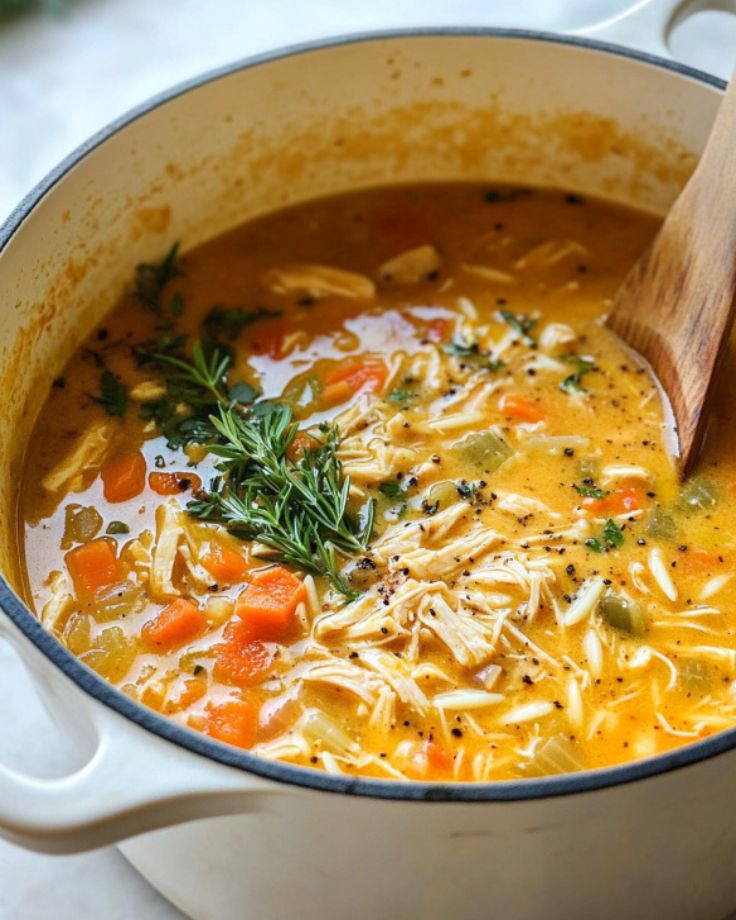
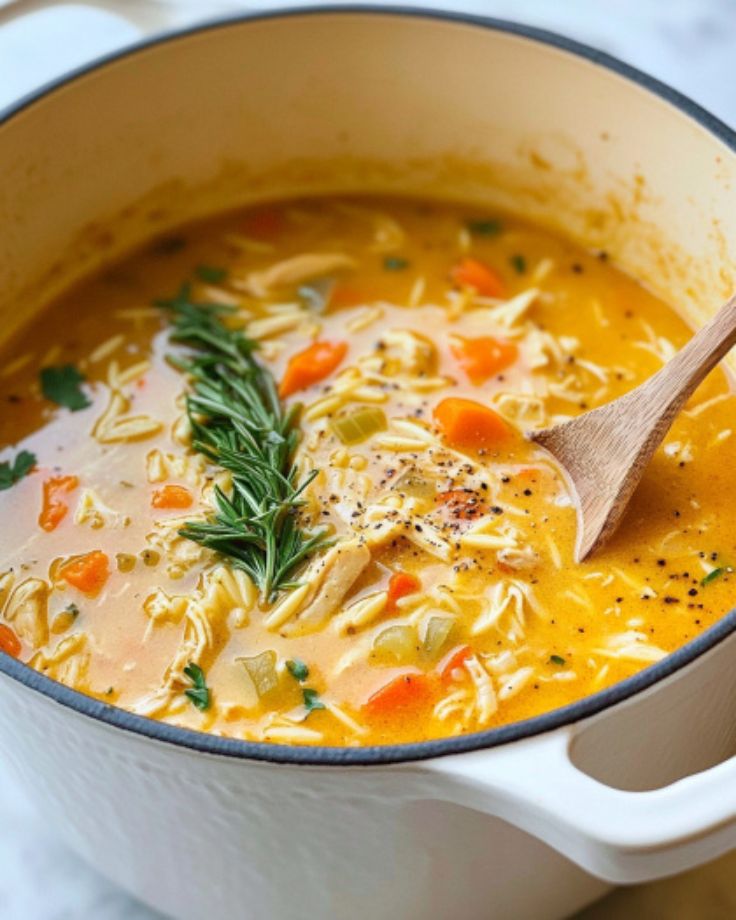
Lemon Chicken Orzo Soup

Prep Time 10 minutes
Cook Time 40 minutes
Total Time 50 minutes
Servings 6
Calories 298
Craving a cozy, healthy, and delicious meal? This Lemon Chicken Orzo Soup is the ultimate comfort dish—light, flavorful, and packed with wholesome ingredients. Perfect for busy days, it’s quick to make and sure to become a family favorite!

Ingredients

  • 2 sticks celery, finely chopped
  • 2 medium carrots, peeled and finely chopped
  • 1/2 medium onion, chopped
  • 1 tbsp butter
  • 1 tbsp olive oil
  • 3 garlic cloves, minced
  • 2 tbsp flour
  • 6 cups chicken broth
  • 1/4 tsp Italian seasoning
  • 1.5 pounds uncooked chicken breasts
  • 1 cup uncooked orzo
  • 1 tbsp lemon juice (adjust to taste)
  • 1 tbsp fresh parsley, chopped (or to taste)
  • Salt and pepper, to taste

Instructions 

  • In a large soup pot, sauté the chopped celery, carrots, and onions in butter and olive oil over medium-high heat for 5-7 minutes.
  • Add the minced garlic to the pot and cook for about 30 seconds. Stir in the flour and cook for an additional minute.
  • our in the chicken broth, stirring until the flour dissolves. Add the Italian seasoning and the chicken breasts. Bring the soup to a boil.
  • Once boiling, cover the pot (leaving the lid slightly ajar) and reduce the heat. Let the soup simmer for 15 minutes.
  • Stir occasionally to prevent the orzo from sticking to the bottom of the pot.
  • Remove the chicken breasts from the soup, chop them into pieces, and return them to the pot. Add the lemon juice, fresh parsley, and season with salt and pepper to taste. Adjust lemon juice to your preference.
  • Serve immediately and enjoy!

Notes

Notes:

  • You can swap chicken breasts for thighs if preferred.
  • For the most accurate results, use an instant-read thermometer to ensure your chicken reaches 165°F.
  • If you're sensitive to salt, opt for low-sodium chicken broth.
  • Leftovers may require extra chicken broth since the orzo will absorb liquid over time.
  • This recipe is also featured in the Salt & Lavender: Everyday Essentials hardcover cookbook.
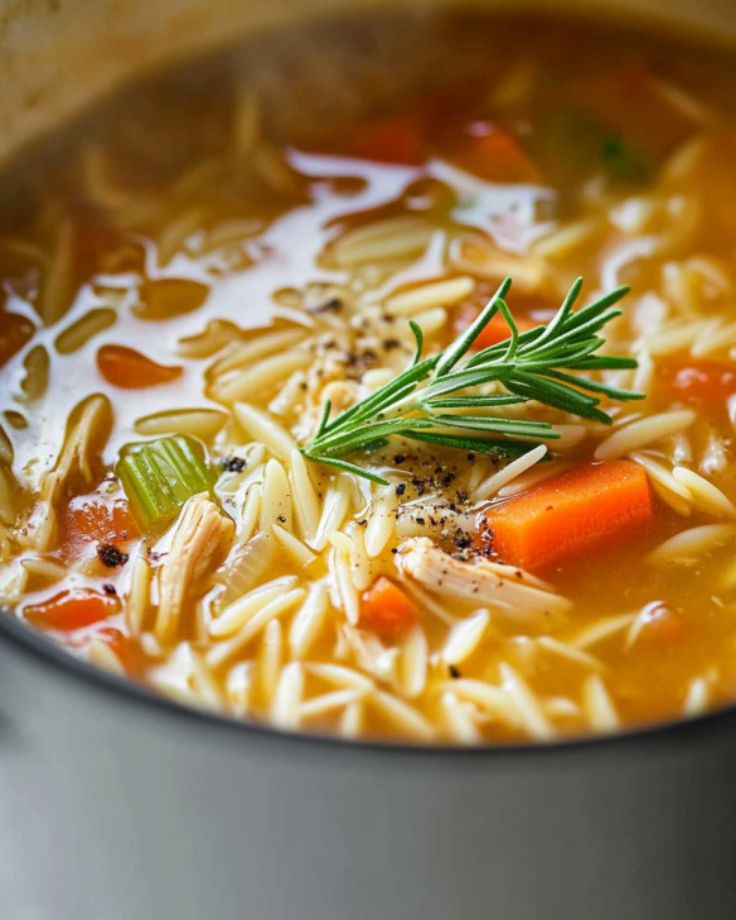
Calories: 298kcal
Course: Soup
Cuisine: American
Keyword: Creamy Lemon Chicken Orzo Soup

  1. Can I make this soup ahead of time?
    Definitely! This soup stores well and actually tastes even better the next day. Just refrigerate it in an airtight container for up to 3-4 days. If the orzo absorbs too much liquid, just add a bit more broth when reheating to get it back to the perfect consistency.
  2. How can I store and reheat leftovers?
    Leftovers are a breeze to store! Pop them in the fridge for up to 4 days. When reheating, just add some extra chicken broth to loosen up the orzo, which tends to soak up the liquid over time. Heat it up on the stovetop, stirring occasionally, and you’ll have a warm bowl of comfort in no time!
  3. Can I freeze this soup for later?
    You sure can! For best results, freeze the soup base without the orzo. The orzo can get a little mushy when frozen, so cook that fresh when you’re ready to enjoy it again. Just freeze the soup (chicken, veggies, and broth) and then reheat and add freshly cooked orzo when serving.
  4. Can I use the slow cooker for this recipe?
    You absolutely can! For slow cooker magic, just toss everything except the orzo, lemon juice, and parsley into the pot. Cook on low for 6-8 hours, or on high for 3-4 hours. About 30 minutes before serving, shred the chicken and toss in the orzo to finish cooking!
  5. Can I use another type of pasta instead of orzo?
    Yes, feel free to swap in another small pasta like ditalini or elbow macaroni! If you’re feeling adventurous, rice works great too, though you’ll need to adjust cooking times accordingly to ensure everything is just right.
Instant Pot Chicken Stew: Cozy Comfort in a Pot

When the weather’s cold and you need something warm,
filling, and easy to make, this Instant Pot Chicken Stew is the answer.

Packed with tender chicken, veggies, and savory herbs,
it’s a one-pot wonder that takes just 10 minutes of pressure cooking for a meal everyone will love.

Perfect for busy nights when you want comfort food
without the effort!

For Instant Pot Chicken Stew

  • Olive Oil – Used to sauté the onion and celery, creating a flavorful base for the stew.
  • Yellow Onion – Adds sweetness and depth of flavor.
  • Celery – Provides a subtle, fresh crunch.
  • Garlic – Infuses the dish with aromatic flavor.
  • Chicken Broth – Forms the stew’s savory base.
  • Worcestershire Sauce – Adds a rich, tangy note to the broth.
  • Rosemary & Thyme – Fresh herbs that bring earthy, fragrant flavors.
  • Bay Leaves – Enhance the stew with a subtle, herbal aroma.
  • Kosher Salt – Essential for seasoning the dish.
  • Carrots – Adds natural sweetness and vibrant color.
  • Boneless Skinless Chicken Breasts – The main protein, tender and juicy when cooked.
  • Baby Yellow Potatoes – Add heartiness to the stew with their creamy texture.
  • Frozen Green Peas – For a pop of color and sweetness.
  • Apple CIider Vinegar – Balances the flavors with a slight tang.
  • Freshly Ground Black Pepper – For a hint of spice and to taste.
  • Optional Garnish: Chopped Fresh Parsley – For a fresh, herbal finishing touch.

Instant Pot Chicken Stew

Prep Time 20 minutes
Cook Time 10 minutes
Total Time 30 minutes
Servings 4
Calories 454
Craving a warm, satisfying meal that’s as easy as it is delicious? This Instant Pot Chicken Stew is the ultimate comfort food, packed with tender chicken, hearty vegetables, and rich flavors – all made in one pot.

Ingredients

  • 1 tbsp olive oil
  • 1 yellow onion, diced
  • 2 celery stalks, diced
  • 4 garlic cloves, minced
  • 2 cups chicken broth (or 2 tsp Chicken Better Than Bouillon + 2 cups water)
  • 1 tbsp Worcestershire sauce
  • 1 tbsp fresh rosemary, minced (see note)
  • 1 tbsp fresh thyme, minced (see note)
  • 2 bay leaves
  • 1 tsp kosher salt (plus more to taste)
  • 4 carrots, sliced into thick rounds
  • 1.5 lbs boneless, skinless chicken breasts (about 3 x 8 oz breasts)
  • 1.5 lbs baby yellow potatoes (or regular yellow potatoes, cut into 1- to 1.5-inch dice)
  • 1 cup frozen green peas
  • 1 tsp Apple Cider Vinegar
  • Freshly ground black pepper, to taste
  • Optional garnish: Chopped fresh parsley

Instructions 

Sauté:

  • Set the Instant Pot to the Sauté function.
  • Once the display reads "Hot," add olive oil.
  • Sauté diced onion and celery until soft and fragrant.
  • Add garlic and turn off the Sauté function, letting the residual heat cook the garlic for 1 minute.
  • Pour in a small amount of broth to deglaze, scraping up any food bits from the bottom of the pot.

Add Ingredients:

  • Pour in the remaining chicken broth.
  • Add Worcestershire sauce, rosemary, thyme, bay leaves, and salt.
  • Layer sliced carrots evenly at the bottom.

Prepare Chicken:

  • Season both sides of the chicken breasts with salt and pepper.
  • Place the chicken on top of the carrots.
  • Layer the potatoes on top of the chicken, followed by frozen peas.
  • Do not stir.

Pressure Cook:

  • Close the Instant Pot lid and set the vent to "Sealing."
  • Select the "Pressure Cook" (or "Manual") setting on High for 10 minutes.
  • It will take around 15 minutes for the pot to come to full pressure.

Release Pressure:

  • Once the cooking cycle is complete, allow the pressure to release naturally for 10 minutes.
  • Use a quick release for any remaining pressure.
  • Carefully remove the chicken breasts and discard the bay leaves.

Blend:

  • Transfer about 2 cups of vegetables and broth into a medium bowl.
  • Use an immersion blender to blend until smooth.
  • Stir the blended mixture back into the stew and add apple cider vinegar.

Shred Chicken:

  • Dice the chicken into bite-sized pieces or shred using two forks.
  • Stir the chicken back into the stew.
  • Adjust the seasoning with salt and pepper to taste.

Serve:

  • Ladle the stew into bowls and optionally garnish with chopped fresh parsley.
  • Serve with biscuits or crusty bread for a complete meal.

Notes

  • Fresh herbs can be substituted with 2 tsp of poultry seasoning if needed.
  • Inactive time accounts for the time it takes for the Instant Pot to pressurize and release pressure.
  • This recipe was tested in both 6-quart and 8-quart Instant Pot models.
Calories: 454kcal
Course: Main Course
Cuisine: American
Keyword: Instant Pot Chicken Stew

  1. Can I use frozen chicken breasts instead of fresh?

Yes! You can absolutely use frozen chicken breasts. Just toss them into the Instant Pot with the other ingredients, and the cooking time stays the same. The pot will take a little longer to reach pressure, but once it’s there, the result will be just as delicious!

  1. What if I don’t have fresh herbs like rosemary and thyme?

No worries! If you don’t have fresh herbs, simply swap them out for dried ones. For every tablespoon of fresh herbs, use about one teaspoon of dried. Or, you can also use a pre-made poultry seasoning for a quick shortcut.

  1. Can I prep the stew in advance and freeze it?

Absolutely! After the stew cools, you can freeze it in an airtight container for up to 3 months. Just thaw it overnight in the fridge and reheat on the stovetop. It’ll taste as comforting as the first time you made it!

  1. How can I make this stew spicier?

If you’re looking for a kick, try adding some red pepper flakes, chopped jalapeños, or even a dash of chili powder. Stir them in with the broth, and let the heat build as it cooks!

  1. Is it necessary to sauté the vegetables before cooking?

While sautéing the vegetables does add extra flavor, you can skip that step if you’re in a rush. Just toss everything into the Instant Pot, and it’ll still turn out tasty. Sautéing does give a nice depth of flavor, though, so I highly recommend it if you’ve got the time!

Cozy up with this heartwarming Chicken and Rice Soup

That’s the ultimate comfort meal for busy nights.

With juicy chicken, tender rice, and a rich blend of savory spices, this soup feels like a warm hug in a bowl.

Whether you’re craving something satisfying for dinner or need leftovers for the week, this easy-to-make recipe delivers big flavor with minimal effort.

Perfect for any night, it’s the cozy meal your kitchen’s been missing!

For Chicken and Rice Soup

  • Chicken – Bone-in chicken breast or thighs will provide the best flavor to the broth. You can use boneless chicken if preferred.
  • Butter – For sautéing the vegetables and adding richness to the soup.
  • Onion – A small yellow onion, diced, for a savory base.
  • Carrots – Diced carrots for a slight sweetness and texture.
  • Celery – Adds freshness and crunch to the soup.
  • Garlic – Fresh garlic, minced, for a flavorful kick.
  • Chicken Broth – The base of the soup. Use low-sodium broth if preferred.
  • Soy Sauce – Enhances the soup’s umami flavor.
  • Hot Sauce – Adds a subtle layer of heat (Frank’s hot sauce works great).
  • Fresh Parsley – For garnish and a burst of color.

For Rice

  • Chicken Broth – To cook the rice and add extra flavor.
  • White Long Grain Rice – Uncooked white rice is used to keep the texture of the soup balanced. Alternatively, cooked rice can be added directly to the soup.

Chicken and Rice Soup Recipe

Prep Time 10 minutes
Cook Time 35 minutes
Total Time 44 minutes
Servings 8 cups
Calories 121
Craving a bowl of warmth and comfort? This Chicken and Rice Soup is the perfect dish to satisfy your hunger and soul.

Ingredients

Seasonings:

  • 1 tsp dried basil
  • ½ tsp each: dried parsley, oregano, thyme, mustard powder
  • ¼ tsp pepper

Soup:

  • 2 tbsp butter
  • 1 small yellow onion, diced
  • ½ cup diced carrots
  • 2 celery ribs, diced
  • 3 cloves garlic, minced
  • 5 cups chicken broth
  • 1 tsp soy sauce
  • 1 tsp ]hot sauce
  • 1 ¼ lbs bone-in chicken breast (or chicken thighs)
  • Fresh parsley for garnish

Rice:

  • 1 ½ cups chicken broth
  • ¾ cup white long-grain rice (uncooked) or 2 ¼ cups cooked rice

Instructions 

Prepare the Soup:

  • In a large soup pot, melt the butter over medium heat. Add the diced onions, carrots, and celery. Sauté for about 4 minutes until softened. Add garlic and cook for another 1 minute.
  • Stir in the seasonings (basil, parsley, oregano, thyme, mustard powder, pepper), soy sauce, hot sauce, chicken, and chicken broth.
  • Bring the soup to a gentle simmer (avoid boiling to keep the chicken tender) and cover partially. Let it cook for about 15-20 minutes until the chicken is fully cooked. Remove the chicken, shred it with two forks, and discard the bones. Return the shredded chicken to the pot.

Cook the Rice:

  • In a separate medium saucepan, bring 1 ½ cups of chicken broth to a boil. Add the rice, submerge it in the liquid, and bring back to a boil.
  • Cover tightly, reduce the heat to a simmer, and cook for 15 minutes. Turn off the heat and let the rice sit, covered, for an additional 10 minutes.
  • The rice will yield about 2 ¼ cups. If you’re using pre-cooked rice, add it directly to the soup instead of cooking separately.

Assemble and Serve:

  • Taste the soup and add salt if needed.
  • Spoon the rice into bowls and ladle the soup on top. If you prefer, you can add the rice directly to the soup pot.
  • Garnish with fresh parsley and serve hot.

Notes

  • Chicken: Bone-in chicken breast or thighs work best for adding flavor to the broth. Boneless chicken can also be used.
  • Slow Cooker Method: For a hands-off approach, cook the soup in a slow cooker on low for 6 hours. Shred the chicken at the end and stir it back in.
  • Storage: Store soup and rice separately in airtight containers. The soup lasts in the fridge for up to 3 days and can be frozen for up to 3 months. Rice also freezes well on its own.
Calories: 121kcal
Course: Soup
Cuisine: American
Keyword: Chicken and Rice Soup

  1. Can I use rotisserie chicken instead of raw chicken?

Yes, absolutely! If you have leftover rotisserie chicken, it’s a huge time-saver. Simply shred about 2 cups of cooked chicken and add it to the soup after simmering the vegetables and broth.

  1. Is it necessary to cook the rice separately from the soup?

Cooking the rice separately helps prevent it from absorbing too much broth, keeping the soup from becoming too thick. Plus, it allows you to store the soup and rice separately if you have leftovers.

  1. Can I use frozen vegetables instead of fresh ones?

Yes, frozen vegetables can easily be swapped in for fresh ones. They’re already chopped and ready to go, just throw them in and adjust cooking time accordingly.

  1. How can I make the soup spicier without altering the recipe too much?

If you like it spicy, simply add more hot sauce, a pinch of cayenne pepper, or some chopped fresh chili. Start small, taste as you go, and adjust the heat to your liking!

  1. Can I make this soup in a slow cooker?

Yes, you can! Sauté the vegetables first and then add everything to the slow cooker. Cook on low for 6 hours or high for 4 hours, then shred the chicken and return it to the soup. Don’t forget to cook the rice separately on the stovetop!

The Ultimate Dump-and-Go Comfort Food

Busy day ahead? No worries. This Slow Cooker Chicken Tortilla Soup requires just five minutes of prep, and the rest is hands-off.

Toss in your ingredients, set the slow cooker, and let it work its magic.

When you’re ready to serve, top it off with crispy tortilla strips and any extra toppings you like.

Perfect for busy nights when you want a flavorful, satisfying meal without all the hassle.

For Slow Cooker Chicken Tortilla Soup

  • Chicken – I use boneless, skinless chicken breasts or thighs. Both work well, depending on your preference for white or dark meat.
  • Yellow Onion – Diced for flavor and a bit of texture in the soup.
  • Black Beans – Drained and rinsed; adds heartiness and fiber.
  • Corn – Fresh or frozen defrosted corn kernels for sweetness and texture.
  • Diced Tomatoes – Standard canned tomatoes that add acidity and balance to the dish.
  • Fire-Roasted Tomatoes with Green Chilis – For a smoky kick and a bit of heat.
  • Ground Cumin – A key spice for that warm, earthy flavor.
  • Garlic ùPowder – A savory depth of flavor to complement the other spices.
  • Smoked Paprika – Adds a smoky, slightly spicy flavor.
  • Chili Powder – Mild heat to balance the flavors without overwhelming the soup.
  • Kosher Salt – To enhance and season the soup.
  • Chicken Stock – The base of the soup for a rich and flavorful liquid.

For Crispy Tortilla Strips 

  • Corn Tortillas – Cut into strips; these become crispy when baked.
  • Avocado Oil – Or any neutral oil for tossing the tortilla strips.
  • Salt – A pinch to season the crispy strips.

For Serving

  • Fresh Lime Juice – Adds a burst of freshness at the end.
  • Optional Toppings – Guacamole, Cilantro, Avocado, Mexican Cheese Blend, Sour Cream, Sliced Jalapenos

Slow Cooker Chicken Tortilla Soup (Dump-and-Go!)

Prep Time 5 minutes
Cook Time 4 hours
Total Time 4 hours 5 minutes
Servings 6
Calories 355
Looking for an easy dinner that practically makes itself? This Slow Cooker Chicken Tortilla Soup is packed with juicy chicken, vibrant veggies, and perfectly crispy tortilla strips.

Ingredients

  • 1 ½ Ib boneless, skinless chicken breasts or thighs
  • 1 small yellow onion, diced
  • 1 can (15-ounce) black beans, drained and rinsed
  • 1 ½ cups fresh or frozen corn kernels, thawed
  • 1 can (15-ounce) diced tomatoes
  • 1 can (15-ounce) diced fire-roasted tomatoes with green chilis (e.g., Rotel)
  • 1 tsp ground cumin
  • 1 tsp garlic powder
  • 1 tsp smoked paprika
  • ½ tsp mild chili powder
  • 1 tsp kosher salt
  • 3 cups chicken stock

For Crispy Tortilla Strips:

  • 4 corn tortillas, cut into thin strips
  • 1 tbsp avocado oil (or another neutral oil)
  • A pinch of salt

To Add at the End:

  • 2 tbsp fresh lime juice

Optional Toppings:

  • Easy Guacamole
  • Cilantro, avocado, Mexican cheese blend, sour cream, sliced jalapenos

Instructions 

  • Prepare the Soup:
    In a 6-quart slow cooker, add the chicken, onion, beans, corn, diced tomatoes, fire-roasted tomatoes, cumin, garlic powder, smoked paprika, chili powder, salt, and chicken stock. Stir to combine.
    Cover and cook on high for 4-5 hours or low for 6-7 hours, until the chicken is fully cooked and shreds easily with a fork. Do not uncover during cooking.
  • Make the Crispy Tortilla Strips (Optional):
    While the soup is cooking, preheat the oven to 400°F (200°C).
    Spread the tortilla strips on a rimmed baking sheet. Drizzle with avocado oil and sprinkle with a pinch of salt. Toss to coat the strips evenly.
    Bake for 8-10 minutes, tossing halfway through, until the strips are golden and crispy. Transfer to a paper towel-lined plate and let cool.
  • Finish the Soup:
    Once the soup is ready, uncover the slow cooker. Remove the chicken and transfer it to a cutting board. Shred it with a fork or cut it into chunks.
    Return the shredded chicken to the slow cooker along with the lime juice. Stir to combine, and taste for seasoning. Adjust with more salt or lime juice if desired.
  • Serve:
    Serve the soup with the crispy tortilla strips and any additional toppings you like, such as guacamole, cilantro, avocado, Mexican cheese blend, sour cream, and jalapenos.

Notes

  • If you prefer to skip the crispy tortilla strips, simply serve the soup with store-bought tortilla chips instead.
  • The nutrition information provided is based on using chicken breasts and avocado oil without any optional toppings.
Calories: 355kcal
Course: Soup
Cuisine: Mexican
Keyword: Slow Cooker Chicken Tortilla Soup

  1. Can I use frozen chicken breasts for this recipe?
    Yes! You can use frozen chicken breasts directly in the slow cooker. There’s no need to thaw them first. Just make sure they cook to an internal temperature of 165°F (74°C).
  2. How can I make the soup spicier?
    For a spicy kick, add some chopped jalapeños, either fresh or pickled. You can also toss in a pinch of cayenne pepper or use a can of spicy fire-roasted tomatoes.
  3. Can I prepare the soup in advance and freeze it?
    Yes, this soup is perfect for prepping ahead. Combine all ingredients (except the toppings) in a freezer-safe bag or container and freeze. When you’re ready, thaw overnight in the fridge and cook as directed.
  4. What can I use if I don’t have tortilla strips?
    No worries! You can substitute store-bought tortilla chips for the crispy strips, or simply skip them altogether if you’re short on time. The soup still tastes amazing!
  5.  Can I use canned beans instead of dried beans?
    Absolutely! Canned black beans are a great substitute. Just make sure to drain and rinse them before adding them to the soup to reduce excess sodium.

Chile Relleno Soup – A Low-Carb Comfort Food Hit!

Who says comfort food can’t be low-carb?

This Chile Relleno Soup combines the rich, smoky flavors of roasted poblano peppers, tender chicken, and gooey melted cheddar into a creamy, satisfying bowl of goodness.

It’s quick, simple, and completely irresistible – perfect for those nights when you want something hearty without the carbs.

Cozy up with this cheesy, smoky delight and enjoy a bowl of warmth that’s both comforting and guilt-free!

For Chile Relleno Soup:

  • Poblano Peppers – Roasted poblano peppers add a smoky depth to the soup, giving it that signature Chile Relleno flavor.
  • Butter – Used for sautéing the onion, garlic, and spices to build a flavorful base for the soup.
  • Chopped Onion – Adds a sweet and savory flavor to the soup’s base.
  • Garlic – Infuses the soup with aromatic richness.
  • Ground Cumin – The cumin adds an earthy, slightly warm spice that enhances the flavor of the peppers.
  • Chicken Bone Broth – A rich and savory liquid base that makes the soup hearty and comforting.
  • Salt and Pepper – To taste, used to season the soup and bring all the flavors together.
  • Boneless, Skinless Chicken – Cut into small pieces, the chicken adds protein and a hearty bite to the soup.
  • Cream Cheese – Adds a creamy richness and helps thicken the soup.
  • Shredded Cheddar Cheese – For that melty, cheesy goodness that makes this soup so indulgent.
  • Cheddar or Pepper Jack Cheese Slices – These melt beautifully on top of the soup to add an extra layer of cheese.

Chile Relleno Soup Recipe

Prep Time 15 minutes
Cook Time 25 minutes
Total Time 40 minutes
Servings 8
Calories 424
Craving a warm, cheesy, and comforting soup that won’t derail your low-carb diet? This Chile Relleno Soup is the perfect bowl of deliciousness!

Ingredients

  • 4 medium poblano peppers
  • 2 tbsp butter
  • ¼ cup chopped onion (about 40 g)
  • 2 cloves garlic, minced
  • 1 tsp ground cumin
  • 4 cups chicken bone broth (about 946 g)
  • Salt and pepper to taste
  • 1 ½ lbs boneless, skinless chicken (thighs or breasts), cut into ½-inch pieces (about 453 g)
  • 8 oz cream cheese (about 226 g)
  • 1 ½ cups shredded cheddar cheese (about 395 g)
  • 8 slices cheddar or pepper jack cheese (thin sandwich slices, ¾ oz each)

Instructions 

Roast the Poblano Peppers:

  • Char the poblano peppers until the skin is blistered and blackened.
  • You can do this over an open flame on a gas stove or under a broiler on high heat.
  • Rotate the peppers to ensure even charring on all sides.

Peel the Peppers:

  • Once charred, place the peppers in a bowl and cover with plastic wrap.
  • Let them cool, then peel off as much skin as possible.
  • Remove the seeds and finely chop the peppers in a food processor or blender. Set aside.

Sauté Onion and Garlic:

  • In a large saucepan, melt the butter over medium heat.
  • Add the chopped onion and cook for about 5 minutes, stirring frequently, until translucent.
  • Stir in the garlic and cumin, cooking for an additional minute until fragrant.
  • Add the chopped poblano peppers and stir to combine.

Simmer the Soup:

  • Pour in the chicken broth, season with salt and pepper to taste.
  • Bring the soup to a boil, then reduce the heat to a simmer.
  • Add the chicken pieces and cook for about 10 minutes, or until the chicken is fully cooked.

Blend the Creamy Base:

  • In a food processor or blender, combine the cream cheese, shredded cheddar cheese, and about 1 cup of the hot broth (without chicken).
  • Blend until smooth, then stir this creamy mixture back into the soup.

Broil the Cheese:

  • Preheat your broiler.
  • Divide the soup into individual ovenproof bowls and float a slice of cheese on top of each bowl.
  • Place the bowls under the broiler, about 6 inches from the heat, and broil until the cheese is melted and bubbly.
Calories: 424kcal
Course: Main Course
Cuisine: Mexican
Keyword: Chile Relleno Soup

  1. Can I swap poblano peppers with another type?
    Poblano peppers add that signature smoky flavor, but if you can’t find them, you can use Anaheim peppers or even bell peppers. Just keep in mind that the flavor won’t be as smoky – but it will still be delicious!
  2. How can I adjust the spice level of the soup?
    If you prefer a milder soup, simply remove the seeds from the poblano peppers before adding them. For a bit of extra heat, toss in a jalapeño or serrano pepper with the onions and garlic – your taste buds will thank you!
  3. Can I make this soup in advance?
    Absolutely! You can roast the peppers a few days ahead and store them in the fridge. To save time, try using pre-cooked chicken or a rotisserie chicken – that way, the soup is ready in a flash!
  4. Can I freeze the soup?
    While the soup can be frozen, the cream cheese and melted cheddar might not hold up well after freezing. If you do freeze it, consider adding a splash of milk when reheating to help restore the creamy texture.
  5. How can I make this soup vegetarian?
    Making it vegetarian is easy! Simply swap the chicken for some hearty black beans and add more vegetables like corn or zucchini. Use vegetable broth in place of the chicken broth for an extra boost of flavor.

Honey Mustard Chicken

If you’re looking for a dinner that delivers BIG flavor without a lot of effort, this Honey Mustard Chicken is a winner.

A sweet and tangy sauce, tender chicken, and the fresh kick of rosemary—what’s not to love?

It’s simple enough for a weeknight but delicious enough to impress anyone at your table.

Get ready to fall in love with this easy, mouthwatering recipe!

For Honey Mustard Chicken Sauce

  • Grainy Mustard – Adds texture and tang to the sauce.
  • Dijon Mustard – Smooth and sharp for a balanced flavor.
  • Honey – Provides sweetness and depth to the sauce.
  • Extra Virgin Olive Oil – Helps to combine the ingredients and adds richness.

For the Chicken

  • Yellow Onion – Sautéed to bring out sweetness and flavor.
  • Garlic – Adds fragrance and depth to the dish.
  • Boneless Skinless Chicken Tenderloins – Lean, tender protein choice.
  • Salt and Pepper – To taste, enhances all the flavors.
  • Fresh Rosemary – Provides a fragrant herbaceous kick.

  1. Can I use chicken thighs instead of chicken tenderloins?

Absolutely! Chicken thighs are juicier and more flavorful than tenderloins, so they make a great substitute. Just be sure to adjust the cooking time, as thighs may take a little longer to cook through. You’ll still get that delicious honey mustard flavor!

  1. What if I don’t have Dijon mustard?

No problem! You can substitute Dijon mustard with yellow mustard or spicy brown mustard. Each will offer a slightly different flavor profile, but they’ll still give you that tangy, savory kick in the sauce. Use whatever you have on hand!

  1. How can I make this recipe spicier?

If you like a bit of heat, add some cayenne pepper, red pepper flakes, or even a chopped jalapeño to the honey mustard sauce. Start with a small amount and adjust to your preferred spice level—it’s that easy!

  1. Can I prepare the sauce ahead of time?

Yes, you can! Make the honey mustard sauce ahead of time and store it in the fridge for up to a week. This way, you’ll save time on the day you cook and just pour it over the chicken when you’re ready to bake.

  1. What sides pair well with Honey Mustard Chicken?

This dish goes perfectly with roasted vegetables, steamed broccoli, or a fresh garden salad. You can even serve it with some rice or mashed potatoes to soak up that delicious sauce. The possibilities are endless!

Mushroom-Stuffed Chicken Breasts

Craving a dish that’s bursting with flavor and easy to make?

These Mushroom-Stuffed Chicken Breasts are your answer!

Tender chicken pockets filled with garlicky mushrooms, fresh spinach, and melted cheese—simple ingredients, but the flavor is anything but basic.

It’s a dish that’s both easy to make and impressively delicious.

Perfect for a weeknight meal or a special dinner that’ll have everyone asking for seconds!

For Mushroom-Stuffed Chicken:

  • Chicken Breasts – Boneless, skinless chicken breasts work best for this recipe as they’re easy to cut into pockets and hold the filling well.
  • Salt & Pepper – Used to season both the inside and outside of the chicken, enhancing the flavor of the dish.
  • Unsalted Butter – Helps cook the mushrooms and adds richness to the filling.
  • Mushrooms – Sliced thin to allow them to cook down and caramelize beautifully for the filling.
  • Garlic – Adds a deep, aromatic flavor to the mushroom mixture.
  • Thyme – Provides an earthy, fragrant touch that complements the mushrooms perfectly.
  • Baby Spinach – Adds color, freshness, and a slight earthy flavor to balance the richness of the cheese.
  • Mozzarella – This melting cheese creates that gooey, irresistible cheese pull when the chicken is sliced.
  • Olive Oil – Used for searing the chicken breasts to get a crispy, golden crust before baking.

Mushroom-Stuffed Chicken Breasts

Prep Time 15 minutes
Cook Time 30 minutes
Total Time 45 minutes
Servings 2
Calories 575
Craving a dish that’s bursting with flavor and easy to make? These Mushroom-Stuffed Chicken Breasts are your answer! Juicy chicken pockets filled with garlicky mushrooms, fresh spinach, and melted cheese—this simple yet delicious recipe will take your chicken game to the next level.

Ingredients

  • 2 skinless, boneless chicken breasts (220g / 7oz each) (Note 1)
  • 3/4 tsp salt
  • 1/4 tsp pepper
  • 2 tbsp (30g) unsalted butter
  • 7 oz (200g) mushrooms, sliced thin (~2 heaping cups)
  • 2 garlic cloves, finely minced
  • 1/2 tsp thyme leaves (Note 2)
  • 2 cups baby spinach (Note 3)
  • 3 oz (80g) mozzarella, sliced (or another melting cheese)
  • 1 tbsp olive oil

Instructions 

  • Preheat oven to 200°C (390°F) or 180°C (355°F) for fan ovens.

repare chicken breasts:

  • Cut a pocket into each chicken breast, being careful not to cut all the way through. Cut on the side with the natural fold to keep the smooth side intact.
    Season both the inside and outside of the chicken breasts with half of the salt and pepper.

Make the mushroom filling:

  • In an oven-proof skillet, melt butter over high heat. Add sliced mushrooms and cook for 3 minutes, until they begin to turn golden.
    Add the minced garlic, thyme, and the remaining salt and pepper. Continue cooking for an additional 2 minutes until the mushrooms are golden and aromatic.
    Stir in the spinach and cook for 30 seconds, or until wilted.

Stuff the chicken:

  • Carefully stuff the mushroom and spinach mixture into the pocket of each chicken breast. Top with sliced mozzarella.
    Seal the pockets with toothpicks, just enough to hold the filling in place (doesn’t need to be fully sealed).

Sear the chicken:

  • Wipe the skillet with paper towels and heat olive oil over medium-high heat. Sear the chicken breasts on both sides for about 1.5 minutes until golden.

Bake:

  • Transfer the skillet to the preheated oven and bake for 15 minutes, or until the internal temperature of the chicken reaches 65°C (149°F), measured at the thickest part of the breast.

Rest the chicken:

  • Remove the chicken from the skillet and let it rest for 5 minutes under loosely tented foil.

Serve and enjoy!

  • Serve the stuffed chicken with your favorite sides, like a creamy risotto or fresh salad.

Notes

  1. Chicken breasts are ideal for this recipe because they are the right size and shape for stuffing. This recipe won’t work well with thighs or other cuts.
  2. Feel free to swap herbs – you can use dried thyme or other herbs like chives, parsley, rosemary (1/2 tsp), oregano, or marjoram.
  3. You can replace baby spinach with other leafy greens like chopped English spinach, silverbeet (Swiss chard), kale, or even cabbage.
Calories: 575kcal
Course: Main Course
Cuisine: Western
Keyword: Mushroom-Stuffed Chicken Breasts

1. Can I prep the chicken ahead of time?

Yes! You can stuff the chicken breasts and refrigerate them until you’re ready to cook. It makes dinner prep a breeze, and gives the flavors more time to meld together.

2. How do I stop the cheese from leaking out?

To prevent any cheesy mess, make sure you don’t overstuff the chicken. A generous amount is perfect, but avoid too much filling. Use toothpicks to seal the chicken, and it’ll hold everything together during cooking.

3. What if I don’t have toothpicks to seal the chicken?

No worries! You can use kitchen twine to tie the chicken, or just gently pound the chicken to an even thickness before stuffing—no sealing needed!

4. How do I make sure the chicken is fully cooked without drying it out?

The best way to avoid dry chicken is by using a meat thermometer. Aim for an internal temperature of 165°F (74°C). It’ll be perfectly cooked without drying out.

5. Can I switch the cheese?

Definitely! While mozzarella is great for its meltability, feel free to use any cheese that melts well, like provolone, Gouda, or Swiss. Go with what you love!

Pollo Asado: Bold, Flavorful, and Perfect for Any Meal

This Pollo Asado is your new go-to recipe for juicy, marinated chicken that’s bursting with vibrant Mexican flavors!

With a zesty citrus marinade and aromatic spices like achiote, cumin, and garlic, this chicken is anything but ordinary.

Whether you’re enjoying it on its own or turning it into tacos, bowls, or burritos, it’s sure to become a family favorite.

Quick to make, this easy recipe is packed with flavor and versatility—get ready to impress!

For Pollo Asado

  • Chicken Thighs – Bone-in, skin-on chicken thighs are ideal for this recipe. They provide great flavor and juiciness.
  • Orange Juice – Fresh orange juice adds a tangy sweetness that balances the spices in the marinade.
  • Lime Juice – Adds a zesty acidity that complements the orange juice and enhances the flavor.
  • Olive Oil – Used for marinating the chicken and ensuring it stays tender.
  • Vinegar – Provides a slight tang to balance the richness of the olive oil and chicken.
  • Achiote Paste – Adds deep, earthy flavors with a touch of spice. (See homemade achiote paste recipe for details.)
  • Garlic – Crushed garlic brings aromatic flavor to the marinade.
  • Oregano – Dried oregano gives the chicken a classic Mexican flavor.
  • Cumin – A key spice that adds a warm, earthy note.
  • Black Pepper – Adds mild heat and depth to the marinade.
  • Onion Powder – Brings a savory sweetness to the chicken.
  • Salt – Enhances all the flavors in the marinade.

For Homemade Achiote Paste (Optional)

  • Annatto Seeds – These give the paste its signature color and flavor.
  • Cumin Seeds – Adds an earthy spice.
  • Black Peppercorns – For a touch of peppery heat.
  • Cloves – Gives the paste a rich, aromatic depth.
  • Dried Oregano – Adds a herbaceous flavor.
  • Garlic – Minced garlic creates a strong base for the paste.
  • Orange Juice – The citrus helps bring everything together.
  • White Vinegar – Adds tang and balances the spices.
  • Salt – To season the paste.

Pollo Asado Recipe

Prep Time 30 minutes
Cook Time 30 minutes
Total Time 1 hour
Servings 6
Calories 306
Craving a juicy, flavorful chicken dish that's bursting with bold, Mexican-inspired flavors? This Pollo Asado recipe delivers tender, marinated chicken thighs with a perfect balance of citrus and spices.

Ingredients

  • 6 bone-in, skin-on chicken thighs
  • 1 small orange, juiced
  • 1 small lime, juiced
  • 2 tbsp olive oil
  • 1 tbsp vinegar
  • 2 tbsp achiote paste (see notes for homemade version)
  • 3 cloves garlic, crushed
  • 1 tsp dried oregano
  • 1 tsp dried cumin
  • 1 tsp black pepper
  • 1 tsp onion powder
  • 1 tsp salt

Instructions 

Prepare the Marinade:

  • In a bowl, whisk together the orange juice, lime juice, olive oil, vinegar, achiote paste, crushed garlic, oregano, cumin, black pepper, onion powder, and salt.

Marinate the Chicken:

  • Add the chicken thighs to the marinade. Cover the bowl and refrigerate for at least 30 minutes, or up to 4 hours, to allow the flavors to infuse.

Preheat the Oven:

  • Preheat your oven to 200°C (400°F). Allow the chicken to sit at room temperature while the oven heats.

Prepare the Baking Tray:

  • Lightly grease a large baking tray. Arrange the marinated chicken thighs on the tray, ensuring they are spaced evenly.

Bake the Chicken:

  • Bake the chicken for 28-30 minutes or until the internal temperature reaches 165°F (74°C).

Notes

  • Homemade Achiote Paste: Combine 3 tablespoons annatto seeds, 1 teaspoon cumin seeds, 1 teaspoon black peppercorns, 1/2 teaspoon cloves, 1 teaspoon dried oregano, 4 minced garlic cloves, 1/4 cup orange juice, 2 tablespoons white vinegar, and 1/4 teaspoon salt. Toast the seeds and spices until fragrant, then grind them. Blend with garlic, oregano, orange juice, vinegar, and salt to form a paste.
  • Grilled Option: Clean and grease your grill grates. Grill the chicken for 5-7 minutes on one side, then flip and grill for another 4-5 minutes. Continue grilling until the internal temperature reaches 165°F.

To Store:

  • Refrigerate: Store any leftovers in an airtight container in the fridge for up to 4 days.
  • Freeze: Let the chicken cool completely, then wrap each piece in foil, place in a freezer bag, and freeze for up to 3 months.
  • Reheat: To reheat, bake at 350°F (177°C) for 10-12 minutes, or microwave in 30-second intervals until heated through.

Variations:

  • Side Dishes: Pair the chicken with warm tortillas, beans, and coconut milk rice for a complete meal.
  • Toppings: Add pico de gallo or guacamole to complement the spiciness of the chicken.
  • Serving Ideas: Enjoy the chicken in tacos, burritos, air fryer quesadillas, or taco bowls.
Calories: 306kcal
Course: Main Course
Cuisine: Mexican
Keyword: Pollo Asado Recipe

  1. How long should I marinate the chicken for?

For the best flavor, marinate the chicken for at least 4 hours. If you’re short on time, 30 minutes will still give you a tasty result. Just don’t marinate it for too long (8+ hours), as the citrus can break down the chicken.

  1. Can I use boneless chicken breasts instead of thighs?

Yes, you can! While chicken breasts cook faster and can be a bit drier than thighs, they’ll still work great in this recipe. For extra juiciness, consider adding a bit more marinade or even a splash of chicken broth during baking.

  1. Don’t have a grill? Can I still make this?

Absolutely! You can easily bake the chicken instead. Just pop it on a baking tray, preheat your oven to 400°F (200°C), and bake for about 30 minutes or until it reaches 165°F (74°C) internally.

  1. What if I don’t have achiote paste?

No worries! You can either buy achiote paste from a store, or if you’re feeling adventurous, make your own (the recipe is in the notes). If you’re in a pinch, you can substitute with paprika or a combination of dried chili powder and turmeric for that beautiful color and flavor.

  1. Can I make this with other proteins?

For sure! This marinade is perfect for other proteins like chicken breasts, or even shrimp. Adjust cooking times depending on your choice. For shrimp, just grill them for 3-4 minutes on each side until perfectly cooked.

Chicken and Potatoes with Dijon Cream Sauce

This Chicken and Potatoes with Dijon Cream Sauce is a total game-changer!

It’s everything you love about comfort food—crispy, tender chicken and hearty potatoes—smothered in a silky, buttery Dijon cream sauce.

This one-pan wonder is as quick as it is delicious, making it the perfect weeknight dinner when you’re craving something simple yet packed with flavor.

Ready in just 30 minutes, it’s the kind of meal your family will ask for over and over again!

For Chicken and Potatoes

  • Chicken Breasts – Boneless, skinless chicken breasts work best, but you can also use thighs if you prefer dark meat.
  • Italian Seasoning – Adds a lovely herbaceous flavor. You can also substitute with Herbs de Provence if you prefer.
  • Salt and Pepper – Essential for seasoning to taste.
  • Butter – Adds richness and helps to brown the chicken and potatoes for a crispy texture.
  • Olive Oil – For frying the chicken and potatoes, giving them a golden color.
  • Baby Potatoes – Halved or quartered, they should be no larger than 1-inch pieces for even cooking.

For Dijon Cream Sauce

  • Butter – Used to start the sauce with garlic, giving it a rich base.
  • Garlic – Minced garlic infuses the sauce with a lovely, fragrant flavor.
  • Chicken Broth – Low-sodium chicken broth helps build the foundation of the sauce without making it too salty.
  • Dijon Mustard – Provides a tangy, slightly spicy flavor to the cream sauce, adding depth to the dish.
  • Heavy Cream – Creates a smooth, luxurious sauce that coats the chicken and potatoes perfectly.
  • Salt and Pepper – To taste, balancing the flavor of the sauce.

Chicken and Potatoes with Dijon Cream Sauce

Prep Time 5 minutes
Cook Time 25 minutes
Total Time 30 minutes
Servings 3 servings
Calories 696
Looking for a delicious dinner that’s both easy and impressive? This Chicken and Potatoes with Dijon Cream Sauce is the perfect one-pan wonder! With tender chicken and potatoes smothered in a creamy Dijon sauce, it's the kind of meal that feels fancy but comes together in just 30 minutes.

Ingredients

For the chicken and potatoes:

  • 3 medium boneless, skinless chicken breasts
  • 2 tsp Italian seasoning (or Herbs de Provence)
  • Salt and pepper to taste
  • 2 tbsp butter
  • 2 tbsp olive oil
  • ½ pound baby potatoes (halved or quartered, no larger than 1-inch pieces)

For the Dijon Cream Sauce:

  • 1 tbsp butter
  • 1 tsp minced garlic
  • 1 cup chicken broth (preferably low-sodium)
  • 2 tbsp Dijon mustard
  • 1 cup heavy cream
  • ½ tsp salt (adjust to taste)
  • ¼ tsp cracked black pepper (adjust to taste)

Instructions 

  • Preheat the oven to 375°F (190°C).

Prepare the chicken and potatoes:

  • In a large bowl, toss the chicken breasts and halved potatoes with 1 tablespoon olive oil. Season generously with salt, pepper, and Italian seasoning (or Herbs de Provence).

Cook the chicken and potatoes:

  • In a large skillet, melt 2 tablespoons butter over medium heat. Add the remaining 1 tablespoon olive oil, stirring to combine.
  • Add the chicken breasts to one side of the skillet and the potatoes to the other side. Cook undisturbed for 3-4 minutes, then flip the chicken and cook for another 3-4 minutes until both sides are browned.
  • Transfer the chicken and potatoes to a plate and cover to keep warm.

Prepare the sauce:

  • In the same skillet, melt 1 tablespoon butter over medium heat. Add the minced garlic and cook for about 1 minute until fragrant.
  • Stir in the chicken broth and Dijon mustard, then whisk in the heavy cream, salt, and pepper.

Combine and bake:

  • Return the chicken and potatoes to the skillet. Toss them in the sauce to ensure they’re coated.
  • Transfer the skillet to the preheated oven and bake for 15-20 minutes, until the chicken is cooked through and the potatoes are fork-tender.

Serve:

  • Spoon the Dijon cream sauce over the chicken and potatoes. Garnish with freshly cracked black pepper and fresh herbs, if desired.

Notes

  • Make-ahead tip: This recipe can be doubled. Simply follow the steps but arrange the browned chicken and potatoes on a rimmed baking sheet. Pour the sauce over them before baking.
Calories: 696kcal
Course: Main Course
Cuisine: American
Keyword: Chicken and Potatoes with Dijon Cream Sauce

  1. Can I use chicken thighs instead of chicken breasts?

Absolutely! If you prefer dark meat, boneless, skinless chicken thighs are a great substitute. They’re juicier and still work wonderfully with the sauce.

  1. Do I really need to brown the chicken and potatoes before baking?

Browning the chicken and potatoes helps enhance the flavor and texture, but if you’re short on time, you can skip this step. Just make sure the chicken reaches 165°F (74°C) when baking, and the potatoes are fork-tender.

  1. Can I make the Dijon cream sauce ahead of time?

Yes! You can make the sauce in advance and store it in the fridge. Just reheat it gently before combining it with the chicken and potatoes.

  1. What if I don’t have Italian seasoning?

No worries! You can use Herbs de Provence, or even make a simple mix of dried basil, oregano, and thyme to get a similar flavor.

  1. How can I make this recipe dairy-free?

For a dairy-free version, swap the butter for plant-based butter and use a non-dairy cream like coconut cream or almond milk. Just make sure your chicken broth is dairy-free as well.

Coconut Lime Chicken

Fast, Flavor-packed, and Easy!

Looking for a quick dinner that’s bursting with bold flavors?

This Coconut Lime Chicken is your new weeknight hero!

In just 30 minutes, you’ll have juicy chicken bathed in a creamy, tangy coconut-lime sauce that will make your taste buds sing.

Best of all, it’s a one-pan wonder, making cleanup a breeze.

Perfect for busy nights when you want something fresh, flavorful, and satisfying.

Get ready to impress with minimal effort!

For Coconut Lime Chicken

  • Chicken – Boneless, skinless chicken breasts work best, but you can also use thighs if you prefer darker meat.
  • Vegetable Oil – For frying the chicken to get that perfect golden sear.
  • Red Onion – Adds a savory base flavor when sautéed.
  • Fresh Red Chili – Adds a mild heat and freshness to the dish.
  • Dried Chili Flakes – Gives an extra punch to the spice level.
  • Ginger – Fresh ginger brings a zingy, aromatic flavor to the sauce.
  • Garlic – Adds a rich, fragrant base to the sauce.

For Coconut Lime Sauce

  • Coconut Milk – Full-fat, unsweetened coconut milk creates the rich, creamy base of the sauce.
  • Vegetable Stock – Adds depth to the sauce’s flavor. Chicken stock can also be used for a richer taste.
  • Fish Sauce – Imparts a savory, umami flavor that enhances the sauce.
  • Lime Juice – The bright and tangy flavor that balances the richness of the coconut milk.
  • Cornstarch – Used to thicken the sauce to the perfect consistency.
  • Bok Choy – Adds a fresh, crunchy element that complements the chicken and sauce.
  • Coriander (Cilantro) – Fresh cilantro adds a burst of freshness to garnish.

Coconut Lime Chicken

Prep Time 5 minutes
Cook Time 20 minutes
Total Time 25 minutes
Servings 4 servings
Calories 356
Craving a dinner that’s bursting with flavor but doesn’t take hours to make? This Coconut Lime Chicken brings together the perfect balance of zesty lime, creamy coconut milk, and tender chicken, all cooked in just one pan in under 30 minutes!

Ingredients

For the Chicken:

  • 4 small boneless, skinless chicken breasts (or 2 large breasts, sliced in half)
  • ½ tsp salt
  • ½ tsp pepper
  • 1 tbsp vegetable oil (or coconut oil)
  • ½ cup finely chopped red onion
  • 1 long red chili, finely chopped (seeds removed)
  • ¼ tsp dried chili flakes (red pepper flakes)
  • 1 tbsp minced fresh ginger
  • 2 garlic cloves, minced

For the Sauce:

  • 1 cup full-fat coconut milk (unsweetened)
  • ½ cup vegetable or chicken stock
  • 2 tsp fish sauce
  • 2 tbsp fresh lime juice
  • 2 tsp cornstarch (cornflour)
  • 4 small bunches bok choy, washed and cut into 4 long pieces each
  • Fresh lime wedges and coriander (cilantro) to serve

Instructions 

  • Prepare the Chicken:
  • Pat the chicken breasts dry with a paper towel, then season both sides with salt and pepper.

Cook the Chicken:

  • Heat 1/2 tablespoon of oil in a large skillet over medium-high heat. Once hot, add the chicken and cook for 5-8 minutes until golden on the bottom. Flip and cook on the other side for another 5-8 minutes, or until the internal temperature reaches 74°C (165°F). Once cooked, remove the chicken and set aside on a warm plate, covering it with aluminum foil.

Sauté the Aromatics:

  • Reduce the heat to medium and add the remaining oil to the pan. Add the chopped onion and sauté for 2-3 minutes, stirring often, until softened. Scrape up any chicken bits from the bottom of the pan for extra flavor.

Add the Spices:

  • Stir in the fresh chili, chili flakes, ginger, and garlic. Cook for about 1 minute until fragrant.

Make the Sauce:

  • Pour in the coconut milk, stock, and fish sauce. In a small bowl, combine the lime juice and cornstarch, mixing until smooth. Add this to the pan and stir well. Bring the sauce to a simmer, then cook for 5 minutes until it thickens.

Add Bok Choy and Chicken:

  • Stir in the bok choy and return the chicken to the pan, including any juices from the plate. Cook for 1-2 minutes until the bok choy is just tender yet still crunchy.

Serve:

  • Serve the coconut lime chicken over rice, garnished with fresh coriander and lime wedges on the side.
Calories: 356kcal
Course: Dinner, Main Course
Cuisine: Asian, Thai
Keyword: Coconut Lime Chicken

  1. Can I use chicken thighs instead of breasts?

You bet! Chicken thighs are juicy and packed with flavor, so feel free to swap them in. Just make sure to adjust the cooking time slightly, as thighs might take a little longer to cook through. Either way, it’ll be delicious!

  1. I don’t have fish sauce. Can I still make this?

No worries! If you’re missing fish sauce, you can substitute it with soy sauce or tamari (for a gluten-free option). The flavor will still be amazing, just with a slight variation.

  1. How do I make the sauce thicker if it’s too thin?

If your sauce is looking a little runny, just mix a teaspoon of cornstarch with a tablespoon of cold water to create a slurry, then stir it into the sauce. Let it simmer for another minute or two, and voilà – thickened perfection!

  1. Can I add vegetables to this recipe?

Absolutely! You can toss in some veggies like bell peppers, spinach, or even snap peas. Just throw them into the pan with the bok choy for a few minutes until they’re tender but still crunchy – easy peasy!

  1. Can I make this ahead of time?

For sure! You can cook the chicken and sauce ahead of time, then store it in the fridge for up to three days. Just reheat gently on the stovetop, adding a little splash of water or stock if the sauce has thickened too much. Dinner’s ready in no time!