Author

Designer

Browsing

Pollo Guisado (Latin Chicken Stew with Olives)

If you love bold flavors, fall-off-the-bone chicken, and a rich, savory sauce, this Pollo Guisado is about to become your new favorite.

This one-pot wonder is a Latin American classic—braised chicken infused with warm spices, olives, and a deep tomato base, simmered to perfection.

It’s ridiculously easy to make, packed with flavor, and perfect for weeknight dinners or meal prep.

Serve it with rice, plantains, or a side of warm tortillas and prepare to fall in love.

One bite, and you’ll be hooked!

For Pollo Guisado

  • Chicken – Traditionally made with bone-in chicken thighs and drumsticks for the best flavor and tenderness.
  • Adobo Seasoning – A simple Latin spice blend that adds depth and savory goodness to the chicken.
  • Olive Oil – Used for sautéing and enhancing flavor.
  • Scallions – Adds a mild onion flavor and freshness.
  • Garlic and Cilantro – The flavor powerhouses of this dish, adding richness and an herby touch.
  • Tomato Sauce – Creates the base of the stew, adding a deep, rich taste.
  • Sazón Seasoning (Optional) – A Latin seasoning blend that boosts color and flavor.
  • Green Olives & Olive Brine – Adds a salty, briny contrast to balance the dish.
  • Chicken Bouillon – Intensifies the umami flavor and richness of the broth.
  • Cumin – Brings a warm, earthy note to the stew.
  • Bay Leaves – Infuses the broth with a subtle aromatic depth.

For the Sauce & Cooking Liquid

  • Water – Helps simmer the chicken to tender perfection while blending all the flavors.
  • Extra Cilantro – Sprinkled at the end for a fresh, vibrant finish.

Pollo Guisado (Latin Chicken Stew with Olives)

Prep Time 10 minutes
Cook Time 1 hour
Total Time 1 hour 15 minutes
Servings 4
Calories 345
A hearty and flavorful braised chicken stew, Pollo Guisado is a staple in Caribbean, Central, and South American cuisine. Packed with rich flavors, tender chicken, and a savory tomato-olive sauce, this dish is both comforting and easy to make

Ingredients

  • 4 skinless chicken drumsticks (bone-in, about 14 oz)
  • 4 skinless chicken thighs (bone-in, trimmed, about 20 oz)
  • ½ tsp adobo seasoning salt
  • 1 tsp olive oil
  • 4 medium scallions, chopped
  • 3 garlic cloves, minced
  • ¼ cup chopped cilantro, plus 2 tbsp for garnish
  • 1 can (8oz) tomato sauce
  • 1 packet sazon seasoning (optional)
  • ¼ cup pitted green olives, plus 2 tbsp brine
  • 1 tbsp Chicken Better Than Bouillon (or 1 bouillon cube)
  • ½ tsp cumin
  • 2 bay leaves
  • 1 cup water

Instructions 

Stovetop Method

  • Season the Chicken: Sprinkle adobo seasoning over the chicken pieces.
  • Sauté the Aromatics: Heat olive oil in a large pot or Dutch oven over medium heat. Add scallions and sauté until soft (2-3 minutes). Stir in garlic and ¼ cup cilantro, cooking for another 1-2 minutes until fragrant.
  • Brown the Chicken: Place the chicken in the pot, letting it brown for about 5 minutes, flipping halfway.
  • Build the Flavor: Pour in the tomato sauce, add sazon (if using), water, olives, olive brine, bouillon, cumin, and stir well. Toss in the bay leaves and bring everything to a boil.
  • Simmer: Cover and reduce the heat to medium-low. Let the stew simmer for about 50 minutes until the chicken is tender.
  • Thicken the Sauce: Remove the lid and increase the heat to high. Let the sauce cook down for another 5-10 minutes until thickened to your liking.
  • Finish & Serve: Discard the bay leaves, adjust salt if needed, and sprinkle the remaining cilantro on top. Serve warm!

Instant Pot Method

  • Season the chicken as instructed.
  • Use the sauté function to cook the scallions, garlic, and cilantro in olive oil until fragrant.
  • Add the chicken and brown for about 5 minutes.
  • Pour in the tomato sauce, sazon (if using), water, olives, olive brine, bouillon, cumin, and bay leaves. Stir well.
  • Seal the Instant Pot and cook on high pressure for 20 minutes.
  • Allow natural release, then discard the bay leaves and sprinkle with fresh cilantro before serving.
Calories: 345kcal
Course: Dinner
Cuisine: Colombian, Latin
Keyword: Pollo Guisado

1. Can I use boneless, skinless chicken instead of bone-in pieces?

Yes, you can swap in boneless, skinless chicken thighs or breasts. Just note that they cook faster than bone-in pieces, so you’ll need to reduce the simmering time to about 30 minutes to keep them tender and juicy. Easy swap!

2. Is Pollo Guisado spicy?

Not unless you want it to be! This recipe is more savory than spicy, but if you like a little heat, feel free to add chili flakes or a chopped jalapeño. You control the spice level—extra flavorful!

3. Can I make this ahead of time?

Absolutely! This dish actually tastes better the next day when the flavors have had more time to develop. Just store it in the fridge for up to 4 days and reheat gently on the stovetop. Perfect for meal prep!

4. What can I use if I don’t have sazon seasoning?

No sazon? No problem! You can make a quick substitute by combining 1/2 teaspoon of paprika, 1/4 teaspoon garlic powder, cumin, and oregano. It’ll give you that signature Latin flavor without missing a beat!

5. How can I thicken the sauce if it’s too thin?

If your sauce is too runny, simply uncover the pot in the last 10 minutes of cooking to help it reduce and thicken. For a quicker fix, you can stir in a teaspoon of cornstarch mixed with a little water. Stir it in and watch that sauce thicken right up!

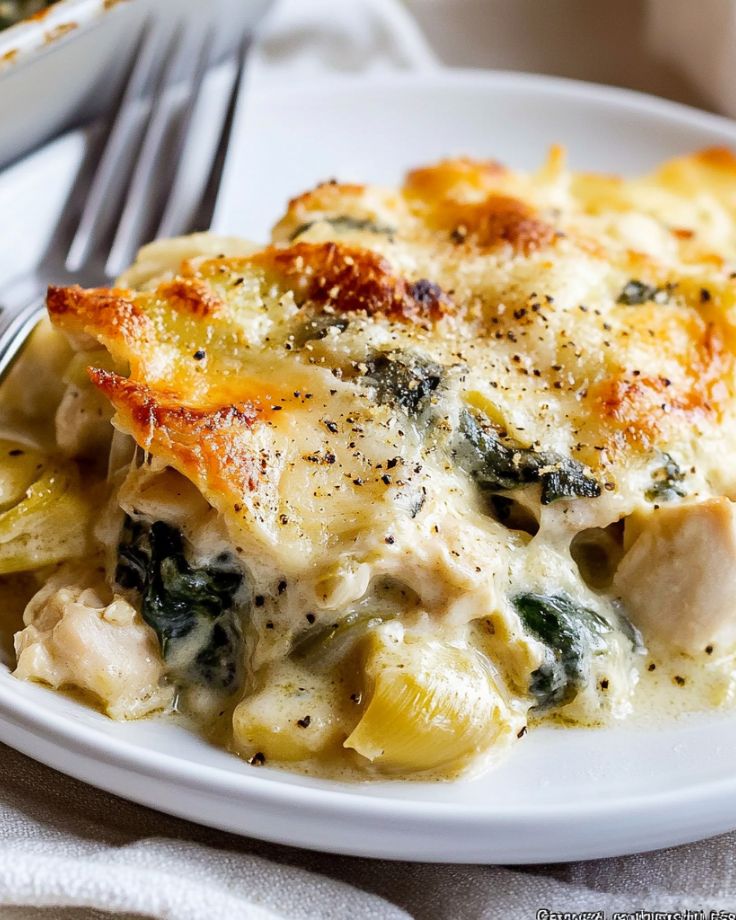
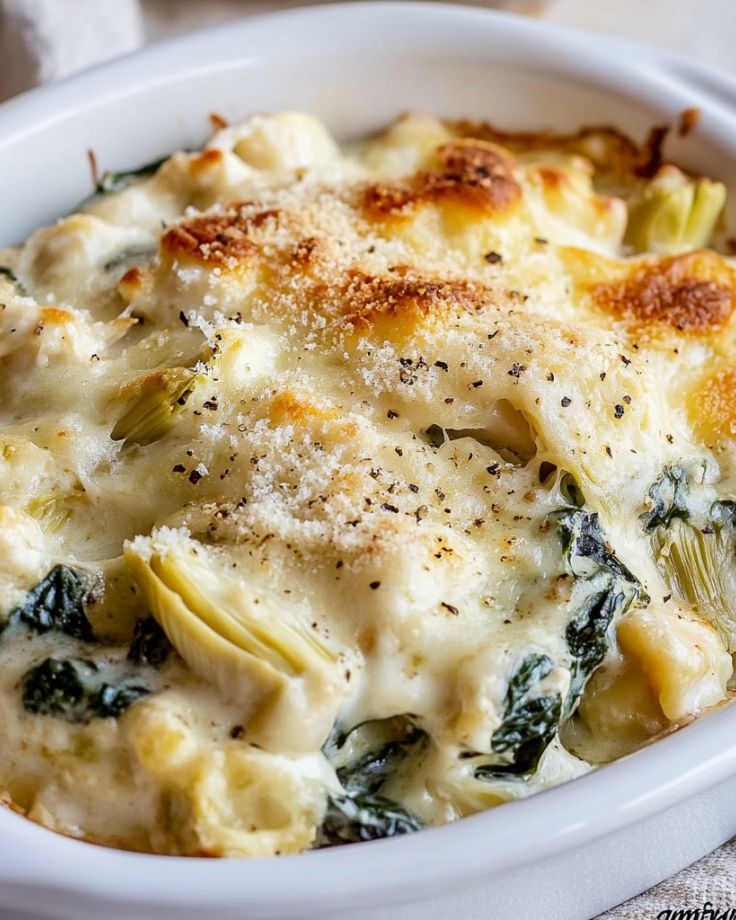
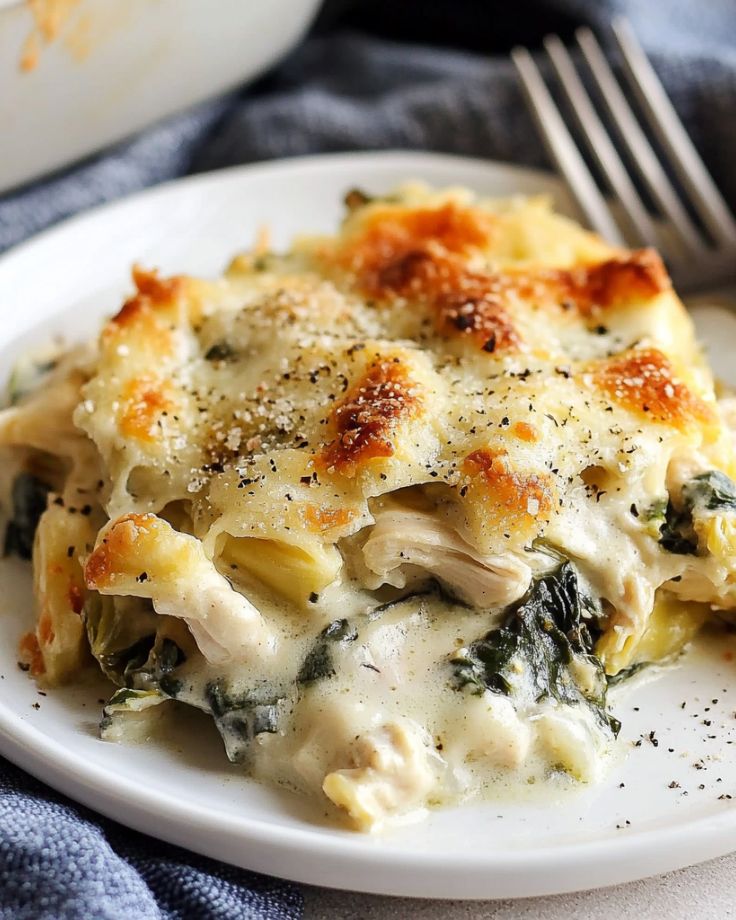
Creamy Chicken Florentine Artichoke Casserole

If you’re looking for a rich, cheesy, and ultra-satisfying dinner that’s as easy as it is impressive, this Creamy Chicken Florentine Artichoke Casserole is your answer!

Tender shredded chicken, spinach, and artichokes are wrapped in a silky, homemade sauce and baked to golden perfection.

It’s comfort food with a nutritious twist—high in protein, packed with greens, and loaded with creamy, cheesy goodness.

Bonus? It’s a perfect make-ahead meal for busy nights! One bite, and you’ll know why this casserole is on repeat in so many kitchens. 

For the Casserole

  • Chicken – Shredded cooked chicken adds protein and makes this dish hearty and satisfying. You can use rotisserie chicken for convenience.
  • Spinach – Fresh baby spinach wilts beautifully into the sauce, adding a nutrient boost.
  • Artichoke Hearts – Chopped frozen artichokes bring a subtle tang and great texture to the casserole.
  • Onion – A white onion, thinly sliced, enhances the dish with a mild sweetness.
  • Garlic – Fresh minced garlic infuses the dish with a rich, aromatic flavor.
  • Olive Oil – Used to sauté the onions and garlic, adding depth to the flavors.

For the Creamy Sauce

  • Butter – Creates a rich base for the sauce and adds a luxurious texture.
  • All-Purpose Flour – Helps thicken the sauce for a smooth, creamy consistency.
  • Milk – The main liquid component, making the sauce creamy without being too heavy.
  • Italian Seasoning – A blend of herbs that adds warmth and depth to the sauce.
  • Monterey Jack Cheese – Melts smoothly into the sauce, giving it a velvety texture and mild cheesiness.
  • Parmesan Cheese – Sprinkled on top for a golden, slightly crispy, and salty finish.
  • Kosher Salt & Black Pepper – Essential for seasoning and enhancing all the flavors.

For Assembly & Baking

  • Nonstick Spray – Used to grease the baking dish, preventing sticking.
  • Baking Dish (9×13-inch) – The perfect size for even baking and a golden-brown finish.

Creamy Chicken Florentine Artichoke Casserole

Prep Time 15 minutes
Cook Time 30 minutes
Total Time 45 minutes
Servings 6
Calories 368
With just 15 minutes of prep time, this easy-to-make casserole bakes to a golden, bubbly perfection, making it the perfect meal for busy weeknights or family gatherings. It's creamy, hearty, and full of flavor—your family will love it!

Ingredients

  • 2 tbsp olive oil
  • ½ medium white onion, thinly sliced
  • 3 cloves garlic, minced
  • 16 oz baby spinach
  • 10 oz frozen artichoke hearts, thawed and roughly chopped
  • 4 tbsp unsalted butter
  • ¼ cup all-purpose flour
  • 2 cups warm milk
  • 2 tsp Italian seasoning
  • 2 cups grated Monterey Jack cheese
  • ½ cup grated Parmesan cheese
  • 3 cups shredded cooked chicken
  • Kosher salt and freshly ground black pepper, to taste

Instructions 

Prepare the oven and baking dish:

  • Preheat your oven to 350°F. Lightly grease a 9x13-inch baking dish with nonstick spray and set aside.

Sauté the vegetables:

  • Heat olive oil in a large skillet over medium-high heat. Add the sliced onion and cook until softened and translucent, about 4 minutes. Stir in the garlic and cook for another 30 seconds until fragrant. Add the spinach and chopped artichoke hearts, cooking until the spinach wilts. Transfer the mixture to a large bowl and set aside.

Make the creamy sauce:

  • In the same skillet, melt the butter over medium heat. Stir in the flour and cook for about 1 minute, whisking continuously. Gradually pour in the warm milk, whisking constantly to avoid lumps. Continue cooking until the sauce thickens and begins to bubble.

Incorporate the cheese and seasoning:

  • Remove the skillet from the heat and stir in the Italian seasoning and Monterey Jack cheese. Season with salt and pepper to taste, stirring until the cheese is fully melted and the sauce is smooth.

Assemble the casserole:

  • Add the creamy sauce to the bowl with the spinach-artichoke mixture. Stir in the shredded chicken until everything is evenly coated. Transfer the mixture to the prepared baking dish, spreading it out evenly.

Bake:

  • Sprinkle the top with grated Parmesan cheese. Bake uncovered for about 30 minutes, or until the casserole is bubbling and golden brown on top.

Serve and enjoy:

  •  Let the casserole rest for about 5 minutes before serving. Enjoy this rich and comforting dish!
Calories: 368kcal
Course: Main Course
Cuisine: American, Italian
Keyword: Chicken Florentine Artichoke Casserole

1. Can I use rotisserie chicken?

Absolutely! Using rotisserie chicken is a fantastic time-saver. Just shred it up and add it to the casserole. You’ll get all the flavor without the hassle of cooking the chicken yourself!

2. Can I substitute fresh spinach with frozen spinach?

Yes, you can! If you’re using frozen spinach, just make sure to thaw it and squeeze out any excess water before adding it to the mixture. This way, you won’t end up with a watery casserole!

3. How do I make this ahead of time?

No problem! You can assemble the casserole up to the point of baking, cover it tightly, and refrigerate it for up to 24 hours. When you’re ready to bake, just let it sit at room temperature for a few minutes before popping it in the oven.

4. What if I don’t have Monterey Jack cheese?

No worries at all. Mozzarella or cheddar work great too. You’ll still get that creamy, melty goodness, but the flavor might shift slightly depending on which cheese you choose.

5. How can I make this recipe gluten-free?

Simple! Just swap the all-purpose flour for a gluten-free flour blend or cornstarch, and you’re good to go. Make sure the other ingredients, like the artichokes and seasoning, are also gluten-free.
Better-Than-Takeout Chinese Orange Chicken!

Craving that crispy, sticky, sweet & tangy orange chicken from your favorite takeout spot?

This easy, foolproof recipe delivers perfectly golden, crunchy chicken coated in a zesty, flavorful orange sauce—made fresh at home in just 35 minutes!

No mystery ingredients, no greasy aftertaste—just pure, addictive flavor.

Serve it over rice, sprinkle on some green onions, and watch it disappear fast. 

Let’s get cooking!

For Chinese Orange Chicken

  • Chicken – Use boneless, skinless chicken breasts cut into bite-sized pieces. They cook quickly and get perfectly crispy when fried.
  • Eggs – Helps the coating stick to the chicken for a crispy texture.
  • Cornstarch – Essential for achieving that light, crispy coating on the chicken.
  • Flour – Combines with cornstarch to give the chicken an extra crunch.
  • Salt – A simple seasoning that enhances the overall flavor of the dish.
  • Oil – For deep frying the chicken to golden perfection.

For the Orange Chicken Sauce

  • Orange Juice – The base of the sauce, providing a fresh, citrusy flavor.
  • Sugar – Adds the perfect amount of sweetness to balance the tanginess.
  • Rice Vinegar (or White Vinegar) – Brings a slight tang that enhances the overall flavor.
  • Soy Sauce – Adds depth and umami to the sauce. Use tamari for a gluten-free option.
  • Ginger – A touch of warmth and spice that complements the citrusy sauce.
  • Garlic Powder (or Fresh Garlic) – Gives the sauce a savory kick.
  • Red Chili Flakes – Adds a subtle heat that balances the sweetness.
  • Orange Zest – Boosts the fresh orange flavor in the sauce.
  • Cornstarch – Thickens the sauce so it coats the chicken perfectly.

For Garnish

  • Green Onions – Adds a pop of color and a fresh, mild onion flavor.
  • Orange Zest – Enhances the citrusy aroma and taste.

Homemade Chinese Orange Chicken

Prep Time 15 minutes
Cook Time 20 minutes
Total Time 35 minutes
Servings 4
Calories 561
Crispy, golden chicken tossed in a tangy orange sauce that’s better than takeout! Ready in just 35 minutes.

Ingredients

Ingredients

  • 4 boneless, skinless chicken breasts, cut into bite-sized pieces
  • 3 eggs, whisked
  • cup cornstarch
  • cup flour
  • Salt, to taste
  • Oil, for frying

For the Orange Sauce:

  • 1 cup orange juice
  • ½ cup sugar
  • 2 tbsp  rice vinegar (or white vinegar)
  • 2 tbsp soy sauce (or tamari for a gluten-free option)
  • ¼ tsp ground ginger
  • ¼ tsp garlic powder (or 2 fresh garlic cloves, finely minced)
  • ½ tsp red chili flakes
  • Zest of 1 orange
  • 1 tbsp cornstarch
  • 2 tbsp water

For Garnish:

  • Chopped green onions
  • Additional orange zest

Instructions 

Prepare the Orange Sauce:

  • In a medium saucepan, combine orange juice, sugar, vinegar, soy sauce, ginger, garlic, and red chili flakes. Heat over medium heat for about 3 minutes.
  • In a small bowl, mix 1 tablespoon of cornstarch with 2 tablespoons of water to form a slurry.
  • Slowly whisk the slurry into the sauce and continue cooking for another 5 minutes, or until the sauce thickens.
  • Remove from heat and stir in the orange zest. Set aside.

Prepare the Chicken:

  • In a shallow bowl, combine flour, cornstarch, and a pinch of salt.
  • In another shallow bowl, whisk the eggs.
  • Dip each piece of chicken into the egg mixture, then coat evenly in the flour mixture. Set aside.
  • Heat 2-3 inches of oil in a deep, heavy-bottomed pot over medium-high heat until it reaches 350°F (175°C).
  • Fry the chicken in small batches for 2-3 minutes, turning occasionally, until golden brown and crispy. Remove and drain on a paper towel-lined plate. Repeat with remaining chicken.

Assemble & Serve:

  • Toss the crispy chicken pieces in the orange sauce until evenly coate
  • Serve hot, garnished with chopped green onions and extra orange zest.
  • Enjoy with steamed rice or vegetables for a complete meal!
Calories: 561kcal
Course: Dinner
Cuisine: Asian
Keyword: Chinese Orange Chicken

How can I keep the chicken crispy after adding the sauce?

For extra crispy chicken, try double frying. After your first fry, let the chicken rest and then fry it again for a minute or two until golden. This ensures the coating stays crispy even after tossing in the sauce.

Can I make the sauce ahead of time?

Absolutely! Prepare the orange sauce up to a week in advance and store it in an airtight container in the fridge. When ready, just reheat it before coating your freshly fried chicken.

What can I serve this with?

Orange chicken pairs perfectly with steamed rice, fried rice, or sautéed vegetables like broccoli or snap peas. These sides help balance the sweetness and create a well-rounded meal.

How do I make this recipe gluten-free?

To make it gluten-free, swap out soy sauce for gluten-free tamari and use cornstarch instead of flour for the chicken coating. Double-check your vinegar and other ingredients to make sure they’re gluten-free too!

Can I adjust the spice level?

Yes! If you like it spicier, add more red chili flakes to the sauce or stir in a chopped fresh chili while cooking. Adjust it according to your heat preference for the perfect level of spice.

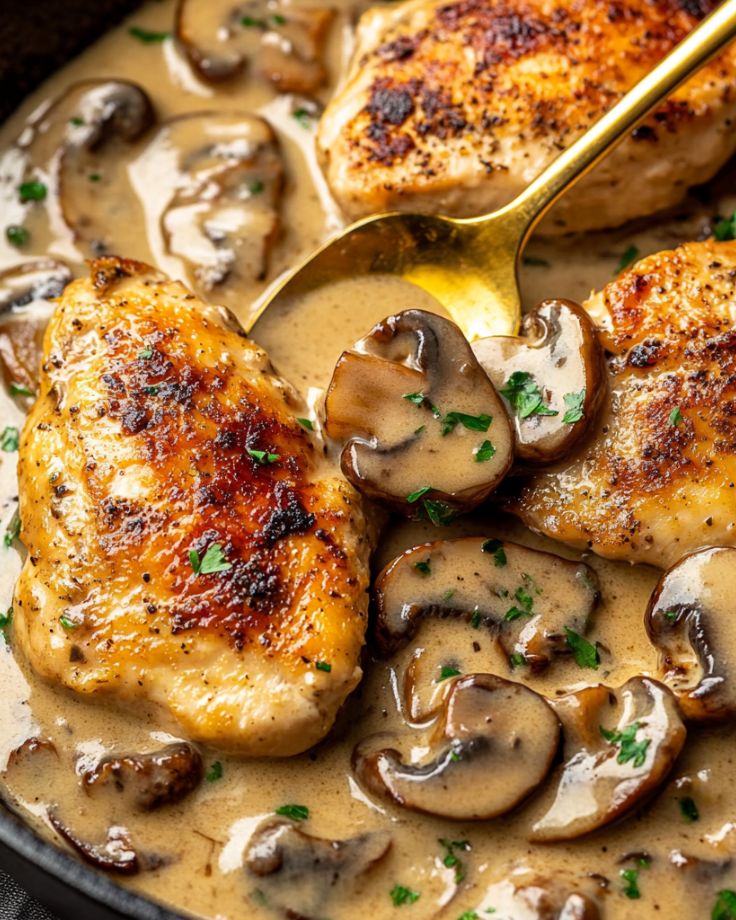
Creamy Mushroom Chicken

Craving a rich, creamy, and ultra-flavorful dinner that’s ready in just 30 minutes?

This Creamy Mushroom Chicken combines golden pan-seared chicken with a luscious garlic mushroom sauce—all made in just one pan with simple pantry staples.

Serve it over pasta, rice, or mashed potatoes, and watch it disappear.

Weeknight dinner just got a major upgrade!

For Creamy Mushroom Chicken

  • Chicken – Use large boneless, skinless chicken breasts, sliced in half for quicker cooking and even tenderness.
  • Flour – Lightly coats the chicken to create a delicate crust that helps the sauce cling to it.
  • Salt & Pepper – Essential for seasoning and enhancing all the flavors.
  • Olive Oil – Used for pan-frying the chicken to a golden brown.
  • Butter – Adds richness and helps develop the flavor in the sauce.
  • Mushrooms – Cremini or white mushrooms work best for a deep, earthy flavor.
  • Italian Seasoning – A simple way to add a blend of herbs for extra flavor.
  • Garlic – Brings bold, aromatic depth to the sauce.

For the Creamy Mushroom Sauce

  • Chicken Broth – Helps deglaze the pan and builds a flavorful base.
  • Lemon Juice – Adds a hint of acidity to brighten the dish.
  • Dijon Mustard – Subtle tanginess that enhances the depth of the sauce.
  • Heavy Cream – Creates the luscious, creamy texture that makes this dish irresistible.

Creamy Mushroom Chicken

Prep Time 10 minutes
Cook Time 20 minutes
Total Time 30 minutes
Calories 483
A quick and easy dish featuring tender pan-fried chicken in a rich, garlicky mushroom sauce—ready in just 30 minutes!

Ingredients

  • 2 large chicken breasts
  • Salt & pepper, to taste
  • Flour (for dredging)
  • 2 tbsp olive oil
  • 2 tbsp butter
  • 12 ounces cremini or white mushrooms, sliced
  • ¼ tsp Italian seasoning
  • 3 cloves garlic, minced
  • ½ cup chicken broth
  • ½ tsp lemon juice
  • ½ tsp Dijon mustard
  • 1 cup heavy cream

Instructions 

Prepare the Chicken:

  • Slice the chicken breasts in half lengthwise to create four thinner cutlets.
  • Season with salt and pepper, then lightly coat with flour.

Sear the Chicken:

  • Heat olive oil in a large skillet over medium-high heat.
  • Sauté until mushrooms release their moisture and develop a golden sear. Remove and set aside with the chicken.

Make the Sauce:

  • Add garlic, chicken broth, lemon juice, and Dijon mustard to the pan. Stir to combine.
  • Simmer for about 3–4 minutes until the liquid reduces by half.

Combine & Finish:

  • Pour in the heavy cream and return the chicken and mushrooms to the pan.
  • Simmer for about 5 minutes until the chicken is fully cooked and the sauce thickens.
  • Adjust seasoning with salt and pepper as needed.
Calories: 483kcal
Course: Main Course
Cuisine: Italian-inspired
Keyword: Mushroom Chicken

1. Can I use chicken thighs instead of chicken breasts?

Absolutely! Chicken thighs are a fantastic choice for this dish—juicy and flavorful. Just make sure to cook them for a few extra minutes to ensure they’re fully cooked.

2. What if I don’t have heavy cream?

No problem! You can easily swap in half-and-half or even whole milk for a lighter version of the sauce. If you’re missing that creamy richness, just add an extra tablespoon of butter.

3. How do I make this gluten-free?

To make this dish gluten-free, simply dredge the chicken in cornstarch instead of flour. The rest of the recipe stays the same, and you’ll still get that delicious creamy sauce!

4. Can I freeze the leftovers?

Yes! This creamy chicken stores well in the freezer for up to 3 months. Just be sure to let it cool completely before transferring it to an airtight container. When you’re ready to eat, simply reheat gently over low heat.

5. What side dishes go well with this recipe?

This dish pairs perfectly with mashed potatoes, rice, or even pasta! For something lighter, serve it with a fresh green salad or steamed vegetables like green beans or asparagus.

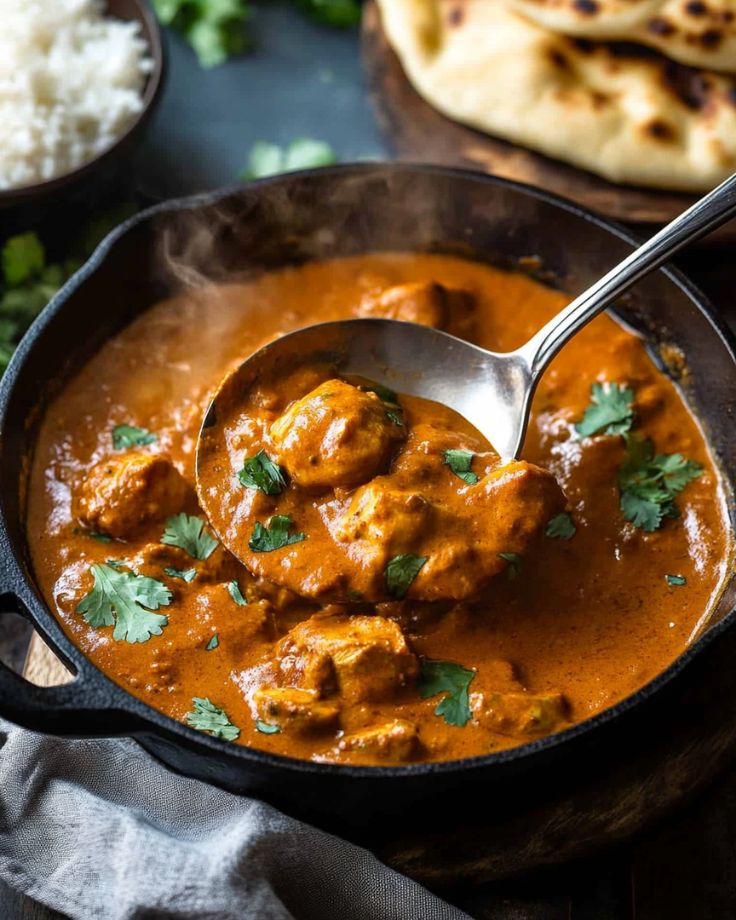
Chicken Tikka Masala – Bold Flavors, Easy Comfort

Forget takeout—this Chicken Tikka Masala is your new go-to for a rich, creamy, and flavor-packed dinner!

Juicy, spiced chicken is seared to perfection, then simmered in a velvety tomato-based curry that clings to every bite.

One pan, simple ingredients, and ready in under an hour!

The best part? You control the spice, the creaminess, and the richness.

Whether you’re a spice-lover or keeping it mild, this dish rivals any Indian restaurant—right from your own kitchen!

   Big flavors, no fuss. Serve with fluffy rice and warm naan for the ultimate cozy meal.

Let’s get cooking! 

For the Chicken Marinade

  • Chicken – Boneless, skinless chicken thighs work best for juicy, tender bites, but you can use chicken breasts too.
  • Plain Yogurt – Helps tenderize the chicken while adding a slight tangy flavor.
  • Garlic and Ginger – Freshly minced for maximum aroma and depth of flavor.
  • Garam Masala – A warming spice blend that brings authentic Indian flavors.
  • Turmeric – Adds a vibrant golden color and earthy taste.
  • Ground Cumin – Gives a warm, slightly smoky flavor.
  • Kashmiri Chili Powder – Mildly spicy with a rich red color; substitute with regular chili powder if needed.
  • Salt – Enhances all the flavors in the marinade.

For the Sauce

  • Vegetable Oil or Canola Oil – For frying and sautéing the aromatics.
  • Butter – Adds richness and enhances the creaminess of the sauce.
  • Onions – Finely diced to create a deep, flavorful base.
  • Garlic and Ginger – Essential for that bold, aromatic taste.
  • Garam Masala – Infuses the sauce with warm, fragrant spices.
  • Ground Cumin – Adds depth and warmth.
  • Turmeric Powder – Gives the sauce its signature golden hue.
  • Ground Coriander – Adds a mild citrusy note.
  • Tomato Puree (Passata) – Provides a smooth, rich tomato base for the curry.
  • Kashmiri Chili Powder – Adds color and mild heat to the sauce.
  • Red Chili Powder – Adjust according to your spice preference.
  • Salt – Brings out the flavors in the sauce.
  • Heavy Cream or Evaporated Milk – Creates a luscious, creamy consistency.
  • Brown Sugar – Balances the acidity of the tomatoes.
  • Water – Used to adjust the sauce thickness if needed.
  • Fresh Cilantro (Coriander) – For garnishing and an extra pop of freshness.

Chicken Tikka Masala Recipe

Prep Time 15 minutes
Cook Time 30 minutes
Total Time 45 minutes
Servings 6
Calories 581
A rich and creamy homemade Chicken Tikka Masala that’s packed with flavor and easy to make in one pan! Juicy, spiced chicken in a luscious tomato-based curry—better than takeout!

Ingredients

For the Chicken Marinade:

  • 28 oz boneless, skinless chicken thighs, cut into bite-sized pieces
  • 1 cup plain yogurt
  • tbsp garlic, minced
  • 1 tbsp fresh ginger, minced
  • 2 tsp garam masala
  • 1 tsp turmeric
  • 1 tsp ground cumin
  • 1 tsp Kashmiri chili (or ½ tsp red chili powder)
  • 1 tsp salt

For the Sauce:

  • 2 tbsp vegetable or canola oil
  • 2 tbsp butter
  • 2 small onions (or 1 large), finely diced
  • tbsp garlic, finely grated
  • 1 tbsp fresh ginger, finely grated
  • tsp garam masala
  • tsp ground cumin
  • 1 tsp turmeric powder
  • 1 tsp ground coriander
  • 14 oz tomato puree (Passata)
  • 1 tsp Kashmiri chili (optional, for color and flavor)
  • 1 tsp red chili powder (adjust to taste)
  • 1 tsp salt
  • cups  heavy cream (or evaporated milk for a lighter option)
  • 1 tsp brown sugar
  • cup water (if needed)
  • 4 tbsp fresh cilantro, chopped (for garnish)

Instructions 

Marinate the Chicken:

  • In a bowl, combine chicken with all marinade ingredients. Let it sit for at least 10 minutes (or up to overnight for deeper flavor).

Sear the Chicken:

  • Heat oil in a large skillet over medium-high heat. Cook chicken in batches for about 3 minutes per side until browned. Remove from pan and set aside.

Prepare the Sauce:

  • Melt butter in the same pan. Sauté onions for 3 minutes until soft, scraping up any browned bits.
  • Add garlic and ginger, cooking for 1 minute until fragrant. Stir in garam masala, cumin, turmeric, and coriander, cooking for 20 seconds.
  • Pour in tomato puree, chili powders, and salt. Simmer for 10–15 minutes, stirring occasionally, until thickened and deep brown-red.

Finish the Dish:

  • Stir in cream and brown sugar. Return chicken to the pan and cook for 8–10 minutes, until fully cooked and sauce is thick and bubbling.
  • Add water if needed to adjust consistency.

Serve:

  • Garnish with fresh cilantro and serve hot with garlic butter rice and naan.

Notes

Tips & Adjustments:
  • For a smoky flavor: Sear the chicken in batches to avoid steaming.
  • To reduce spice: Decrease the Kashmiri chili powder, or add more sugar or cream.
  • For extra richness: Swap cream for coconut milk or add a dollop of butter before serving.
 
Calories: 581kcal
Course: Main Course
Cuisine: Indian

1. Can I use chicken breasts instead of thighs?

Absolutely! While chicken thighs are juicier and more flavorful, you can easily swap them for chicken breasts. Just make sure not to overcook them, as they can dry out faster. Keep an eye on the cooking time and they’ll be just as delicious!

2. How can I make the recipe less spicy?

Not a fan of too much heat? No problem! Simply reduce the amount of Kashmiri chili or red chili powder. If you’re really sensitive to spice, you can even skip the chili powder altogether and let the other spices shine.

3. Do I have to marinate the chicken overnight?

Not at all! While marinating overnight enhances the flavor, you can get away with just 10 minutes. The longer you marinate, the more flavor you’ll infuse, but a quick marinade works great when you’re in a rush!

4. Can I prepare the sauce ahead of time?

Yes, you totally can! Make the sauce in advance and store it in the fridge for up to two days. When you’re ready to eat, simply heat it up, add the seared chicken, and simmer for a few minutes. Easy peasy!

5. Is there a dairy-free alternative for the cream?

For sure! Coconut milk or coconut cream are fantastic dairy-free alternatives. They’ll give the sauce that creamy texture with a hint of coconut flavor. It’s the perfect swap for a rich, vegan-friendly Chicken Tikka Masala!

Slow Cooker Jerk Chicken – Big Flavors, Minimal Effort!

If you love bold, smoky, and spicy flavors but don’t want to spend hours in the kitchen, this Slow Cooker Jerk Chicken is for you!

Let your crockpot do the hard work, infusing tender, fall-apart chicken with authentic Caribbean spices while you go about your day.

Then, finish it off with a quick broil for that irresistible crispy skin.

No complicated steps, just big, punchy flavors in every bite!

Perfect for meal prep, weeknight dinners, or impressing guests—this is a recipe you’ll make on repeat.

For Slow Cooker Jerk Chicken

  • Chicken – You can use bone-in, skin-on chicken thighs or a whole chicken cut into pieces for extra flavor and tenderness.
  • Lime or Lemon – Used to clean and tenderize the chicken while adding a touch of citrus freshness.
  • Creole Seasoning – A blend of spices that adds a savory kick. You can substitute with salt, pepper, or a chicken spice mix.
  • Scotch Bonnet Pepper – Brings the authentic Jamaican heat! Adjust the amount based on your spice tolerance.
  • Garlic and Ginger – Essential for deep, aromatic flavor in the marinade.
  • Cinnamon and Allspice – These warming spices give jerk chicken its signature depth and Caribbean flair.
  • Nutmeg and White Pepper – Adds a subtle earthy and peppery kick.
  • Dark Brown Sugar – Balances out the heat and spice with a touch of sweetness.
  • Onion and Green Onions – Provide a savory, slightly sweet base for the marinade.
  • Fresh Thyme – Brings a fragrant, herbaceous note to the dish.
  • Soy Sauce – Adds umami richness and helps deepen the marinade flavor.
  • Pineapple Juice – Infuses a slight tangy sweetness that enhances the jerk marinade.
  • Bouillon Powder (Optional) – Intensifies the savory depth of the marinade.
  • Vegetable Oil – Helps coat the chicken in the marinade for even cooking.
  • Salt and Pepper – Essential for seasoning to taste.

Slow Cooker Jerk Chicken Recipe

Prep Time 20 minutes
Cook Time 3 hours
Total Time 3 hours 20 minutes
Servings 6
Calories 376
This Slow Cooker Jerk Chicken is packed with bold Caribbean flavors and just the right amount of heat, making it a super easy and delicious meal. The slow cooking process ensures tender, juicy chicken, while a quick broil at the end gives it a perfect crispy finish.

Ingredients

  • 1 lime or lemon
  • 6-7 chicken thighs or 3 to 3 ½ lbs of chicken, cut into pieces
  • 2 tsp Creole seasoning (or substitute with salt and pepper)
  • 1 or more Scotch Bonnet peppers (or Habaneros)
  • 6 garlic cloves, chopped
  • ½ tbsp ground cinnamon
  • ½ tbsp  ground allspice
  • ½ tsp coarsely ground white pepper
  • ½ tsp freshly grated nutmeg
  • 3 tbsp  dark brown sugar
  • 1 medium onion, coarsely chopped
  • 3 green onions (scallions), chopped
  • 1 sprig fresh thyme
  • 1 tbsp fresh ginger, chopped
  • 1 tbsp  soy sauce
  • ½ cup pineapple juice (or pineapple chunks)
  • 1 tbsp bouillon powder (optional)
  • Salt and pepper, to taste

Instructions 

Prepare the Chicken:

  • Trim excess fat from the chicken and pat dry.
  • Rub with lime or lemon juice, then season with Creole seasoning (or salt and pepper).

Make the Marinade:

  • In a food processor or blender, combine cinnamon, garlic, ginger, thyme, green onions, onion, Scotch Bonnet pepper, soy sauce, bouillon (if using), brown sugar, nutmeg, allspice, white pepper, and pineapple juice.
  • Pulse until well blended (about 30 seconds).

Marinate the Chicken:

  • Coat the chicken thoroughly with ¾ of the marinade.
  • Place it in a ziplock bag or directly into the slow cooker.
  • Let it marinate in the refrigerator for at least 3 hours (overnight for best results).

Cook in the Slow Cooker:

  • Set the slow cooker to high and cook for about 3 hours (or until the chicken is fully cooked and tender).

Broil for a Crispy Finish:

  • Carefully remove the chicken and place it on a foil-lined baking sheet.
  • Brush with some of the cooked marinade.
  • Adjust the oven rack so the chicken is 4-5 inches below the broiler.
  • Broil on high for 3-5 minutes, watching closely to prevent burning.

Prepare the Sauce:

  • While the chicken broils, simmer the remaining marinade with the juices from the slow cooker for 5-7 minutes until it thickens.
  • Brush the sauce over the broiled chicken before serving.
Calories: 376kcal
Course: main
Cuisine: Caribbean
Keyword: Cooker Jerk Chicken Recipe

  1. Can I use boneless, skinless chicken breasts instead of thighs?
    Yes, you can swap chicken thighs for breasts. However, chicken thighs are much juicier and flavorful. If you go with breasts, be sure to check the chicken early to avoid drying out.
  2. Do I need to marinate the chicken?
    While marinating the chicken is recommended for maximum flavor, it’s not absolutely necessary. If you’re short on time, you can skip it, and the slow cooking process will still give you tasty jerk chicken.
  3. How can I adjust the spice level?
    The Scotch Bonnet pepper is the main source of heat. For a milder version, remove the seeds or use just half the pepper. If you want it spicier, add more peppers or a pinch of cayenne.
  4. Can I skip adding liquid to the slow cooker?
    You don’t need to add extra liquid! The chicken will release juices as it cooks, creating plenty of moisture. However, if you like a bit more sauce, you can add a small splash of pineapple juice or broth.
  5. Can I prep this dish the night before?
    Absolutely! Marinate the chicken overnight in the fridge for even deeper flavor. You can also freeze the chicken with the marinade, then pop it into the slow cooker the next day for a super easy dinner.

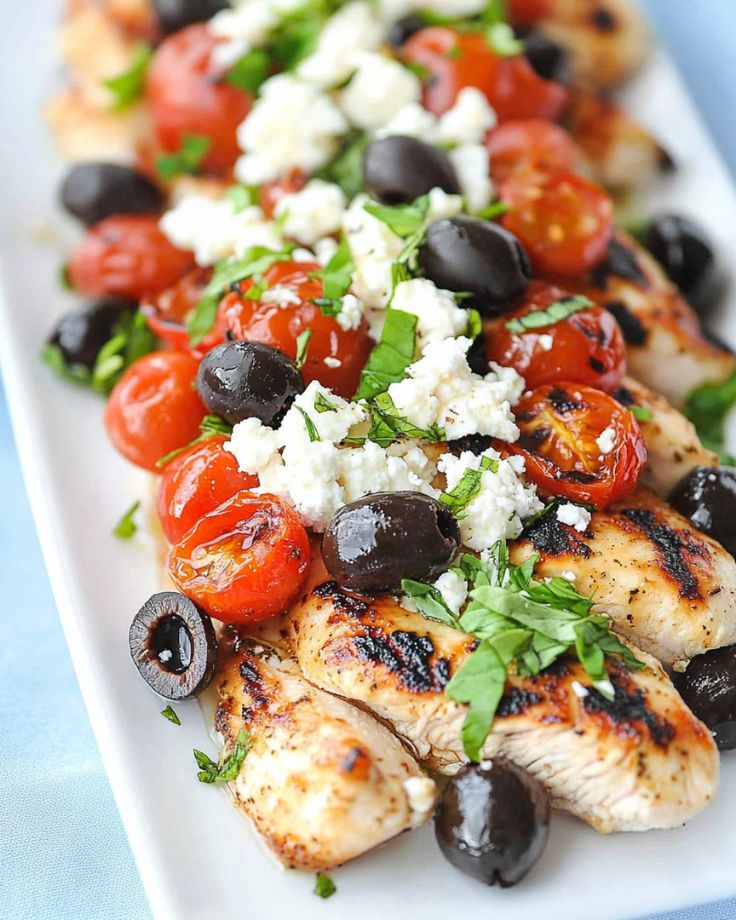
Greek-Inspired Chicken – Fast, Flavorful & Budget-Friendly!

Want a quick, easy, and restaurant-worthy dinner that won’t break the bank?

This Greek-Inspired Chicken Breast is your answer!

Juicy, golden-seared chicken is topped with a medley of sweet roasted tomatoes, briny olives, and creamy feta, finished with fresh greens for a pop of color and flavor.

Bonus: It’s customizable! Swap in your favorite herbs, cheese, or even a different protein.

Plus, at under $1 per serving, it’s a no-brainer for busy weeknights.

One bite, and you’ll feel like you’re dining on a sunny Greek island! 

Let’s get cooking

For Greek-Inspired Chicken

  • Chicken – Boneless, skinless chicken breasts, sliced in half lengthwise for faster, even cooking.
  • All-Purpose Flour – Lightly coats the chicken to create a subtle crust that helps hold the flavors.
  • Dried Oregano – Adds a classic Mediterranean herbaceous flavor.
  • Black Pepper & Salt – Essential seasonings to enhance the overall taste.
  • Olive Oil – Used for pan-frying the chicken and sautéing the aromatics.
  • Garlic – Gives a rich, bold flavor to the dish.
  • Grape Tomatoes – Adds a juicy, slightly sweet contrast to the savory ingredients.
  • Black Olives – Brings a briny, salty kick to balance the flavors.
  • Feta Cheese – Crumbled on top for a creamy, tangy finish.
  • Baby Spinach – Provides freshness and a pop of color.

Greek-Inspired Chicken Breast Recipe

Prep Time 10 minutes
Cook Time 15 minutes
Total Time 25 minutes
Servings 6
Calories 320
his Greek-Inspired Chicken is a quick, budget-friendly dinner packed with savory flavors from tender chicken, feta, olives, and fresh veggies. Ready in 25 minutes, it’s a healthy and satisfying meal for the whole family!

Ingredients

  • cup all-purpose flour
  • ½ tsp dried oregano
  • ½ tsp ground black pepper
  • ½ tsp coarse salt
  • 1 ½ lbs boneless, skinless chicken breasts (cut in half lengthwise)
  • 3 tbsp olive oil, divided
  • 2 garlic cloves, roughly chopped
  • ½ pint grape tomatoes, halved
  • 3 oz large black olives, pitted and halved
  • ½ cup crumbled feta cheese
  • Small handful of baby spinach, chopped

Instructions 

Prepare the Chicken:

  • Heat 2 tablespoons of olive oil in a large skillet over medium heat.
  • On a plate, mix flour, oregano, black pepper, and salt.
  • Dredge each piece of chicken in the flour mixture, coating both sides.

Prepare the Toppings:

  • Reduce heat to low and add the remaining tablespoon of olive oil to the skillet.
  • Add chopped garlic and sauté for 30 seconds until fragrant.
  • Stir in grape tomatoes and olives, cooking for another 1-2 minutes.

Assemble & Serve:

  • Spoon the tomato-olive mixture over the cooked chicken.
  • Sprinkle with crumbled feta cheese and chopped baby spinach (or use fresh herbs like oregano, basil, or parsley).
Calories: 320kcal
Course: Main Course
Cuisine: Greek, Mediterranean
Keyword: Chicken Breast Recipe

Enjoy! Feel free to adjust ingredients based on availability or personal preference.

Greek-Inspired Chicken – Common Questions & Answers

1. Can I use chicken thighs instead of chicken breasts?

Absolutely! Chicken thighs are juicier and pack more flavor. Just adjust the cooking time to ensure they reach 165°F (74°C) internally.

2. Do I need to marinate the chicken?

Nope! This recipe is packed with flavor on its own. But if you want extra tenderness, marinate the chicken for 30 minutes to 2 hours with olive oil, lemon juice, and a sprinkle of oregano.

3. What if I don’t have feta cheese?

No problem! Swap it out with goat cheese, ricotta salata, or even parmesan. If you’re dairy-free, try marinated tofu crumbles for a similar tangy bite.

4. Can I make this ahead of time?

Yes! Cook the chicken and the tomato-olive mixture separately, then store them in the fridge for up to 3 days. When ready to serve, just reheat and top with fresh spinach and feta.

5. Can I bake or grill the chicken instead of pan-frying?

Definitely! For baking, cook at 400°F (200°C) for 20-25 minutes. For grilling, sear over medium-high heat for about 6-7 minutes per side until fully cooked.

Got another question? Drop it in the comments—happy cooking!

Lemon & Dill Chicken

This Lemon & Dill Chicken is the weeknight hero you didn’t know you needed! 

Juicy, golden-seared chicken breasts bathe in a bright, garlicky lemon-dill sauce that’s light yet irresistibly flavorful.

Ready in just 30 minutes with simple, fresh ingredients, it’s the perfect balance of zesty, herby, and downright delicious.

Bonus? It’s healthy, low-carb, and dairy-free—but you’d never guess from the taste!

One bite, and you’ll be making this on repeat.

Let’s get cooking! 

For Lemon & Dill Chicken

  • Chicken – Use boneless, skinless chicken breasts for a lean and juicy option.
  • Salt & Ground Black Pepper – Enhances the natural flavor of the chicken.
  • Olive Oil or Canola Oil – For searing the chicken to golden perfection.
  • Onion – Adds a subtle sweetness and depth to the sauce.
  • Garlic – Brings a rich, aromatic kick to the dish.
  • Chicken Broth – Forms the base of the light, flavorful sauce.
  • Flour – Helps thicken the sauce slightly for a smooth texture.
  • Fresh Dill – The star ingredient, adding a bright, herby freshness.
  • Lemon Juice – Provides a zesty, tangy balance to the sauce.

Lemon & Dill Chicken

Prep Time 10 minutes
Cook Time 20 minutes
Total Time 30 minutes
Servings 4
A light and flavorful dish with fresh lemon and dill, creating a quick, Greek-inspired pan sauce.

Ingredients

  • 4 boneless, skinless chicken breasts (1 to 1¼ pounds)
  • Salt, to taste
  • Ground black pepper, to taste
  • 3 tsp extra-virgin olive oil or canola oil, divided
  • ¼ cup finely chopped onion
  • 3 cloves garlic, minced
  • 1 cup reduced-sodium chicken broth
  • 2 tsp all-purpose flour
  • 2 tsp  fresh dill, chopped, divided
  • 1 tsp lemon juice

Instructions 

Season & Sear the Chicken

  • Sprinkle both sides of the chicken breasts with salt and pepper.
  • Heat 1½ teaspoons of oil in a large heavy skillet over medium-high heat.
  • Add the chicken and sear until golden brown on both sides, about 3 minutes per side.
  • Transfer to a plate and cover with foil to keep warm.

Make the Sauce

  • Reduce the heat to medium and add the remaining 1½ teaspoons of oil to the skillet.
  • Sauté the onion and garlic for about 1 minute, stirring frequently.
  • In a small bowl, whisk together the broth, flour, 1 tablespoon of dill, and lemon juice.
  • Pour the mixture into the skillet, whisking constantly until slightly thickened, about 3 minutes.

Finish Cooking

  • Return the chicken (along with any juices) to the skillet.
  • Reduce the heat to low and simmer until the chicken is cooked through, about 4 minutes.

Serve & Garnish

  • Transfer the chicken to a serving plate.
  • Season the sauce with additional salt and pepper if needed, then spoon it over the chicken.
  • Sprinkle with the remaining tablespoon of fresh dill before serving.
Course: Main Course
Cuisine: Mediterranean / Greek-Inspired
Keyword: Lemon & Dill Chicken

Common Questions & Answers for Making Lemon & Dill Chicken Easier

1. Can I use chicken thighs instead of breasts?

Yes! Chicken thighs work just as well and are often juicier. Just adjust the cooking time slightly, as they may take a little longer to cook through.

2. What if I don’t have fresh dill?

No worries! Dried dill works too—just use one-third the amount since it’s more concentrated. If you don’t have dill at all, parsley or thyme can give a different but delicious twist.

3. Can I make this ahead of time?

Definitely! Cook the chicken and sauce, then store them separately in the fridge for up to 3 days. Reheat gently on the stove, adding a splash of broth if needed to loosen the sauce.

4. What should I serve with it?

This dish pairs beautifully with steamed veggies, roasted potatoes, rice, or a crisp salad. It’s light yet satisfying, so feel free to mix and match your favorite sides!

5. How do I thicken the sauce if it’s too thin?

Easy fix! Whisk ½ teaspoon of cornstarch with a splash of cold water, then stir it into the sauce while simmering. It’ll thicken up in no time!

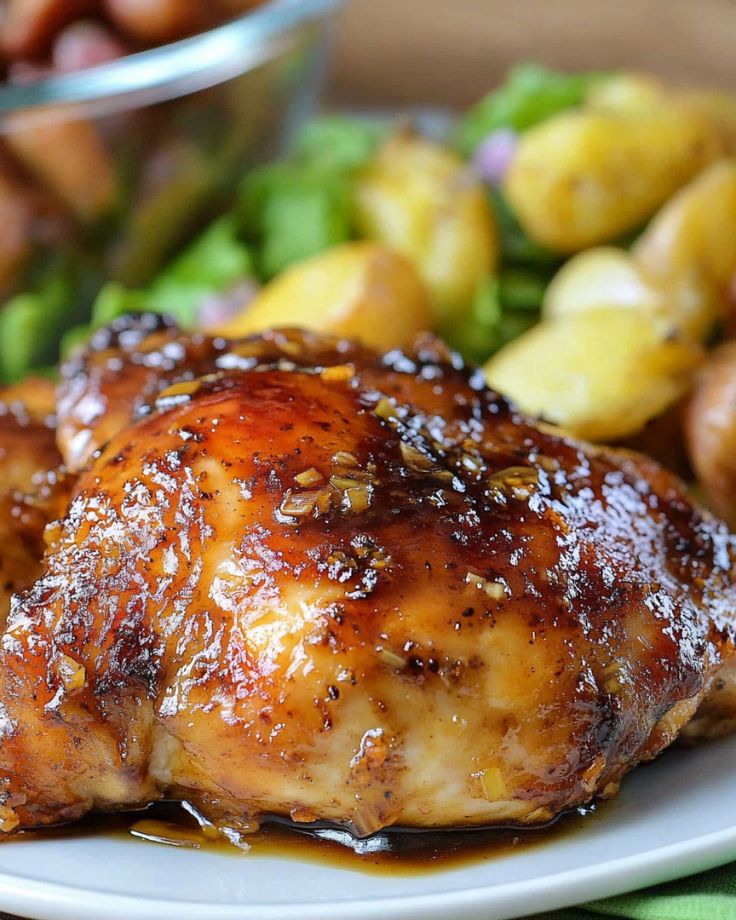
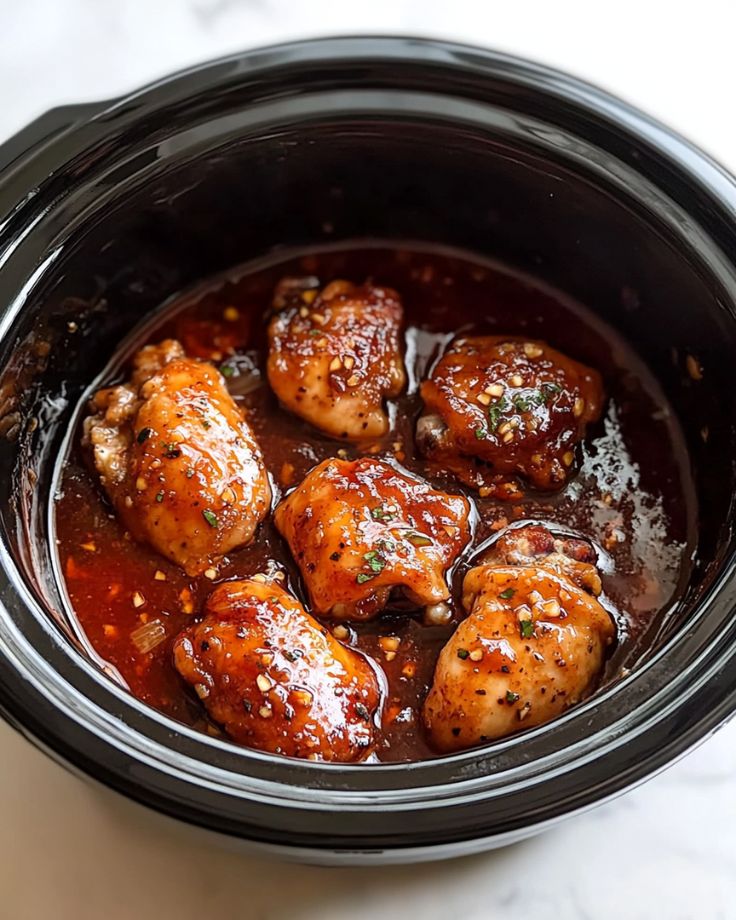
Slow Cooker Honey Garlic Chicken

Juicy, fall-apart Slow Cooker Honey Garlic Chicken—aka the easiest, most flavor-packed dinner you’ll make this week! 

Just throw everything in the crockpot, let it do its thing, and boom—tender, saucy, sweet-savory perfection.

Made with just a handful of pantry staples, this recipe is pure magic for busy nights.

Bonus? It’s ridiculously versatile—serve it with rice, veggies, or stuff it in a sandwich.

Minimal effort, MAXIMUM flavor. Let’s do this! 

For Honey Garlic Chicken

  • Chicken – Use boneless, skinless chicken thighs for the juiciest results, but chicken breasts work too!
  • Garlic – Freshly minced garlic adds bold, aromatic flavor to the sauce.
  • Honey – Brings natural sweetness and helps create a sticky, glossy sauce.
  • Soy Sauce – Use low-sodium soy sauce to control the saltiness while adding umami depth.
  • Ketchup – Gives the sauce a rich tangy base with a hint of sweetness.
  • Dried Oregano – Adds a subtle earthy flavor to balance the sweetness.
  • Fresh Parsley – A pop of freshness to brighten the dish.
  • Toasted Sesame Seeds – For a nutty crunch and extra flavor.

For Thickening the Sauce (Optional)

  • Cornstarch – Mix with cold water to make a slurry, which thickens the sauce for a glossy finish.

Slow Cooker Honey Garlic Chicken

Prep Time 5 minutes
Cook Time 4 hours
Total Time 4 hours 5 minutes
Servings 6
Calories 228
This easy slow cooker recipe features tender chicken thighs simmered in a flavorful honey garlic sauce. With just a few simple ingredients, it's a fuss-free meal the whole family will love!

Ingredients

  • 6 boneless, skinless chicken thighs*
  • 4  garlic cloves, minced
  • cup honey
  • ½ cup low-sodium ketchup
  • ½ cup low-sodium soy sauce
  • ½ tsp dried oregano
  • 2 tbsp fresh parsley, chopped
  • ½ tsp toasted sesame seeds

Instructions 

  • Place the chicken thighs in the bottom of your slow cooker.
  • In a bowl, whisk together the garlic, honey, ketchup, soy sauce, oregano, and parsley until well combined.
  • Pour the sauce over the chicken. Cover and cook on LOW for 4-5 hours or HIGH for 3-4 hours until the chicken reaches an internal temperature of 165°F (74°C).**
  • Transfer the cooked chicken to a serving plate and spoon the sauce over the top.
  • Sprinkle with toasted sesame seeds and serve.

Notes

  • You can use bone-in or skin-on chicken thighs or substitute with chicken breasts if preferred.
  • Cooking times may vary depending on your slow cooker model. Check for doneness by ensuring the internal temperature reaches 165°F (74°C).
  • Serve with rice, steamed veggies, or noodles for a complete meal.
  • Cook Time: 4-5 hours (on LOW) or 3-4 hours (on HIGH)
Calories: 228kcal
Course: Main Course
Cuisine: Asian-Inspired / Fusion
Keyword: Cooker Honey Garlic Chicken

Optional: Thicken the Sauce

To thicken the sauce, mix 1 tablespoon cornstarch with 1 tablespoon cold water to form a slurry.

Common Questions About Slow Cooker Honey Garlic Chicken

  1. Can I put raw chicken straight into the slow cooker?

Yep! No need to pre-cook—just toss it in and let the slow cooker do its thing. If you’re using frozen chicken, make sure it’s fully thawed first for even cooking.

  1. Do I really need to sear the chicken first?

Not a must, but totally worth it! A quick sear adds extra flavor and helps lock in the juices. If you’ve got the time, give it a quick pan-fry before slow cooking.

  1. How do I know when the chicken is done?

Cook on LOW for 4-5 hours or HIGH for 3-4 hours until the internal temp hits 165°F (74°C). Slow cookers can vary, so check early if yours runs hot!

  1. How do I make the sauce thicker?

Easy fix! Whisk together 1 tbsp cornstarch + 1 tbsp cold water to make a slurry, then stir it into the sauce 30 minutes before the cooking time is up. Let it simmer and thicken!

  1. What should I serve with it?

This beauty goes with just about anything—rice, quinoa, roasted veggies, or even stuffed into a sandwich. Want to switch it up? Shred the chicken and make tacos!

Quick and Easy Green Chile Chicken Enchilada Casserole

Looking for a quick dinner that packs big flavor?

This Green Chile Chicken Enchilada Casserole is your secret weapon for busy nights.

With just a few simple ingredients, you’ll have a dish that’s bursting with bold, savory flavors—and the best part?

It’s loved by everyone, even the picky eaters.

Ready in under two hours, this casserole is sure to become a new family favorite!

For Green Chile Chicken Enchilada Casserole

  • Chicken – Use 4 boneless, skinless chicken breasts for a lean protein. You can also use chicken thighs for a juicier alternative.
  • Garlic Salt – Season the chicken with garlic salt for extra flavor.
  • Corn Tortillas – 18 (6-inch) corn tortillas, torn in half for easier layering.
  • Green Chile Enchilada Sauce – 1 (28 oz) can for a mild, tangy base with a slight kick.
  • Monterey Jack Cheese – 1 (16 oz) package, shredded for a smooth melt and creamy texture.
  • Sour Cream – 1 (8 oz) container, reduced-fat, for richness and creaminess.

Quick and Easy Green Chile Chicken Enchilada Casserole

Prep Time 15 minutes
Cook Time 1 hour 30 minutes
Total Time 1 hour 45 minutes
Servings 8 servings
Calories 487
This tasty chicken enchilada casserole is a family favorite, loved even by picky eaters. It's so simple and delicious that it even earned me a spot in the newspaper! You can skip the charring step if you prefer—just tear the tortillas into quarters for better absorption of the sauce.

Ingredients

  • 4 boneless, skinless chicken breasts
  • Garlic salt (to taste)
  • 18 (6-inch) corn tortillas, torn in half
  • 1  (28 oz) can green chile enchilada sauce
  • 1  (16 oz) package shredded Monterey Jack cheese
  • 1 (8 oz) container reduced-fat sour cream

Instructions 

  • Preheat the oven to 350°F (175°C) and lightly grease a medium-sized baking dish.
  • Season the chicken breasts with garlic salt and place them in the prepared baking dish. Bake for about 45 minutes or until the chicken is fully cooked (internal temperature should be 165°F/74°C and juices should run clear).
  • Once baked, remove the chicken from the oven and allow it to cool before shredding it into bite-sized pieces. Set it aside.
  • While the chicken cools, char the tortilla halves over an open flame using metal tongs, cooking them for about 1 minute until lightly puffed.
  • Pour 1/2 inch of the enchilada sauce into the bottom of the baking dish. Arrange 6 of the tortilla halves in a single layer on top of the sauce.
  • Layer the dish: top the tortillas with half of the shredded chicken, 1/3 of the cheese, 1/2 of the sour cream, and 1/3 of the remaining enchilada sauce.
  • Repeat the layers, using the remaining tortillas, chicken, cheese, sour cream, and enchilada sauce.
  • Once all the layers are assembled, cover the casserole and bake in the preheated oven for 45 minutes.
  • After baking, allow the casserole to cool slightly before serving.
Calories: 487kcal
Course: Main Course
Cuisine: Mexican
Keyword: Green Chile Chicken Enchilada Casserole

  1. Can I use store-bought rotisserie chicken?
    Absolutely! Grab a rotisserie chicken to save time. Shred it up, and you’re ready to go. Skip the baking and move straight to the casserole assembly!
  2. Do I really need to char the tortillas?
    Not at all! If you’re looking for a shortcut, just tear the tortillas into quarters. This way, they soak up the sauce beautifully without any extra work!
  3. Can I prep the casserole ahead of time?
    Yes, you can assemble the casserole earlier in the day, cover it, and store it in the fridge. When you’re ready, just pop it in the oven and bake as usual!
  4. Can I substitute the sour cream for something else?
    Totally! Greek yogurt works just as well, and it’ll add a bit of tang to the dish without sacrificing creaminess.
  5. How can I make the casserole spicier?
    Simple! Add a couple of diced jalapeños or a sprinkle of cayenne pepper to give it an extra kick. Adjust to your heat preference—make it as spicy as you like!