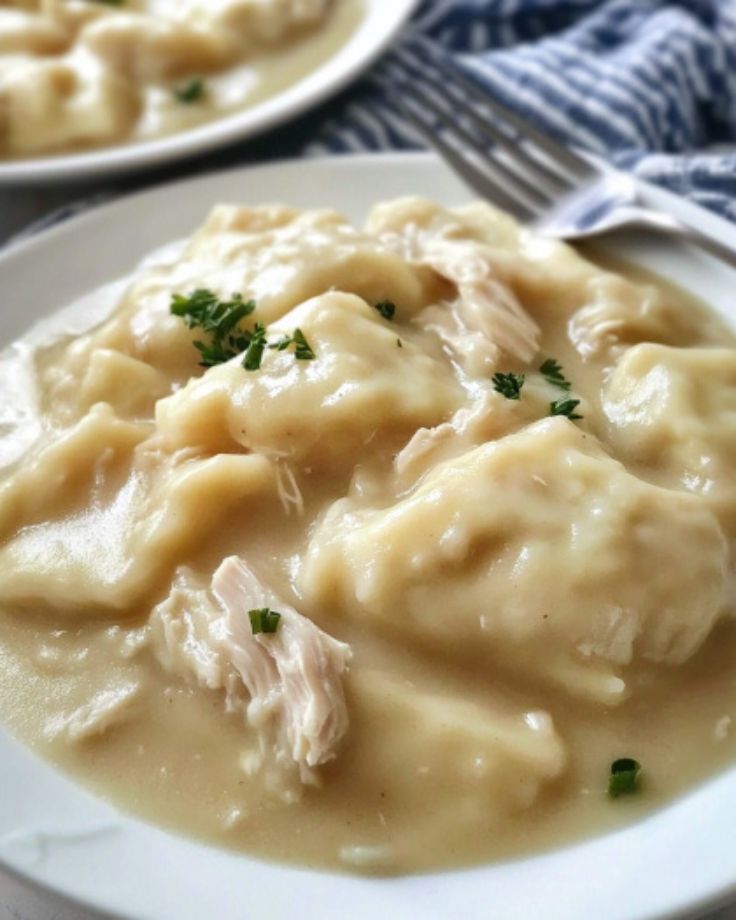
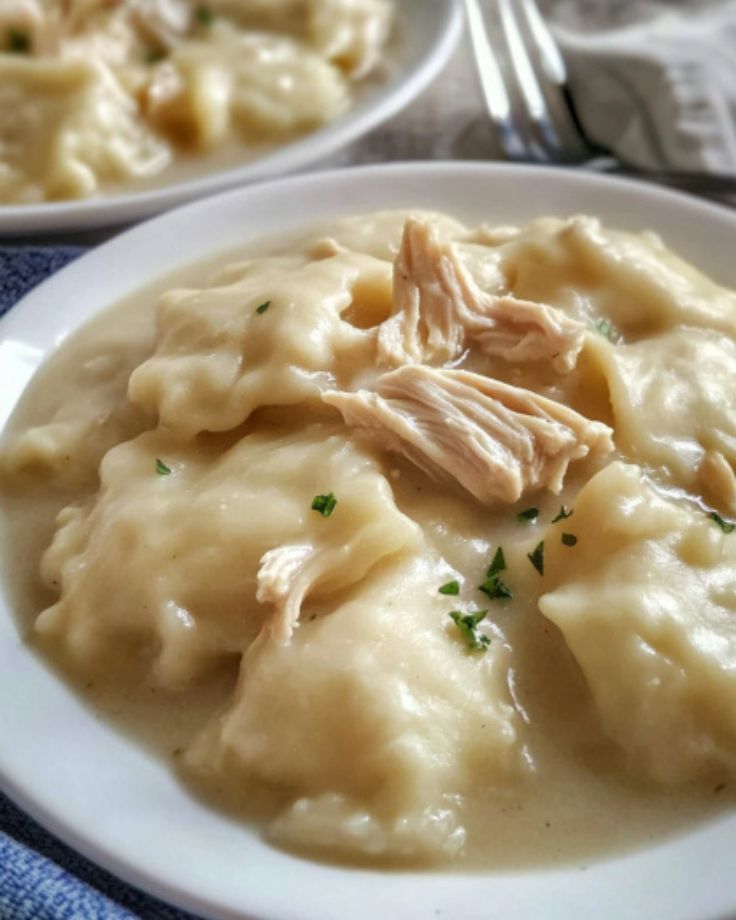
Author

Designer

Browsing

Chicken Enchiladas

Looking for an easy, mouthwatering dinner that’s packed with bold flavor?

These chicken enchiladas are a total game-changer! With tender chicken, gooey cheese,
and a zesty homemade enchilada sauce,
this dish comes together in no time and will quickly become your new weeknight go-to.

Whether you’re cooking for the family or meal prepping for the week, these enchiladas deliver big flavor with minimal effort.

Let’s dive in!

For Chicken Enchiladas

  • Chicken – Use boneless, skinless chicken breasts, diced into small pieces. This will make your enchiladas juicy and tender.
  • Avocado Oil (or Olive Oil) – This is used for sautéing the chicken and onion, giving a light and flavorful base.
  • White Onion – Adds savory depth to the filling, sautéed until soft.
  • Green Chiles – These bring a mild kick and depth of flavor to the chicken mixture.
  • Black Beans – Adds heartiness to the filling and a mild, earthy flavor.
  • Flour Tortillas – The classic base for enchiladas, making them soft and flexible for easy rolling.
  • Mexican-Blend Shredded Cheese – A combination of cheeses like cheddar and Monterey Jack creates the perfect gooey texture and flavor.

For Enchilada Sauce

  • Red Enchilada Sauce – The key to making these enchiladas saucy and flavorful; use homemade or store-bought.

Optional Toppings

  • Fresh Cilantro – For a fresh, herby finish.
  • Chopped Red Onions – Adds a crunchy, slightly tangy bite.
  • Diced Avocado – For a creamy contrast to the spiciness.
  • Sour Cream – To balance out the heat and add richness.
  • Crumbled Cotija Cheese – A salty, crumbly topping for an authentic touch.

Chicken Enchiladas

Prep Time 15 minutes
Cook Time 45 minutes
Total Time 1 hour
Servings 8 servings
Calories 558
Craving a crowd-pleasing dinner that's packed with flavor? These chicken enchiladas are the answer! With tender chicken, gooey cheese, and a homemade red enchilada sauce, this easy recipe delivers a delicious, satisfying meal that everyone will love.

Ingredients

  • 2 tbsp avocado oil (or olive oil)
  • 1 small white onion, peeled and diced
  • 1 ½ lbs boneless skinless chicken breasts, cut into ½-inch cubes

  • 1 can (4 oz) diced green chiles
  • Salt and freshly cracked black pepper, to taste
  • 1 can (15 oz) black beans, rinsed and drained
  • 8 large flour tortillas
  • 3 cups Mexican-blend shredded cheese
  • 1 batch homemade red enchilada sauce
  • ptional toppings: Fresh cilantro, chopped red onions, diced avocado, sour cream, crumbled cotija cheese

Instructions 

Prepare Oven & Sauce:

  • Preheat your oven to 350°F (175°C). Make your enchilada sauce ahead of time.

Cook the Filling:

  • Heat the avocado oil in a large sauté pan over medium-high heat. Add the diced onion and cook for about 3 minutes, stirring occasionally. Stir in the diced chicken and green chiles, and season generously with salt and pepper. Continue to sauté for 6–8 minutes until the chicken is fully cooked. Stir in the black beans until well combined. Remove from heat and set aside.

Assemble the Enchiladas:

  • Create an assembly line with tortillas, enchilada sauce, chicken mixture, and shredded cheese. Spread about 2 tbsp of enchilada sauce onto each tortilla, then add a spoonful of the chicken mixture down the center. Sprinkle with roughly 1/3 cup of cheese. Roll the tortilla tightly and place it seam side down in a greased 9x13-inch baking dish. Repeat with the remaining tortillas. Pour any leftover sauce over the rolled enchiladas, then top with the remaining cheese.

Bake:

  • Bake the enchiladas uncovered for about 20 minutes, or until they’re bubbling and slightly crispy on the edges.

Serve:

  • Remove the dish from the oven and let it cool slightly before serving. Garnish with your favorite toppings and enjoy the cheesy, flavorful goodness!

Notes

  • Storage:
    Leftover enchiladas can be stored in an airtight container in the fridge for up to 3 days or frozen for up to 3 months.
  • Make Ahead:
    To prep in advance, follow the steps up to assembling the enchiladas. Wrap the baking dish tightly with foil and refrigerate for up to 3 days, or freeze for up to 3 months. If frozen, thaw in the fridge for 24 hours before baking as directed.
Calories: 558kcal
Course: Main Dish
Cuisine: Mexican
Keyword: Chicken Enchiladas

  1. Can I use rotisserie chicken instead of cooking chicken from scratch?
    Absolutely! Using rotisserie chicken is a fantastic shortcut. Just shred it and toss it into the filling. It’s quick, convenient, and still super tasty!
  2. What’s the best way to make tortillas soft without frying them?
    Simply warm the tortillas in the microwave! Wrap them in a damp paper towel and heat them for about 30 seconds. It makes them pliable without any frying.
  3. Can I use store-bought enchilada sauce?
    Sure! While homemade sauce is great, store-bought enchilada sauce works perfectly here. Just be sure to pick a high-quality one for the best flavor.
  4. Can I prepare the enchiladas ahead of time?
    Definitely! You can assemble the enchiladas a day or two ahead of time, cover them with foil, and refrigerate. Then, just bake them when you’re ready to serve.
  5. How can I make the recipe vegetarian?
    For a vegetarian version, swap the chicken for black beans, roasted veggies, or even sautéed mushrooms. These substitutes still give you that hearty filling but with all the delicious flavors!

French Chicken Casserole: A Simple Yet Flavorful Comfort Meal

Looking for a dinner that combines comforting flavors and minimal effort?

This French Chicken Casserole is the perfect choice. Tender chicken thighs, hearty baby potatoes, and earthy mushrooms all simmer together in a creamy, herb-infused sauce that practically cooks itself.

It’s the kind of dish that’s perfect for family dinners, and it’s packed with flavor, making it a true crowd-pleaser with just a few basic ingredients.

Let the slow simmer do the work and enjoy a warm, satisfying meal tonight!

For French Chicken Casserole

  • Chicken Thighs – Bone-in, skin-on thighs work best for juicy, tender meat that holds up well during cooking.
  • Olive Oil – Used to brown the chicken for extra flavor before simmering.
  • Onion – Adds depth of flavor to the base of the casserole.
  • Garlic – A must-have for an aromatic and flavorful start to the dish.
  • Celery – Brings a subtle crunch and earthy flavor to complement the other vegetables.
  • Button Mushrooms – Adds an earthy richness to the casserole.
  • Dried Thyme & Rosemary – Key herbs that infuse the sauce with comforting, aromatic notes.
  • Chicken Broth &Lime Juice – Used for deglazing the pot, enhancing the flavor of the sauce.
  • Baby Potatoes – Halved and simmered in the sauce, they soak up all the delicious flavors.
  • Chicken Broth – Low sodium broth provides a savory base for the sauce.
  • Heavy Cream – For a creamy, rich finish to the casserole.
  • Frozen Peas – Adds a pop of color and sweetness to balance the richness of the dish.
  • Fresh Parsley – A fresh garnish to brighten up the dish before serving.

French Chicken Casserole Recipe (Alcohol-Free Version)

Prep Time 10 minutes
Cook Time 1 hour 10 minutes
Total Time 1 hour 20 minutes
Servings 4 servings
Calories 617
Craving a comforting, one-pot meal that’s both rich in flavor and effortless to make? This French Chicken Casserole is the answer!

Ingredients

  • 2 tbsp olive oil
  • 6 bone-in, skin-on chicken thighs
  • Salt and pepper, to taste
  • 1 large onion, chopped
  • 3 cloves garlic, minced
  • 2 stalks celery, sliced
  • 1 cup button mushrooms, quartered
  • 1 tsp dried thyme
  • 1 tsp dried rosemary
  • ½ cup low-sodium chicken broth + 1-2 teaspoons lemon juice
  • 1 pound baby potatoes, halved
  • 2 cups low-sodium chicken broth
  • 1 cup heavy cream
  • 1 cup frozen peas
  • Fresh parsley, chopped (for garnish)

Instructions 

Brown the Chicken:

  • Heat the olive oil in a Dutch oven over medium-high heat. Season the chicken thighs with salt and pepper, then brown them on both sides. Once done, remove the chicken and set aside.

Sauté the Vegetables:

  • In the same pot, add the chopped onion, minced garlic, sliced celery, and quartered mushrooms. Cook until the vegetables soften, about 5 minutes.

Season & Deglaze:

  • Add the thyme and rosemary to the pot. Pour in ½ cup of chicken broth mixed with 1-2 teaspoons of lemon juice. Stir, scraping up any bits stuck to the bottom. Let the mixture simmer for about 2 minutes.

Add Potatoes & Broth:

  • Stir in the halved baby potatoes and the remaining chicken broth. Bring to a simmer. Then, return the browned chicken thighs to the pot. Cover and simmer for 30 minutes, until the chicken is nearly cooked through.

Finish the Casserole:

  • Stir in the heavy cream and frozen peas. Cook for an additional 10-15 minutes, until the chicken is fully cooked, the potatoes are tender, and the sauce has thickened slightly. Season with salt and pepper to taste.

Serve:

  • Garnish with freshly chopped parsley before serving.

Notes

  • Season Generously: Make sure to season the chicken well with salt and pepper to enhance the flavors of the entire casserole.
  • Thicken the Sauce: If you prefer a thicker sauce, mix 1 tablespoon of cornstarch with a little water and stir it into the casserole near the end of cooking.
Calories: 617kcal
Course: Main Course
Cuisine: French
Keyword: French Chicken Casserole Recipe (Alcohol-Free Version)

  1. Can I make this casserole ahead of time?
    Yes, you can prepare the casserole the day before and store it in the fridge. Simply assemble it, cover tightly, and refrigerate. When you’re ready to cook, just pop it in the oven and bake as directed.
  2. Can I use boneless skinless chicken instead of bone-in thighs?
    While bone-in thighs give a richer flavor, you can absolutely use boneless skinless chicken. Just keep in mind that boneless chicken will cook faster, so check for doneness earlier.
  3. Why does this recipe use chicken broth and lemon juice?
    This recipe uses chicken broth and lemon juice to add depth of flavor and acidity, enhancing the dish. The chicken broth provides a rich, savory base, while the lemon juice adds a touch of brightness to balance the flavors, making the casserole both flavorful and well-rounded.
  1. Can I freeze the casserole?
    Yes, French Chicken Casserole can be frozen before cooking. Assemble it, cover tightly with plastic wrap, and freeze for up to 3 months. Thaw overnight in the fridge and bake when ready.
  2. How do I store leftovers?
    Store any leftovers in an airtight container in the fridge for up to 3-5 days. To reheat, add a splash of broth or cream to the casserole to bring back its creamy texture.

Chicken Stew (45 Minutes, One Pot!)

This hearty chicken stew tastes like it simmered all day, but it’s ready in just 45 minutes!
Packed with tender chicken, buttery potatoes, and cozy veggies, it’s comfort food made easy.

Your family will love how flavorful and satisfying it is, and you’ll appreciate how quick and simple it was to prepare!

For Chicken Stew

  • Chicken Breasts – Boneless and skinless work perfectly here; they’ll shred easily and add lots of flavor to the stew.
  • Butter – Cooking the vegetables in butter gives them a delicious richness you won’t want to skip.
  • Carrots and Celery – These classic stew veggies build a comforting flavor base—feel free to toss in onion, peas, or corn too!
  • Garlic – Adds depth and savory flavor. Don’t skimp here!
  • All-purpose Flour – Helps thicken the stew, giving you that perfectly hearty texture.
  • Baby Potatoes – Quartered baby potatoes cook quickly and stay tender, not mushy.
  • Chicken Broth – Low-sodium is best; it lets you control the saltiness and flavors.
  • Thyme and Bay Leaf – These herbs infuse subtle warmth and depth; dried thyme works too if you don’t have fresh.
  • Fresh Parsley – An optional but tasty garnish that adds freshness and color to finish off the stew!

Chicken Stew

Prep Time 10 minutes
Cook Time 35 minutes
Total Time 45 minutes
Servings 4
Calories 386
A cozy, one-pot meal that’s packed with tender chicken, hearty potatoes, and flavorful broth—ready in just 45 minutes! This easy homemade stew is perfect for busy weeknights when you want something warm, comforting, and full of wholesome ingredients.

Ingredients

  • 2 tbsp tablespoons butter
  • 2 large carrots, peeled and sliced into rounds
  • 1 stalk celery, chopped
  • Kosher salt, to taste
  • Freshly ground black pepper, to taste
  • 3 garlic cloves, minced
  • 1 tbsp all-purpose flour
  • Ibs boneless, skinless chicken breasts
  • 3 sprigs fresh thyme (or ½ teaspoon dried thyme)
  • 1 bay leaf
  • ¾ Ib baby potatoes, quartered
  • 3 cups low-sodium chicken broth
  • Fresh parsley, chopped, for garnish (optional)

Instructions 

  • Heat butter in a large pot over medium heat. Add sliced carrots and chopped celery, then season generously with salt and freshly ground black pepper. Cook vegetables, stirring frequently, until tender, about 5 minutes. Add minced garlic and cook until aromatic, about 30 seconds.
  • Sprinkle flour over the vegetables, stirring until they’re evenly coated. Add chicken breasts, thyme sprigs, bay leaf, quartered potatoes, and chicken broth to the pot. Season again with salt and pepper. Bring to a gentle simmer and cook until the chicken is fully cooked (no longer pink) and potatoes are fork-tender, about 15 minutes.
  • Remove the pot from heat. Transfer chicken breasts to a medium bowl and shred into bite-sized pieces using two forks. Once shredded, return chicken to the stew.
  • Serve the stew garnished with freshly chopped parsley, if desired.

Notes

Serving Suggestions:
  • Enjoy your stew with crusty homemade bread or biscuits for dipping.
  • Pair with a crisp spinach salad or creamy mashed potatoes for a satisfying meal.
Storage: Store leftover stew in an airtight container in the refrigerator for up to 3 days.
Calories: 386kcal
Course: Main Course
Cuisine: Western / American
Keyword: Chicken Stew

1. Can I use chicken thighs instead of chicken breasts?

Absolutely! Chicken thighs are juicier and add extra flavor. They’re a great swap if you prefer dark meat or want a more tender stew.

2. How can I thicken my stew?

Easy! Try one of these tricks:

  • Mash some potatoes into the broth.
  • Mix a tablespoon of flour with water and stir it in.
  • Add a splash of heavy cream for a richer texture.

3. Can I make this ahead of time?

Yes! In fact, it tastes even better the next day as the flavors meld together. Just store it in an airtight container in the fridge for up to 4 days.

4. Can I freeze chicken stew?

Yep! Let it cool completely, then store in freezer-safe containers for up to 3 months. Thaw in the fridge overnight and reheat on the stove.

5. What should I serve with chicken stew?

Go classic with:

  • Crusty bread or biscuits for dipping
  • A fresh green salad
  • Mashed potatoes or rice to soak up that flavorful broth

Now grab a bowl and get cozy—this stew is calling your name!

20-Minute Air Fryer Chicken & Veggies

Healthy, insanely quick, and packed with big flavour! When you toss chicken and veggies in the air fryer, dinner magic happens—they come out tender, delicious, and perfectly charred.

Your family will love customizing this easy meal with their favourite veggies, and you’ll love how effortlessly it comes together on busy nights.

For Air Fryer Chicken & Veggies

  • Chicken Breast – Boneless and skinless works best. Cut into bite-sized pieces for quick cooking.
  • Broccoli Florets – Fresh or frozen both work wonderfully, adding texture and nutrients.
  • Zucchini – Adds moisture and tenderness; chop evenly for consistent cooking.
  • Bell Peppers – Any color you prefer—brings sweetness, crunch, and vibrant color.
  • Onion – Adds a subtle sweetness and depth of flavor.
  • Garlic – Freshly minced or crushed, bringing bold flavor in just a small amount.
  • Olive Oil – Helps the seasoning stick, ensuring everything crisps perfectly in the air fryer.
  • Seasonings (Garlic powder, Chili powder, Salt & Pepper) – A simple combo for great flavor.
  • Italian Seasoning – Easy shortcut seasoning, but feel free to use your favorite blend!

Healthy Air Fryer Chicken and Veggies (Ready in 20 Minutes!)

Prep Time 5 minutes
Cook Time 15 minutes
Total Time 20 minutes
Servings 4
Calories 230
This delicious, nutritious chicken and vegetable recipe is incredibly easy to whip up, full of flavor, and makes a healthy low-carb or keto-friendly meal in under 20 minutes.

Ingredients

  • 1 Ib chicken breast, diced into bite-sized pieces (approximately 2-3 medium breasts)
  • 1 cup broccoli florets (fresh or frozen)
  • 1 zucchini, chopped into bite-sized pieces
  • 1 cup bell peppers, diced (any color or combination)
  • ½ onion, diced
  • 2 cloves garlic, minced or crushed
  • 2 tbsp olive oil
  • ½ tsp each garlic powder, chili powder, salt, and black pepper
  • 1 tbsp Italian seasoning (or substitute your preferred spice blend)

Instructions 

  • Preheat: Set your air fryer temperature to 400°F (200°C).
  • Prep Ingredients: Cut the chicken breast and vegetables into small, bite-sized pieces and place them in a large bowl.
  • Season: Drizzle the olive oil over the chicken and veggies, sprinkle evenly with garlic powder, chili powder, salt, pepper, and Italian seasoning. Toss until everything is evenly coated.
  • Air Fry: Transfer the seasoned chicken and vegetables to your preheated air fryer basket. Cook for approximately 10 minutes, shaking or stirring halfway through cooking, until the chicken is fully cooked and vegetables are slightly charred. (Note: For smaller air fryer baskets, cook in batches.)

Notes

  • Spices: Feel free to swap Italian seasoning for your favorite spice mix (e.g., taco, cajun, lemon pepper). If the spice blend already contains salt, consider reducing additional salt.
  • Vegetables: Substitute or add any quick-cooking veggies of your choice. If using potatoes, air fry the potatoes alone for about 10 minutes before adding chicken and other vegetables.
Calories: 230kcal
Course: Main Course
Cuisine: American
Keyword: Air Fryer Chicken and Veggies

1. Can I cook the chicken and veggies together in the air fryer?
Absolutely! Just make sure everything is cut into similar-sized pieces so they cook evenly. Arrange in a single layer for the best results—crowding the basket will make them steam instead of crisp up.

2. Do I need to preheat the air fryer?
Yes! Preheating to 400°F (200°C) gives you that perfect golden char and speeds up cooking time. If your air fryer doesn’t have a preheat setting, just run it empty for a few minutes before adding the food.

3. How do I keep the chicken juicy?
The secret? A little olive oil! Tossing the chicken in oil before air frying locks in moisture, so you get tender, juicy bites every time. Also, don’t overcook—10 minutes is usually perfect!

4. Can I use frozen veggies?
Yep! No need to thaw—just toss them in frozen. They’ll release a little extra moisture, so give them an extra minute or two in the air fryer. If you want them crispier, pat them dry before seasoning.

5. Can I switch up the seasoning?
Of course! Italian seasoning is a great all-rounder, but feel free to use taco, Cajun, or lemon pepper blends. Just adjust the salt if your seasoning mix already has some in it.

Instant Pot Chicken Carnitas

Instant Pot Chicken Carnitas are juicy, shredded chicken made in just 30 minutes!

When you cook chicken carnitas under pressure, magic happens—they come out tender, packed with bold spices, tangy citrus juices, and caramelized onion flavor.

Your family will love customizing their tacos, burrito bowls, or nachos, and you’ll love how incredibly quick and easy this delicious dinner is to put together.

For Instant Pot Chicken Carnitas

  • Chicken Breasts – Boneless, skinless chicken breasts cook quickly and shred easily, absorbing tons of flavor.
  • Cumin and Oregano – These spices create the bold, earthy base flavor of carnitas.
  • Chili Powder – Adds just enough warmth without overwhelming spice.
  • Onion and Garlic – Essential aromatics for deep, savory flavor.
  • Pineapple or Orange Juice – Sweet and tangy, this adds brightness and balances the spices.
  • Lime Juice – Freshly squeezed lime juice gives an extra zing and freshness.
  • Chicken Stock – Choose low-sodium stock to control salt levels and add moisture.
  • Olive Oil – For sautéing onion and garlic; enhances flavors and prevents sticking.
  • Fresh Cilantro – Optional but recommended garnish for fresh flavor and vibrant color.

Prep Time 10 minutes
Cook Time 20 minutes
Total Time 30 minutes
Servings 6
Calories 208
Enjoy these juicy and flavorful chicken carnitas, effortlessly cooked in an Instant Pot and ready in under half an hour. Perfect for tacos, burritos, bowls, or nachos. Plus, they're Whole30, Paleo, and Gluten-Free friendly!

Ingredients

  • 1 tbsp cumin
  • 1 tbsp oregano
  • 1 tsp salt
  • 1 tsp black pepper
  • 1 tsp chili powder
  • 1 tbsp olive oil
  • 1 medium onion, chopped
  • 4 garlic cloves, minced
  • ¼ cup (60 ml) pineapple juice or orange juice
  • ¼ cup (60 ml) lime juice
  • ¼ cup low-sodium chicken stock
  • 1 Ib boneless, skinless chicken breasts
  • Fresh cilantro (optional, for garnish)

Instructions 

  • In a small bowl, combine cumin, oregano, salt, black pepper, and chili powder. Set aside.
  • Turn your Instant Pot to the "Sauté" setting and heat olive oil. Add chopped onion, sautéing for approximately 3 minutes until fragrant and soft. Stir in minced garlic and cook for another minute.
  • Pour pineapple or orange juice, lime juice, and chicken stock into the Instant Pot. Add the spice mixture, stirring well. Place the chicken breasts into the pot, coating evenly with the sauce.
  • Cancel the "Sauté" function. Secure the Instant Pot lid, ensuring the steam valve is set to the "Sealing" position. Cook on "Manual" or "Pressure Cook" at high pressure for 8 minutes.
  • After cooking, allow the Instant Pot to naturally release pressure for 10 minutes. Then carefully turn the valve to "Venting" to release any remaining steam. Once the steam fully releases, open the lid.
  • Shred the chicken using two forks.

Optional Step (for crispier carnitas):

  • Preheat your oven's broiler on high.
  • Transfer shredded chicken to a lightly greased baking sheet, spreading evenly.
  • Broil for 5 minutes. Remove from oven, drizzle some of the leftover cooking juices over the chicken, toss gently, then return to broil another 5 minutes.

Notes

 Serving Suggestion:
  • Finish with a squeeze of fresh lime juice and garnish with chopped cilantro. Serve as tacos, in burrito bowls, over nachos, or in quesadillas.
Calories: 208kcal
Course: Main Course
Cuisine: Mexican-inspired
Keyword: Instant Pot Chicken Carnitas

1. Can I use chicken thighs instead of breasts?

Absolutely! Chicken thighs are juicier and even more flavorful. Just swap them in for the same weight and follow the exact same cooking method. Bonus: they’re harder to overcook!

2. How can I make the carnitas spicier?

Want to turn up the heat? Add chipotle peppers in adobo sauce, a pinch of cayenne, or extra chili powder. You control the spice level—make it as fiery as you dare!

3. Can I make this in a slow cooker instead of an Instant Pot?

Yes! Toss everything into the slow cooker and let it do its thing for 6-8 hours on low or 4-5 hours on high. Same incredible flavor, just a longer hands-off approach.

4. Can I make this ahead of time?

You bet! Cook, shred, and store it in the fridge for up to 3 days. For that fresh-off-the-stove taste, reheat with a splash of the cooking juices. Want crispy carnitas? Broil them for a few minutes before serving!

5. Can I freeze the leftovers?

YES! Freeze shredded chicken with some of the juices in an airtight container for up to 3 months. Thaw overnight in the fridge, reheat, and it’s as good as new. Meal prep win!

Crockpot Chicken Wild Rice Soup

This dreamy, creamy Chicken Wild Rice Soup is comfort food at its BEST!
Just toss chicken, veggies, wild rice, and broth into your crockpot, then sit back and let the slow cooker work its magic.

Honestly, it’s amazing how something SO easy can taste this cozy.
Perfect for chilly nights—and ideal for lazy cooks (that’s me, folks!).

Your family will love how rich and satisfying it is, and you’ll love how effortlessly it comes together.
Customize with your favorite toppings for the ultimate cozy dinner!

For Crockpot Chicken Wild Rice Soup 

  • Chicken – Boneless, skinless chicken breasts work perfectly, but rotisserie chicken is great if you’re short on time.
  • Wild Rice – Hearty, nutritious, and gives the soup great texture.
  • Mirepoix (Carrots, Celery, Onion) – Classic flavor base that adds savory depth.
  • Garlic – Just a couple of cloves go a long way to boosting flavor.
  • Chicken Broth – Your soup’s rich, flavorful base. Homemade or store-bought both work!
  • Poultry Seasoning – Adds warm, savory notes to complement the chicken.

For the Creamy Soup Base

  • Butter and Flour – Creates a simple roux to thicken your soup and make it deliciously creamy.
  • Whole Milk – Warming the milk slightly helps create a smooth, lump-free creamy base.
  • Sherry (Optional) – Adds a subtle, sophisticated flavor that’s worth trying!
  • Extra Milk, Water, or Heavy Cream – Adjust soup consistency to your liking—use heavy cream if you prefer it extra rich.

Crockpot Chicken Wild Rice Soup

Prep Time 15 minutes
Cook Time 6 hours
Total Time 6 hours 15 minutes
Servings 10
Calories 277
This comforting Crockpot Chicken Wild Rice Soup is delightfully easy to prepare! Tender chicken, hearty wild rice, flavorful vegetables, and creamy broth make it the ideal cozy meal. Enjoy with warm crusty bread for a satisfying dinner.

Ingredients

  • 1 cup uncooked wild rice
  • 1 lb boneless, skinless chicken breasts
  • 2 cups chopped mirepoix (carrots, celery, and onion)
  • 2 garlic cloves, minced
  • 6 cups chicken broth
  • 1 tsp poultry seasoning
  • ½ cup unsalted butter
  • ½ cup all-purpose flour
  • cups whole milk, warmed slightly
  • 2 cups Up to 2 cups additional milk or water, as needed
  • Salt and pepper, to taste
  • Optional: Heavy cream (for a richer, creamier soup)

Instructions 

  • Prepare and Cook:
    Rinse wild rice thoroughly. Combine wild rice, raw chicken breasts, chopped mirepoix vegetables, minced garlic, chicken broth, and poultry seasoning in the crockpot. Cover and cook on low for about 6 hours until the chicken is fully cooked and the wild rice is tender. It's normal to have some liquid remaining; leave it in the crockpot.
  • Chop Chicken:
    Remove the chicken breasts from the crockpot and let cool slightly. Cut into bite-sized chunks or shred with a fork, then set aside.
  • Make Creamy Soup Base:
    In a separate saucepan, melt butter over medium heat. Sprinkle in flour and cook for about 1 minute, stirring constantly. Gradually add warmed milk (warm briefly in microwave beforehand), whisking continuously to create a smooth, creamy sauce. Stir in the sherry, if using, for additional flavor depth.
  • Combine and Serve:
    Return the chicken and creamy sauce mixture to the crockpot, stirring gently to combine. Adjust consistency by adding additional milk, water, or a splash of heavy cream as desired. Season to taste with salt and pepper.

Notes

  • Substitute with Rotisserie Chicken: You can substitute the fresh chicken breasts with 2–3 cups of shredded or cubed rotisserie chicken. Simply add the chicken during step 4.
  • Warming the milk before adding to the butter-flour mixture helps ensure a lump-free, silky-smooth texture for your creamy base.
Calories: 277kcal
Course: Main Course
Cuisine: American
Keyword: Crockpot Chicken Wild Rice Soup

1. Can I use rotisserie chicken instead of raw chicken breasts?

Absolutely! If you’re short on time, shredded rotisserie chicken works perfectly. Just add it during the last 30 minutes of cooking so it heats through without drying out. So easy!

2. Do I need to cook the wild rice before adding it to the crockpot?

Nope! Just rinse the wild rice and toss it in raw. It cooks perfectly in the slow cooker, soaking up all that rich flavor while you go about your day.

3. Can I use a different type of rice instead of wild rice?

You can, but wild rice is the best choice because it holds up well and adds great texture. White rice will get mushy, and brown rice will need a different cook time. Stick with wild rice if you can!

4. How do I adjust the thickness of the soup?

If it’s too thick, just add more broth, milk, or even a splash of water to loosen it up. If it’s too thin, let it cook uncovered for a bit or stir in a little extra roux (butter + flour).

5. Can I make this soup on the stovetop instead of a crockpot?

Yep! Just toss everything into a large pot, bring to a boil, then simmer for about an hour until the chicken is cooked and the rice is tender. Same deliciousness, just a little faster!

Slow Cooker Spinach-Artichoke Chicken Stew

Love spinach-artichoke dip? Wait till you taste this creamy Spinach-Artichoke Chicken Stew!

Just toss everything into the slow cooker, let the magic happen—it turns into tender chicken swimming in an outrageously delicious sauce inspired by everyone’s favorite dip.

Your family will adore this easy comfort-food dinner, and you’ll love how simple it was to put together. Perfect for busy weekdays or lazy weekends!

For the Chicken Stew 

  • Chicken Thighs – I use boneless, skinless chicken thighs for extra tenderness, but chicken breast works well too.
  • Butter – for sautéing and adding richness to the stew.
  • Onion, Celery, and Garlic – the aromatic veggies that create depth and flavor—don’t skip these!
  • Chicken Stock – adds savory flavor and keeps the stew moist.
  • White Wine – gives the stew a subtle tang and balances out the richness.
  • Lemon Juice – brightens the stew with just a hint of fresh citrus.
  • Red Pepper Flakes – provides gentle warmth without overpowering heat.

For the Creamy Spinach-Artichoke Mixture

  • Frozen Spinach – conveniently adds greens, texture, and nutritional punch.
  • Marinated Artichoke Hearts – tangy, flavorful, and inspired by your favorite dip.
  • Cream Cheese – creates a velvety, creamy sauce you’ll want to spoon up until every last drop is gone!
  • Fresh Dill – adds freshness and lifts the stew’s creamy richness.
  • Scallions & Parmesan – sprinkled on top for extra flavor and the perfect finishing touch.

Slow Cooker Spinach-Artichoke Chicken Stew

Prep Time 10 minutes
Cook Time 4 hours 20 minutes
Total Time 4 hours 30 minutes
Servings 4
Calories 623
This creamy chicken stew is inspired by the beloved spinach-artichoke dip. It brings comforting flavors but stays balanced with the freshness of dill, and marinated artichokes. Serve it with pita or tortilla chips for a complete experience.

Ingredients

  • 2 tbsp unsalted butter
  • 1 large yellow or red onion, finely chopped
  • Kosher salt and black pepper, to taste
  • 3 celery stalks, chopped
  • 8 garlic cloves, smashed and chopped
  • 2 to 2¼ lbs boneless, skinless chicken thighs
  • 1 cup chicken stock
  • ½ cup white grape juice
  • 1 tsp white vinegar
  • Juice of ½ lemon (about 1½ tbsp)
  • 1 tsp red pepper flakes
  • 1 package (10 oz) frozen cut spinach
  • 1 jar (12 oz) marinated artichoke hearts, drained (about 1 heaping cup)
  • ½ cup cream cheese (about 4 oz)
  • ½ cup fresh dill, finely chopped
  • 4 to 6 scallions, thinly sliced, for topping
  • Grated Parmesan cheese, for topping

Instructions 

  • Sauté Vegetables:
    In a large skillet over medium-high heat, melt the butter. Add the chopped onion, season lightly with salt, and cook, stirring occasionally, for about 5 minutes until softened. Add the celery and garlic, and continue to cook for another 2 minutes until fragrant. Transfer the mixture to a 6- to 8-quart slow cooker.
  • Cook Chicken:
    Add the chicken thighs, chicken stock, white grape juice + white vinegar, and lemon juice into the slow cooker. Season with red pepper flakes, 1 teaspoon salt, and a generous amount of black pepper. Stir to combine, cover, and cook on low for 4 hours. The stew can be kept on the warm setting for several hours if needed.
  • Add Spinach & Artichokes:
    About 20 minutes before serving, add the frozen spinach and marinated artichoke hearts to the slow cooker. Let them cook on low until the spinach is heated through and fully incorporated into the stew (about 15-20 minutes for frozen spinach blocks, less time for pre-chopped spinach).
  • Finish Stew:
    Stir in the cream cheese and chopped dill. Continue stirring until the cream cheese fully melts into the stew.
  • Shred Chicken:
    Use the back of a spoon to break the chicken apart into pieces. Taste and adjust the seasoning with more salt and black pepper if desired.
  • Serve:
    Ladle the stew into bowls and garnish with sliced scallions and grated Parmesan.
Calories: 623kcal
Course: Main Course
Cuisine: American
Keyword: Slow Cooker Spinach-Artichoke Chicken Stew

1. Can I use fresh spinach instead of frozen?

Absolutely! Fresh spinach works just as well—just sauté it first to remove excess moisture. If you’re in a hurry, toss it in during the last few minutes of cooking and let it wilt straight in the stew.

2. Do I really need to sauté the veggies first?

Technically, no—but it makes a difference! Cooking the onion, celery, and garlic first brings out extra flavor. But if you’re short on time, just throw everything into the slow cooker and let it do the work!

3. Can I swap chicken thighs for chicken breasts?

Yep! Chicken breasts will work, but they’re leaner and might not be as tender. If using breasts, try shredding them slightly at the end to soak up more of the creamy sauce!

4. Can I freeze leftovers?

You bet! Let the stew cool completely, then freeze in an airtight container for up to 3 months. Thaw in the fridge overnight and reheat gently on the stovetop or in the microwave.

5. What should I serve with this?

Go all out with crusty bread, rice, or buttery mashed potatoes to soak up all that creamy goodness. Feeling low-carb? Try cauliflower rice or a simple side salad!

French Onion Stuffed Chicken Breasts

Golden chicken breasts stuffed with sweet, jammy caramelized onions and bubbling melted cheese—this dish tastes as amazing as it sounds!

It’s everything you love about French Onion Soup, transformed into an easy, elegant chicken dinner.

Don’t skip caramelizing those onions—the magic happens right there, and trust me, it’s absolutely worth it.

For the Chicken

  • Chicken Breasts – Boneless, skinless chicken breasts are perfect for stuffing; they stay juicy and tender in the oven.
  • Gruyere Cheese – Melts beautifully and gives that classic, gooey French onion flavor.
  • Parmesan Cheese – Adds extra savory depth and balances the sweetness of the onions.
  • Salt and Pepper – Enhances the chicken’s flavor and balances the dish.
  • Olive Oil – Use it to quickly sear the chicken, giving it a beautiful golden-brown crust.

For the Caramelized Onion Filling

  • Onions – Sliced thinly and slowly caramelized until sweet, jammy, and deep golden brown. Worth every minute!
  • Butter and Olive Oil – A combination of both helps onions caramelize evenly without burning.
  • Sugar – A pinch speeds up caramelization, enhancing the natural sweetness of onions.
  • Fresh Thyme – Brings a subtle herby note, perfect with sweet onions.
  • Balsamic Vinegar – Adds a slight tang and richness, lifting the flavors.
  • Beef Broth – Keeps onions moist and saucy, mimicking that French Onion Soup quality.
  • Garlic – Essential for depth of flavor; cook briefly to keep it aromatic.

French Onion Stuffed Chicken Breasts

Prep Time 10 minutes
Cook Time 45 minutes
Total Time 55 minutes
Servings 4
Calories 693
Juicy chicken breasts filled with sweet caramelized onions and melted cheese—a special dinner treat that feels gourmet yet cozy!

Ingredients

  • 2 tbsp unsalted butter
  • 4 tbsp extra virgin olive oil, divided
  • 4 large white onions, thinly sliced
  • 1 tsp sugar
  • 2 tsp fresh thyme
  • 1 tbsp balsamic vinegar
  • 1 cup beef broth, divided
  • 3 cloves garlic, minced
  • 4 boneless, skinless chicken breasts
  • cups Gruyere cheese, grated
  • ½ cup Parmesan cheese, freshly grated
  • Kosher salt and freshly ground black pepper, to taste

Instructions 

  • Preheat Oven:
    Preheat your oven to 400°F. Lightly grease a 9x13-inch baking dish with butter or nonstick cooking spray.
  • Caramelize the Onions:
    Heat 2 tablespoons butter and 2 tablespoons olive oil in a large skillet over medium-high heat. Add sliced onions and cook, stirring occasionally, until they soften. Reduce heat to medium if onions start browning too quickly.
  • Deepen the Flavor:
    Sprinkle onions with salt, sugar, and fresh thyme. Continue cooking, stirring every few minutes, until onions turn deeply golden and jammy—around 30 minutes or longer. If onions become dry, gradually add up to ½ cup beef broth to keep them moist.
  • Finish the Onions:
    Once caramelized, add balsamic vinegar to the pan, scraping any browned bits from the bottom. Stir in minced garlic and cook for an additional minute until fragrant. Remove from heat and set aside.
  • Prepare the Chicken:
    Carefully cut a lengthwise pocket into each chicken breast, without slicing all the way through. Fill each pocket generously with about 2 tablespoons caramelized onions and a mixture of Gruyere and Parmesan cheeses. Secure pockets with toothpicks.
  • Assemble the Dish:
    Spread remaining caramelized onions evenly in the prepared baking dish and stir in the remaining ½ cup beef broth.
  • Sear the Chicken:
    Heat the remaining 2 tablespoons olive oil in a clean skillet over medium-high heat. Season stuffed chicken breasts with salt and pepper. Sear chicken until golden brown on each side, about 4 minutes per side. (Chicken doesn't need to cook completely during this step.)
  • Bake to Finish:
    Place seared chicken breasts on top of onions in the baking dish. Spoon some onions and juices over each breast, and sprinkle with remaining cheeses. Bake uncovered for 15-20 minutes, or until chicken is fully cooked and cheese is melted and bubbling.
  • Serve and Enjoy:
    Remove toothpicks before serving. Enjoy this delicious, hearty dish hot from the oven!
Calories: 693kcal
Course: Main Course
Cuisine: French-inspired
Keyword: French Onion Stuffed Chicken Breasts

1. Can I caramelize the onions ahead of time?

Yes! Caramelizing onions takes time, so prepping them in advance is a game changer. Store them in an airtight container in the fridge for up to 3 days. When you’re ready to cook, just warm them up before stuffing the chicken.

2. How do I stop the cheese from leaking out?

To keep all that cheesy goodness inside:
Use toothpicks to secure the chicken after stuffing.
Don’t overstuff—too much filling makes it harder to seal.
Sear the chicken first—it helps “lock in” the filling before baking.

3. What can I use instead of Gruyere?

No Gruyere? No problem! Swiss, mozzarella, or provolone are all great substitutes. Each one melts beautifully and keeps that rich, cheesy flavor.

4. How do I know when the chicken is fully cooked?

Use a meat thermometer! Insert it into the thickest part of the chicken—it should read 165°F (74°C). No thermometer? Just cut into the chicken; if it’s white and the juices run clear, you’re good to go!

5. Can I make this recipe ahead of time?

Absolutely! Stuff the chicken and keep it covered in the fridge for up to 24 hours before cooking. Let it sit at room temp for 15 minutes before searing and baking. Easy, right?

Perfect Pan-Seared Chicken Breast

Never serve dry, bland chicken again!
This Pan-Seared Chicken Breast is your new quick-fix secret to juicy, flavorful chicken.

Cooked perfectly on your stovetop in just 15 minutes,
pantry-friendly spices and one-skillet magic make this recipe a total dinner hero!

Your family will love this easy, foolproof method,
and you’ll love how quickly it all comes together for a delicious meal any night of the week.

For Pan-Seared Chicken Breast

  • Chicken Breasts – Slice them in half lengthwise for quicker cooking and juicier results. You can use larger breasts cut thinner or small chicken breasts as they are.
  • Olive Oil – Helps the spices adhere and gives the chicken a beautiful golden crust.
  • Garlic Powder – Adds savory depth and aroma.
  • Smoked Paprika – Imparts a subtle smokiness and rich color.
  • Onion Powder – Enhances flavor with mild sweetness and depth.
  • Oregano – Brings a touch of earthy, herby freshness.
  • Salt & Black Pepper – Essential for bringing out all the flavors.
  • Cayenne Pepper – Optional, but adds just the right hint of spice.
  • Butter – Melting it into the skillet creates extra richness and deliciousness to finish your chicken.

Perfect Pan-Seared Chicken Breast

Prep Time 5 minutes
Cook Time 10 minutes
Total Time 15 minutes
Servings 4
Calories 279
Say farewell to dry, bland chicken! This easy Pan-Seared Chicken Breast recipe creates juicy, tender chicken right on your stovetop. With simple spices and quick skillet cooking, you'll have a delicious meal ready in minutes.

Ingredients

  • 2 large chicken breasts, halved lengthwise (or 4 small chicken breasts)
  • 3 tbsp olive oil, divided
  • ¾ tsp garlic powder
  • ¾ tsp smoked paprika
  • ¾ tsp onion powder
  • ¾ tsp dried oregano
  • ¾ tsp salt
  • ¼ tsp ground black pepper
  • ¼ tsp cayenne pepper (optional for a spicy kick)
  • 2 tbsp butter

Instructions 

  • Prepare the chicken:
    If using large chicken breasts, slice them in half lengthwise to form four thinner pieces. Pat dry thoroughly using a paper towel. Brush the chicken pieces evenly with 1 tablespoon of olive oil.
  • Season the chicken:
    In a small bowl, combine garlic powder, smoked paprika, onion powder, oregano, salt, black pepper, and cayenne pepper. Generously sprinkle this seasoning blend on both sides of each chicken breast, gently pressing to adhere.
  • Cook the chicken:
    Heat the remaining 2 tablespoons of olive oil in a large skillet (a cast iron skillet works great) over medium-high heat. When hot, place chicken breasts into the skillet, smooth side down. Sear without moving for about 5 minutes until golden and crisp.
  • Flip and finish cooking:
    Use tongs to carefully flip the chicken breasts. Lower the heat to medium and cook for an additional 2-5 minutes, depending on the thickness of the chicken. To ensure perfect doneness, use a meat thermometer—cooked chicken breast should reach an internal temperature of 165°F (74°C).
  • Add butter and rest:
    Once the chicken is fully cooked, add the butter directly to the skillet, then immediately remove from heat. Allow chicken to rest on a cutting board for about 5 minutes—this helps retain juiciness. Slice and serve warm.

Notes

  • Crispier chicken:
    Add a tablespoon of flour to the spice mixture before seasoning the chicken.
  • Storage:
    Keep leftovers in an airtight container in the refrigerator for up to 3 days.
  • Reheating without dryness:
    Warm leftover chicken gently by adding a splash of chicken broth, then heating in a covered skillet or covered baking dish at 300ºF. The broth will create gentle steam, preventing dryness.
Calories: 279kcal
Course: Main Course
Cuisine: American
Keyword: Pan-Seared Chicken Breast


1. How do I stop the chicken from sticking to the pan?
Let your skillet get hot before adding oil—this creates a natural non-stick surface. Also, use a good-quality pan and don’t move the chicken too soon—let it sear properly!

2. How do I make sure my chicken is juicy and not dry?
The secret? Don’t overcook it! Use a meat thermometer and remove the chicken as soon as it hits 165°F (74°C). Also, let it rest for 5 minutes before slicing—this locks in all the juices.

3. What’s the best seasoning for extra flavor?
A simple blend of garlic powder, onion powder, smoked paprika, salt, and pepper does wonders! Want more depth? Add a pinch of cayenne for heat or Italian herbs for a Mediterranean twist.

4. Can I make this recipe with other cuts of chicken?
Absolutely! Chicken thighs work great and are naturally juicier. Just adjust cooking time as thighs take a bit longer—aim for 170°F (77°C) for best results.

5. Can I meal prep this chicken for the week?
Yes! Store it in an airtight container in the fridge for up to 3 days. For reheating, gently warm with a splash of chicken broth in a skillet or covered dish in a 300ºF oven—this keeps it moist!

Old-Fashioned Chicken and Dumplings (Cracker Barrel Copycat)

Homemade Chicken and Dumplings are the ultimate comfort food, delivering all the nostalgia of Cracker Barrel’s legendary dish.

Tender chicken simmered gently in hearty broth with fluffy, soft dumplings—it’s like wrapping yourself in a warm, cozy hug.

Your family will love how satisfying this meal is, and you’ll appreciate how quickly and easily it comes together using simple pantry ingredients.

For Chicken and Broth 

  • Chicken Breasts – Boneless, skinless chicken breasts are best for easy cooking and shredding. But feel free to use thighs for more flavor if preferred.
  • Chicken Broth – Provides the flavorful base. Homemade or store-bought is fine.
  • Celery and Onion – Adds subtle depth to the broth (you’ll remove these after cooking—they’re just for flavor!).
  • Salt and Pepper – Essential seasoning to enhance the natural flavors of chicken and broth.

For Dumplings

  • All-Purpose Flour – This forms the base of the dumplings, giving them that perfect, fluffy texture.
  • Baking Powder – Helps dumplings rise and become airy.
  • Milk – Adds moisture, creating soft, tender dumplings.
  • Salt – A little salt brings out the flavor in your dumplings and balances the dish perfectly.

Homemade Cracker Barrel-Style Chicken and Dumplings

Prep Time 5 minutes
Cook Time 35 minutes
Total Time 40 minutes
Calories 420
Enjoy comforting, homemade chicken and dumplings inspired by the classic Cracker Barrel recipe. Rich broth, tender chicken, and fluffy dumplings make this dish the ultimate comfort meal.

Ingredients

  • 6 cups chicken broth
  • 2 celery ribs, broken into large pieces
  • ½ medium onion (keep intact as a large piece)
  • 1 lb boneless skinless chicken breasts, halved
  • 3 cups all-purpose flour
  • 1 tbsp baking powder
  • tsp salt
  • 1 cup plus 2 tbsp milk
  • Salt and pepper, to taste

Instructions 

  • In a large pot or Dutch oven, combine chicken broth, celery, onion, and chicken breasts. Bring to a boil, then reduce heat to low and simmer partially covered for about 15 minutes, or until the chicken is cooked through.
  • While the chicken cooks, prepare the dumpling dough. In a medium bowl, whisk together flour, baking powder, and salt. Gently stir in the milk until the dough comes together into a shaggy ball.
  • Place dough onto a lightly floured surface and roll it out to about ¼-inch thick. Using a pizza cutter or knife, slice the dough into strips or squares (approximately 1–2 inches wide).
  • When chicken is fully cooked, remove from broth and set aside on a cutting board. Discard celery pieces and onion from the broth.
  • Drop dough strips carefully into the simmering broth, stirring gently. Simmer dumplings for approximately 20–30 minutes, stirring occasionally, until dumplings are cooked through and broth thickens to a gravy-like consistency.
  • As dumplings cook, shred or chop the cooked chicken into bite-sized pieces. Return the chicken to the pot, mixing gently to combine.
  • Season with salt and pepper to taste. Serve warm, and enjoy.

Notes

  • For a quicker option, substitute pre-cooked chicken (such as shredded rotisserie chicken). In this case, simmer celery and onion with dumplings in broth first, then discard vegetables and add the cooked chicken during the final 5 minutes of simmering to heat thoroughly.
Calories: 420kcal
Course: Main Course
Cuisine: American
Keyword: Copycat Cracker Barrel Chicken and Dumplings

1. Can I use pre-cooked chicken instead of cooking it from scratch?

Yes! Rotisserie chicken or leftover cooked chicken works great. Just skip the step where you cook the chicken in broth. Instead, simmer the broth with onion and celery, remove them, and then add the shredded chicken during the last 5 minutes to heat it through.

2. How do I make sure my dumplings turn out light and fluffy?

The key is not to overmix the dough—stir just until everything comes together. Also, make sure the broth is simmering gently, not boiling, when you drop in the dumplings. A rolling boil can break them apart!

3. Can I use store-bought biscuit dough instead of making dumplings from scratch?

Absolutely! Just cut refrigerated biscuit dough into small pieces and drop them into the simmering broth. Cover and cook for about 10-15 minutes until they’re soft and cooked through. It’s a great shortcut for busy nights!

4. My broth is too thin—how do I thicken it?

If you want a thicker, gravy-like consistency, mix 1 tablespoon of cornstarch or flour with 2 tablespoons of cold water and stir it into the broth. Let it simmer for a few minutes until thickened.

5. Can I add vegetables to this dish?

Yes! Carrots, peas, and corn are great additions. Dice the carrots small so they cook quickly. Add them at the beginning with the broth, and stir in peas or corn during the last few minutes so they don’t overcook.

This recipe is simple, cozy, and so easy to make—once you try it, you’ll be hooked!