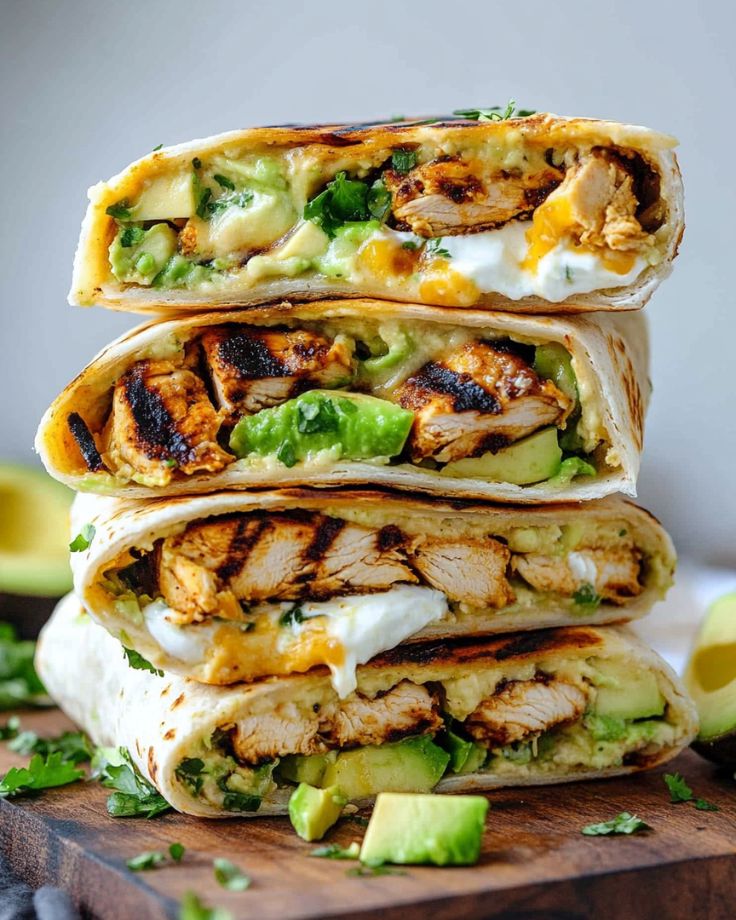
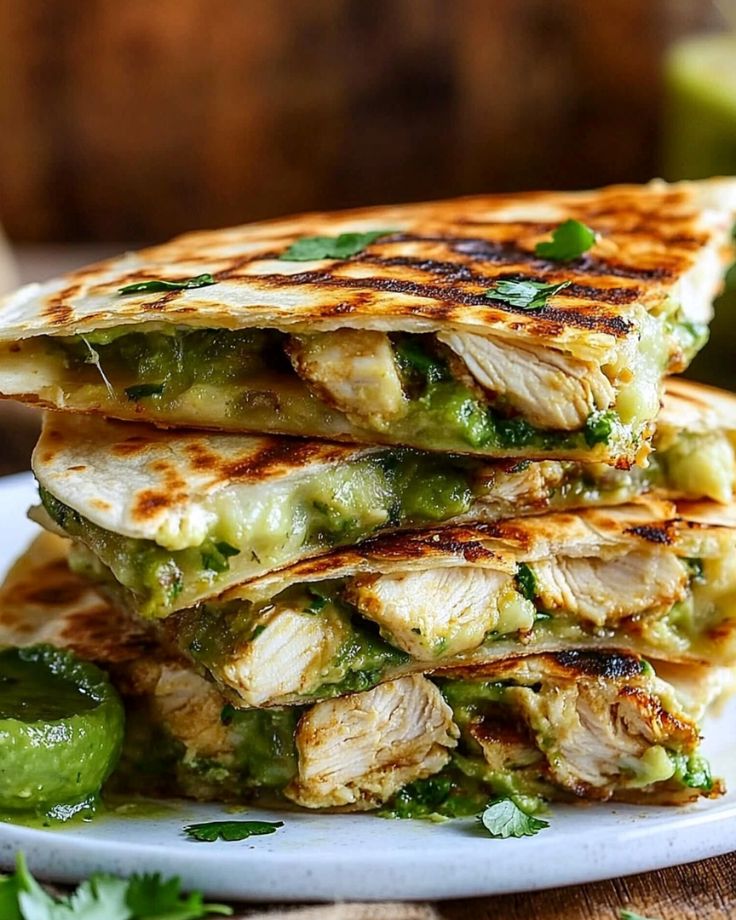
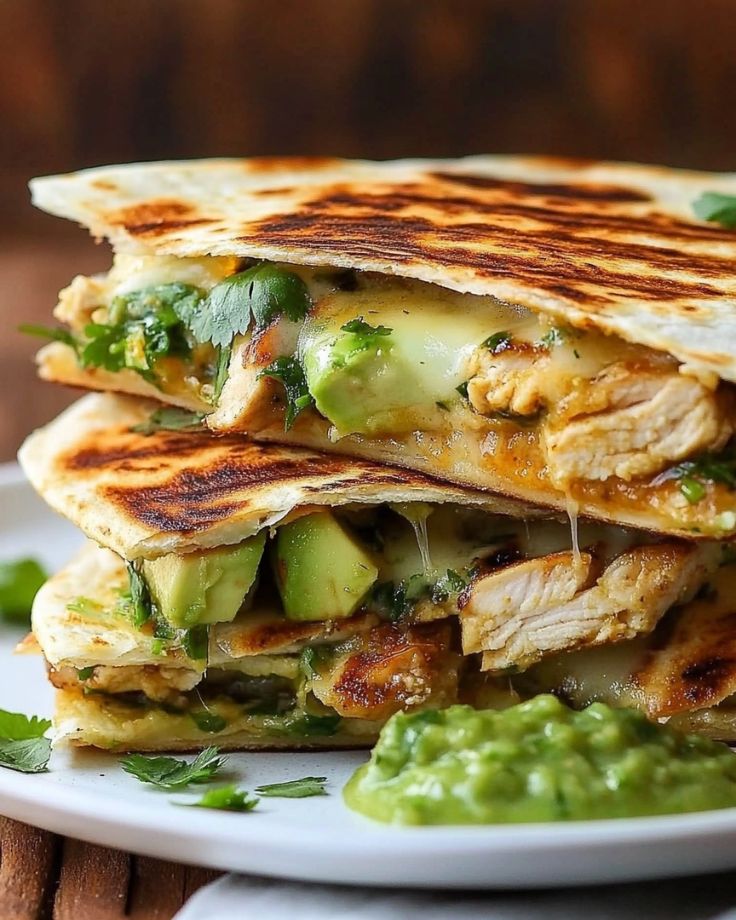
Chicken Avocado Quesadillas
Crispy, cheesy, and packed with flavor—these Chicken Avocado Quesadillas are everything you need for a fast, satisfying meal!
Juicy, seasoned chicken, creamy avocado, and melty cheese come together in a golden, crispy tortilla.
With just 25 minutes from start to finish, this is the perfect recipe for busy weeknights, easy lunches, or whenever you’re craving something irresistibly good.
Bonus? It’s totally customizable—swap the protein, load up on veggies, or make it extra cheesy.
One bite, and you’ll be hooked!
Let’s get cooking!
For the Chicken
- Chicken Breasts – Use boneless, skinless chicken breasts for a lean and juicy filling.
- Olive Oil – Helps sear the chicken for a golden, flavorful crust.
- Salt & Black Pepper – Essential seasonings to enhance the flavor.
- Onion – Adds a touch of sweetness and depth to the filling.
- Bell Peppers – Use any color for a pop of flavor and crunch.
- Garlic – A key ingredient that brings bold, aromatic flavor.
- Tomatoes – Adds freshness and a juicy bite to the filling.
- Fajita or Taco Seasoning – A blend of spices that gives the chicken a rich, smoky, and slightly spicy kick.
For the Quesadillas
- Flour Tortillas – Soft, flexible, and perfect for crisping up in the pan.
- Avocado – Creamy and delicious, adding richness to the quesadilla.
- Sour Cream – Adds a tangy, creamy layer to balance the flavors.
- Shredded Cheese – Use mozzarella, a Mexican blend, or cheddar for that irresistible cheesy pull.
- Lime Juice & Cilantro (Optional) – Fresh lime juice brightens up the flavors, while cilantro adds a burst of freshness.
Chicken Avocado Quesadillas
Ingredients
For the Chicken:
- 2 medium boneless, skinless chicken breasts
- Kosher salt and freshly ground black pepper, to taste
- 2 tsp olive oil, divided
- 1 small onion, finely chopped (about ½ cup)
- 1 cup diced bell peppers (any color)
- 3 garlic cloves, finely chopped
- ½ cup diced tomatoes
- 2 tbsp fajita or taco seasoning
For the Quesadillas:
- 4 medium flour tortillas
- 1 avocado, pitted and sliced
- 4 tsp low-fat sour cream
- ½ cup shredded low-fat mozzarella, Mexican blend, or cheddar cheese
- Fresh lime juice and minced cilantro (optional)
Instructions
Cook the Chicken:
- Heat a large, heavy-duty pan over high heat.
- Season the chicken breasts with salt and pepper.
- Add 1 tablespoon of olive oil to the pan, then cook the chicken for 5-6 minutes per side, or until fully cooked.
- Remove from the pan and let rest before dicing.
Prepare the Filling:
- In the same pan, heat the remaining 1 tablespoon of olive oil.
- Add the onion, bell peppers, and garlic, cooking for 2-3 minutes until softened.
- Stir in the diced tomatoes and fajita seasoning, cooking for another 2 minutes.
- Dice the cooked chicken and return it to the pan, stirring until fully combined.
Assemble the Quesadillas:
- Heat 1 teaspoon of oil in a clean pan over medium heat.
- Place two tortillas in the pan and spread 1 teaspoon of sour cream on one side of each tortilla.
- Top with shredded cheese, sliced avocado, chicken mixture, a squeeze of lime, and a sprinkle of minced cilantro.
- Fold the tortillas in half to form a half-moon shape.
- Cook for 2-3 minutes per side, until the tortillas are crispy and golden, and the cheese is melted.
- Repeat with the remaining tortillas to make two more quesadillas.
Serve & Enjoy:
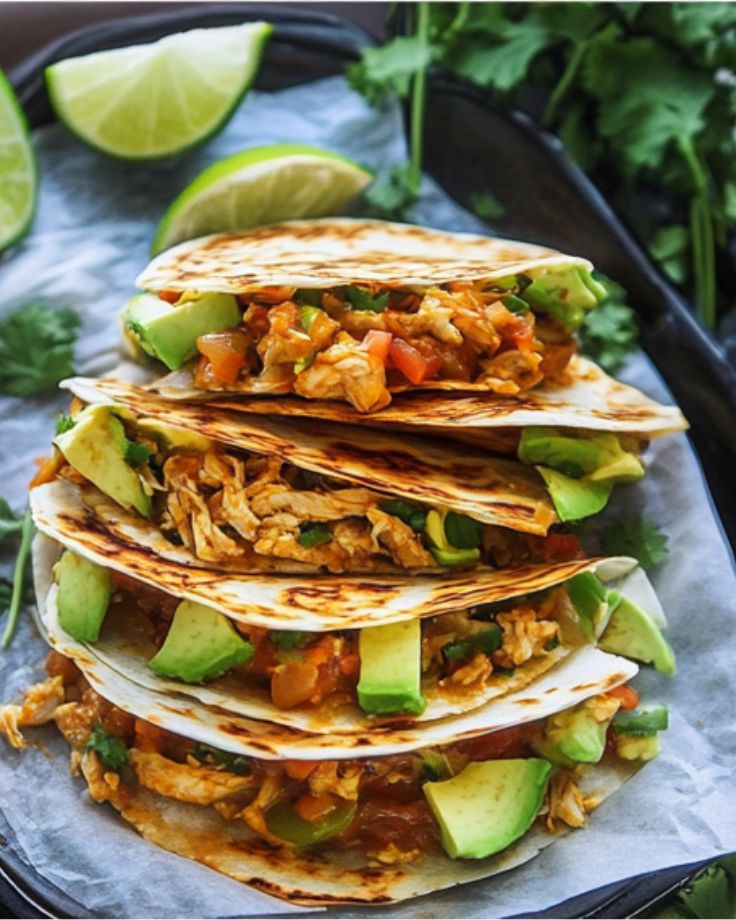
- Slice the quesadillas into wedges and serve immediately with lime wedges, sour cream, salsa, or guacamole.
1. Can I make the filling ahead of time?
Absolutely! Cook the chicken and veggie mix in advance and store it in an airtight container in the fridge for up to 2 days. When it’s time to eat, just reheat, assemble, and cook fresh for the best texture and flavor.
2. How do I keep my quesadillas crispy when reheating?
The skillet is your best friend! Reheat over medium heat for a few minutes on each side until crispy and warm. Avoid the microwave—it makes tortillas soft and soggy.
3. Can I use corn tortillas instead of flour?
Yes, but they’re smaller and more delicate, so they might crack when folded. Warm them up first to make them pliable, and be gentle when assembling.
4. What can I serve with these quesadillas?
Pair them with Mexican rice, refried beans, a fresh salad, or guacamole. And don’t forget dips—salsa, sour cream, or extra avocado always make it better!
5. How do I keep the filling from spilling out?
Less is more! Don’t overfill—stick to a balanced amount of chicken, cheese, and avocado. Press the quesadilla gently while cooking so the cheese melts and holds everything together.