Author

Designer

Browsing

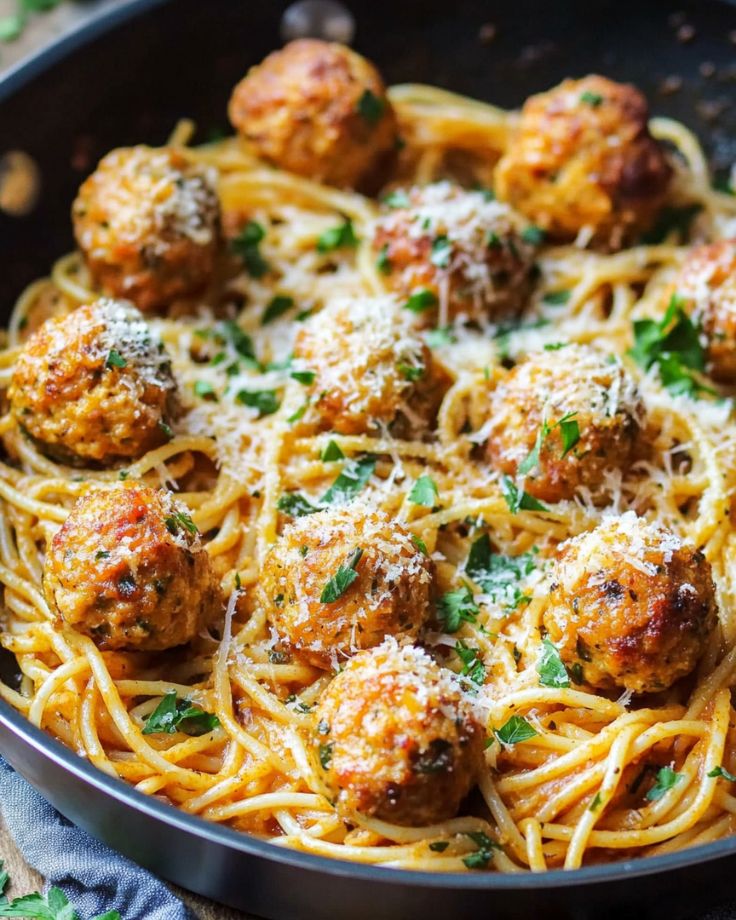
Garlic Herb Spaghetti with Baked Chicken Meatballs

Looking for a dinner that’s as simple as it is delicious?

This Garlic Herb Spaghetti with Baked Chicken Meatballs is your answer!

With minimal prep and just a handful of ingredients, this dish is packed with fresh, zesty flavors and a rich, creamy sauce that’ll have everyone asking for seconds.

Whether you’re feeding the family or treating yourself, this is comfort food at its best – quick, easy, and unbelievably tasty!

For Garlic Herb Spaghetti with Baked Chicken Meatballs

For the Baked Meatballs:

  • Ground Chicken or Turkey – The main protein for the meatballs, offering a lean and juicy texture.
  • Egg – Helps bind the meatball ingredients together.
  • Panko Breadcrumbs – Adds a light, crispy texture to the meatballs.
  • Grated Parmesan – Adds a rich, cheesy flavor to the meatballs.
  • Olive Oil – (Optional) Adds moisture to the meatballs, making them even juicier.
  • Garlic Powder & Onion Powder – Adds savory depth to the meatballs.
  • Salt & Black Pepper – Essential seasonings to enhance flavor.
  • Go-To Seasoning (Optional) – A personal touch for extra flavor if desired.

For the Garlic Herb Pasta:

  • Spaghetti, Linguine, or Cappellini – Your choice of pasta, either regular or whole wheat.
  • Land O Lakes® Butter – A rich butter base for the garlic herb sauce.
  • Garlic – Fresh garlic for an aromatic, savory flavor.
  • Lemon Zest – Brightens the dish with a citrusy punch.
  • Fresh Spinach – Adds a burst of color and freshness.
  • Fresh Parsley – For a fresh herb flavor that complements the other ingredients.
  • Grated Parmesan – A creamy, cheesy element that brings everything together.
  • Water – To loosen up the sauce and make it a bit creamy.
  • Lemon Juice – A final squeeze for a fresh tang, rounding out the dish.
  • Salt & Pepper – To taste, balancing the flavor of the dish.

Garlic Herb Spaghetti with Baked Chicken Meatballs

Prep Time 10 minutes
Cook Time 50 minutes
Total Time 1 hour
Servings 4
Calories 43
This recipe features a deliciously savory blend of garlic, lemon, butter, parsley, and Parmesan – all brought together in a comforting dish with juicy baked chicken meatballs. The perfect dinner to satisfy your cravings!

Ingredients

For the Baked Meatballs:

  • 1 lb ground chicken or turkey
  • 1 egg
  • ½ cup panko breadcrumbs
  • ½ cup grated Parmesan cheese
  • 2 tbsp olive oil (optional, for extra moisture)
  • ½ tsp garlic powder
  • ½ tsp onion powder
  • ½ tsp salt
  • Black pepper to taste
  • Optional seasonings (e.g., Go-To seasoning from What's Gaby Cooking)

For the Garlic Herb Pasta:

  • 8 oz spaghetti, linguine, or cappellini (whole wheat is fine)
  • 1 stick (½ cup) Land O Lakes® Butter
  • 3 garlic cloves, minced
  • 1 tsp lemon zest
  • 3-4 oz fresh spinach, chopped
  • 1 cup fresh parsley, chopped
  • ½ cup grated Parmesan cheese
  • ¼ cup water (add more or less depending on desired consistency)
  • A squeeze of lemon juice
  • Salt and pepper to taste

Instructions 

  • Preheat the oven to 400°F.
  • Prepare the meatballs: In a bowl, mix the ground chicken or turkey with egg, breadcrumbs, Parmesan, olive oil, garlic powder, onion powder, salt, pepper, and any additional seasonings you like. Roll the mixture into about 30 small meatballs and place them on a foil-lined baking sheet sprayed with oil. Bake for 25-30 minutes or until golden and cooked through.
  • Cook the pasta: Follow the package instructions for your choice of pasta. Once cooked, drain and set aside.
  • Make the garlic herb sauce: In a large pot, melt butter over medium heat. Add the minced garlic and lemon zest, cooking for a few minutes—be sure not to brown the garlic. Add the chopped spinach and parsley, cooking until just wilted.
  • Combine the pasta and meatballs: Add the cooked pasta and meatballs into the pot with the garlic herb sauce. Toss everything together, then add grated Parmesan and a little water to achieve a creamy consistency. Adjust seasoning with salt, pepper, and a final squeeze of lemon juice.
  • Serve: Plate the pasta and enjoy forkfuls of this flavorful dish!
Calories: 43kcal
Course: Dinner
Cuisine: Italian
Keyword: Garlic Herb Spaghetti with Baked Chicken Meatballs

  1. Can I use pre-cooked or frozen meatballs?

Absolutely! If you’re in a hurry, you can use pre-cooked or frozen meatballs. Just thaw them before adding to the pasta, or pop them in the sauce to heat through. Easy!

  1. How can I make the meatballs more flavorful?

Want to kick up the flavor? Add in some minced garlic, fresh herbs like basil or oregano, or a dash of red pepper flakes for a little heat. It’s the little things that make a big difference!

  1. Can I swap the pasta for a gluten-free option?

For sure! Whether it’s rice pasta, quinoa pasta, or any gluten-free alternative, it’ll work beautifully with the garlic herb sauce. No worries!

  1. How can I add some spice to the dish?

Spicy food lover? Toss in some red pepper flakes when you’re sautéing the garlic or add a little hot sauce to the pasta right at the end. Adjust to your preferred spice level!

  1. Can I make the meatballs ahead of time?

Yep, you can totally prep the meatballs in advance! Make them, bake them, and store them in the fridge for a couple of days, or freeze them for later. Easy, peasy!

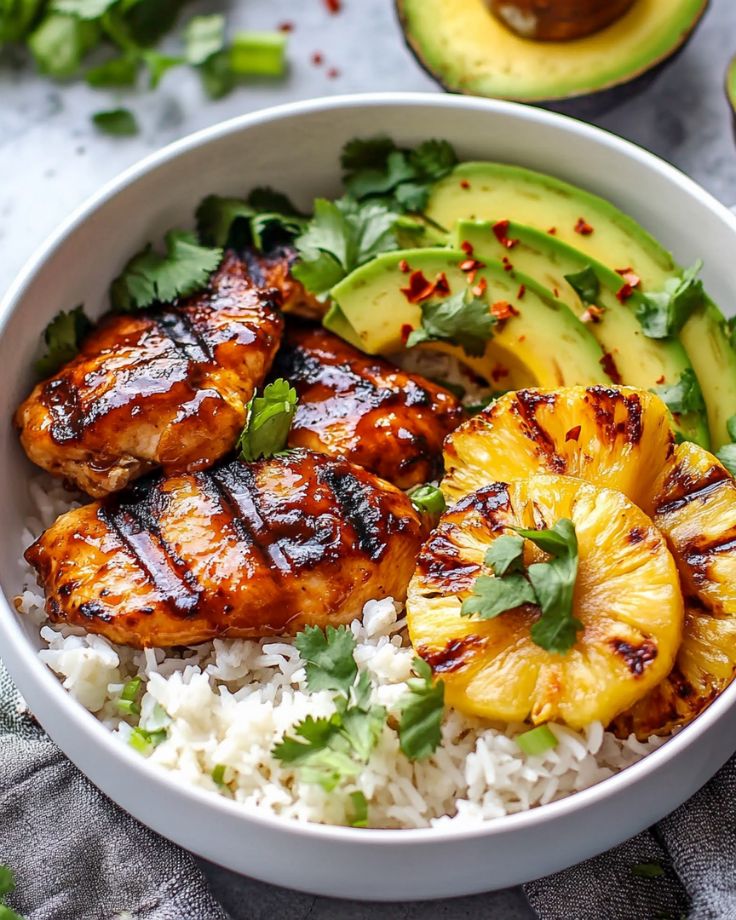
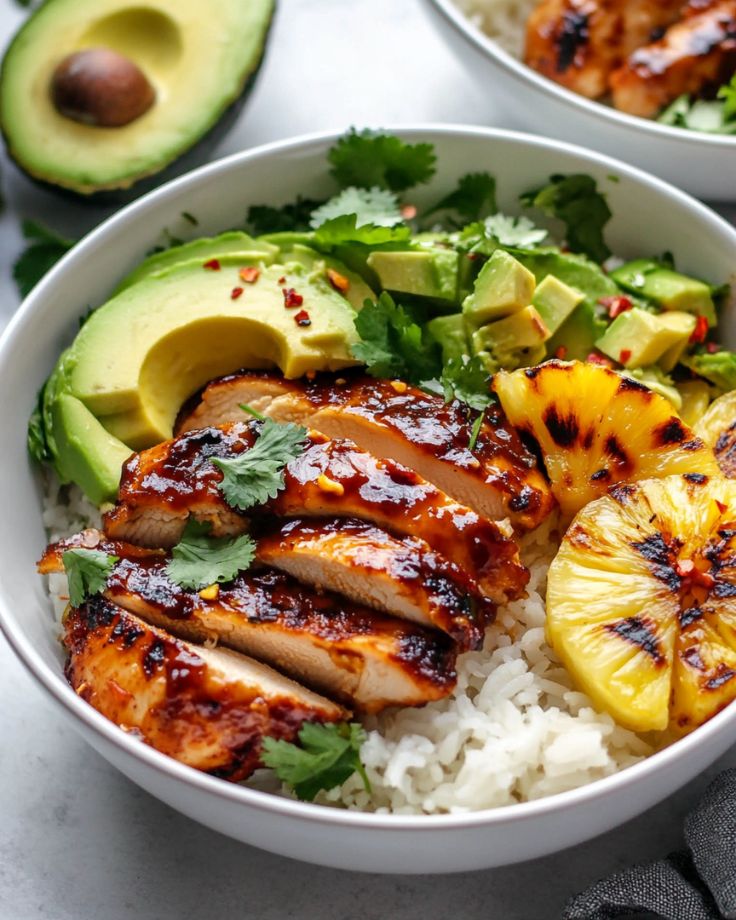
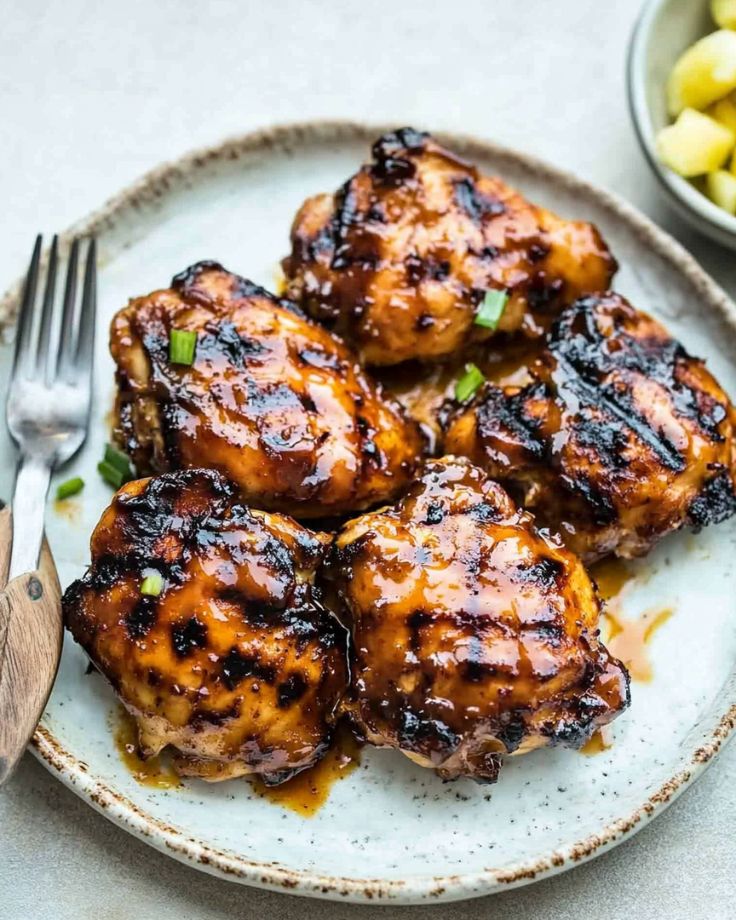
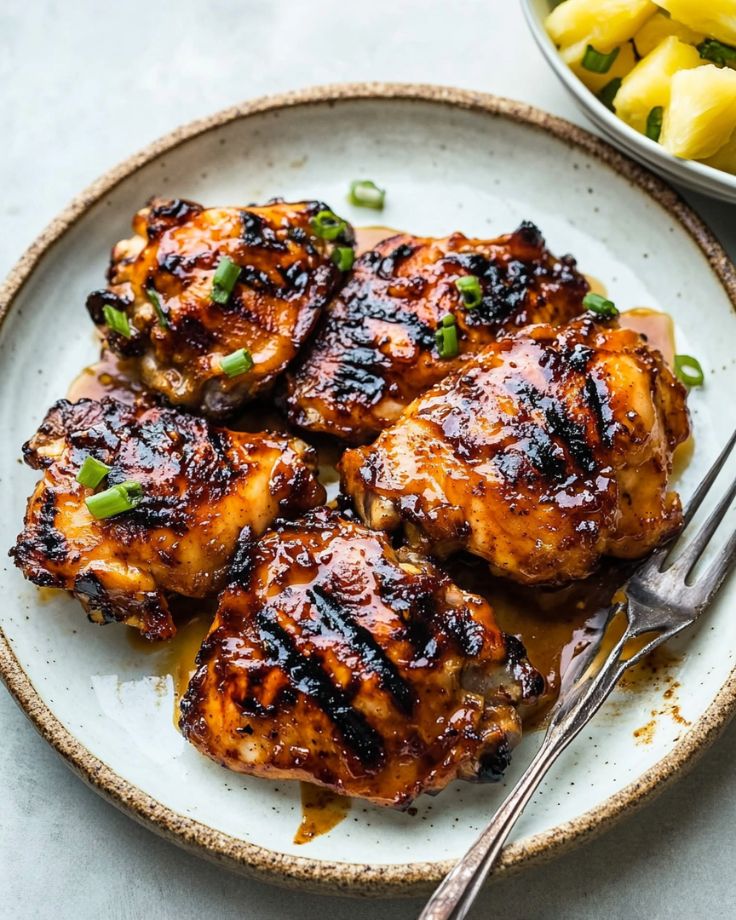
Grilled Hawaiian BBQ Chicken is a tropical twist on your regular BBQ!

With juicy, tender chicken and a smoky-sweet BBQ glaze, it’s a flavor-packed dish that’s perfect for summer grilling.

Pair it with sweet grilled pineapple for the ultimate combination of savory and tropical.

It’s quick, easy, and guaranteed to become your go-to grilling recipe!

For the Grilled Hawaiian BBQ Chicken

  • Chicken Breasts – Boneless and skinless for a juicy, tender bite.
  • Pineapple – Fresh or canned, it adds a tropical sweetness that complements the BBQ flavor.
  • Pineapple Juice – For a touch of extra sweetness and tang in the marinade.
  • Olive Oil – Helps to bind the marinade and add moisture to the chicken.
  • Soy Sauce – Adds saltiness and depth to the marinade.
  • BBQ Sauce – Sweet and smoky, this is the heart of the BBQ flavor.
  • Brown Sugar – Adds sweetness to balance the savory ingredients.
  • Minced Garlic – For a savory kick and aromatic flavor.
  • Ground Black Pepper – Adds a hint of spice to the marinade.
  • Sea Salt – To bring out the flavors of the chicken and the marinade.
  • Paprika – A dash of smoky flavor for extra depth.
  • Chopped Green Onion – Optional for garnish and a fresh bite.

Grilled Hawaiian BBQ Chicken Recipe

Prep Time 10 minutes
Cook Time 15 minutes
Marinade Time 20 minutes
Total Time 45 minutes
Servings 8 servings
Calories 295
This Grilled Hawaiian BBQ Chicken is a fantastic option for summer grilling, perfect for family dinners. Whether served solo, with rice, or wrapped in a tortilla, it’s a crowd-pleaser!

Ingredients

  • 4 large boneless, skinless chicken breasts
  • 1  small pineapple (fresh or canned)
  • ¼ cup pineapple juice
  • ¼ cup olive oil
  • 3 tbsp soy sauce
  • ½ cup BBQ sauce (such as Sweet Baby Ray's, or your favorite)
  • ¼ cup brown sugar
  • 2 tsp minced garlic
  • 1 tsp ground black pepper
  • ½ tsp sea salt
  • ½ tsp paprika
  • Optional: chopped green onion for garnish

Instructions 

  • Prep the Pineapple: If using fresh pineapple, remove the skin and either cut into large slices or wedges, depending on your preference. If using canned pineapple, skip this step.
  • Make the Marinade: In a large bowl, combine pineapple juice, olive oil, soy sauce, BBQ sauce, brown sugar, minced garlic, black pepper, sea salt, and paprika. Mix well. Add the chicken breasts and pineapple slices, ensuring both are well-coated with the marinade. Cover and refrigerate for 20-30 minutes.
  • Grill the Chicken: Preheat your grill to medium heat and spray with cooking spray to prevent sticking. Place the marinated chicken breasts on the grill, brushing with additional marinade. Close the lid and cook for 5 minutes, until the chicken has developed a nice char.
  • Flip and Continue Grilling: After 5 minutes, flip the chicken over, baste with more marinade, and cook for another 5 minutes.
  • Add Pineapple: Flip the chicken again if desired, then add the pineapple slices to the grill. Grill both the chicken and pineapple for an additional 5-10 minutes, flipping the pineapple halfway through, until the chicken reaches an internal temperature of 165°F and the pineapple is soft.
  • Serve: Once cooked, remove from the grill and let the chicken rest for a few minutes. Slice and serve with your choice of sides, such as rice, veggies, or in a wrap.

Notes

 
Leftover Storage:
Store any leftovers in an airtight container in the fridge for up to 4 days.
Canned Pineapple:
If using canned pineapple, it’s thinner and more delicate on the grill. Just grill for a couple of minutes until it’s soft.
Slicing Pineapple:
You can slice fresh pineapple either by removing the core and cutting into wedges or leave the core in and slice it into rings. If you leave the core, be mindful to eat around it.
Side Ideas:
Pair with rice, veggies, or toss the grilled chicken and pineapple in a salad or wrap for a quick meal.
Grilling Tips:
Cook the chicken over medium heat to avoid charring the exterior before it's cooked through. If it’s getting too dark, move the chicken to a cooler part of the grill to finish cooking until the internal temperature reaches 165°F.
Marinade Time:
Don’t marinate the chicken for too long, as the pineapple juice can make the chicken mushy. It’s best to marinate for no more than 30 minutes.
Calories: 295kcal
Course: Main Course, Main Dish
Cuisine: American, Hawaiian
Keyword: Grilled Hawaiian BBQ Chicken Recipe

  1. Can I use chicken thighs instead of breasts?
    Absolutely! Chicken thighs are a fantastic substitute. They’re even juicier and more flavorful, so go ahead and swap them if you prefer dark meat.
  2. How can I speed up the marinating process?
    If you’re in a rush, try using a vacuum-seal bag to speed up marination. You can also marinate the chicken at room temperature for 20 minutes—just be sure not to leave it out too long for food safety.
  3. Can I grill the pineapple with the chicken?
    Yes, you can! Just throw the pineapple slices on the grill during the last few minutes of cooking. It’ll get all caramelized and smoky, adding even more flavor to your dish.
  4. Do I need to reserve some marinade for basting?
    Yes, it’s best to set aside some of the marinade before adding it to the raw chicken. This reserved marinade can be cooked and used for basting the chicken while grilling, keeping everything safe and extra flavorful.
  5. Can I use an air fryer for this recipe?
    For sure! Preheat your air fryer to 350°F (175°C), and cook the marinated chicken for 15-18 minutes, flipping halfway through. Just make sure the chicken reaches an internal temperature of 165°F (74°C) for perfect results!

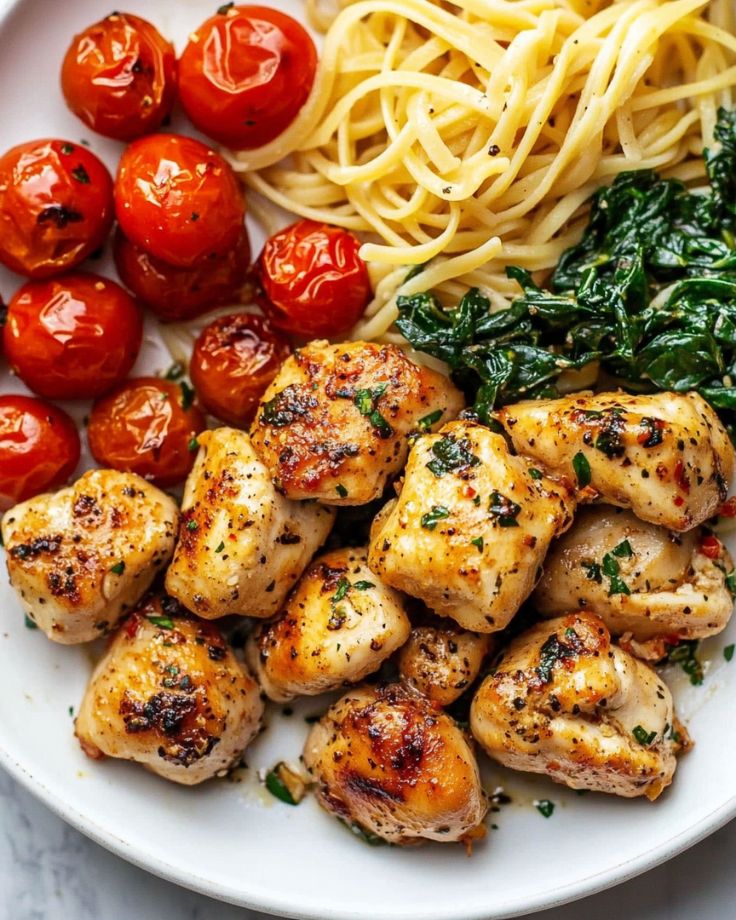
Garlic Butter Chicken Bites

In just 15 minutes, you can have a flavor-packed meal that’s perfect for busy nights.
These Garlic Butter Chicken Bites are made with just a few simple ingredients, yet they deliver big on taste!

The crispy chicken, rich butter, and fragrant garlic sauce will have you coming back for more.
Trust me, it’s as easy as it is delicious. Get ready to make this your new go-to weeknight dinner!

For Garlic Butter Chicken Bites

  • Chicken – Boneless, skinless chicken breasts cut into 1 1/4-inch pieces for juicy, tender bites.
  • All-Purpose Flour – Helps coat the chicken, adding a slight crust and ensuring the seasoning sticks.
  • Italian Seasoning – Adds a flavorful herb mix to season the chicken.
  • Salt & Pepper – For seasoning, to taste.
  • Olive Oil – For frying, adds richness while ensuring a crisp texture.
  • Unsalted Butter – Divided for cooking, adds richness and flavor to the chicken.
  • Minced Garlic – Fresh garlic infuses the dish with a fragrant, savory depth.
  • Fresh Parsley – Chopped finely for a burst of color and fresh flavor.

Garlic Butter Chicken Bites

Prep Time 9 minutes
Cook Time 6 minutes
Total Time 15 minutes
Servings 3
Calories 190
This quick and easy 15-minute recipe is perfect for a weeknight dinner, requiring minimal preparation and just a few basic ingredients, but delivering a burst of flavor! A must-try for busy evenings.

Ingredients

  • lbs . boneless, skinless chicken breasts, cut into 1 1/4-inch pieces
  • 2 tbsp all-purpose flour
  • tsp Italian seasoning
  • Salt and freshly ground black pepper (to taste)
  • 1 tbsp olive oil
  • 3 tbsp unsalted butter, divided
  • tbsp minced fresh garlic (about 4 cloves)
  • 2 tbsp finely chopped fresh parsley

Instructions 

  • Heat a 12-inch non-stick skillet over medium-high heat.
  • Pat the chicken pieces dry with paper towels to remove any excess moisture.
  • Sprinkle the chicken with flour, Italian seasoning, and your desired amount of salt and pepper (approximately 3/4 tsp salt and 1/2 tsp pepper). Toss to coat evenly, ensuring the flour sticks to the chicken.
  • Add 1 Tbsp of olive oil and 1 Tbsp of butter to the skillet. Once the butter melts, tilt the pan to evenly coat the surface.
  • Add the chicken to the skillet in an even layer, making sure there's some space between each piece to allow for browning rather than steaming.
  • Let the chicken cook undisturbed for about 3 minutes until it turns golden brown on the bottom. Flip the pieces over and cook for an additional 2 minutes or until the chicken is nearly cooked through.
  • Add the remaining 2 Tbsp of butter, along with the garlic and parsley. Stir and cook for 1 more minute, until the chicken reaches an internal temperature of 165°F and is no longer pink in the center.
  • Serve immediately.

Notes

  • For extra herb flavor, you can double the parsley.
  • For an added touch, squeeze some fresh lemon juice over the chicken just before serving.
  • For a quick side dish, try lemon couscous: Bring 1 can (14.5 oz) of chicken broth, 2 Tbsp lemon juice, and 2 Tbsp water to a boil in a small saucepan. Once boiling, stir in 1 cup of couscous (not pearl) and remove from heat. Let sit for 5 minutes, then fluff with a fork.
  • You can also serve this with sautéed or steamed vegetables like zucchini, squash, asparagus, or broccoli for a quick, balanced meal.
Calories: 190kcal
Course: Main Course
Cuisine: American
Keyword: Garlic Butter Chicken Bites

  1. How do I keep the chicken juicy and tender?
  • For tender, juicy chicken, make sure to cut the pieces into uniform sizes. This ensures they cook evenly!
  • Don’t overcook the chicken—once it hits 165°F (74°C), it’s time to take it off the heat.
  • If reheating leftovers, use a skillet over low heat with a little butter to keep them nice and moist.
  1. Can I add veggies to the dish?
  • Absolutely! Add in veggies like zucchini, bell peppers, or spinach.
  • If you’re using delicate greens like spinach, stir them in at the very end so they stay vibrant and fresh.
  1. What are the best sides to serve with these chicken bites?
  • For a well-rounded meal, try pairing the chicken with:
    • Rice – Any variety works, and it’s great for soaking up that garlic butter.
    • Mashed Potatoes – Rich and creamy, perfect to balance the garlic butter.
    • Roasted Vegetables – Think broccoli, carrots, or Brussels sprouts.
    • Bread – You can’t go wrong with a slice of garlic bread to scoop up all that delicious sauce!
  1. Can I use chicken thighs instead of breasts?
  • Yes! Chicken thighs are a fantastic choice—they’re juicy and flavorful.
  • Just keep in mind that thighs might need a little more time to cook than breasts, so check the internal temperature to ensure they’re cooked through.
  1. How do I store and reheat leftovers?
  • Store any leftovers in an airtight container in the fridge for up to 3-4 days.
  • When reheating, use a skillet over low heat with a touch of butter or olive oil to keep the chicken moist and flavorful.

Honey Garlic Chicken Stir Fry

Looking for a quick and tasty meal that packs a punch of flavor?
This Honey Garlic Chicken Stir Fry is your new go-to!

With a handful of simple ingredients, you’ll create a deliciously sweet and savory sauce
that coats tender chicken and crisp veggies.

Perfect for busy weeknights or when you want something tasty on the table
in just 30 minutes!

Ready to transform your dinner routine? Let’s get cooking!

For Honey Garlic Chicken Stir Fry

  • Chicken – Boneless, skinless chicken breasts (cut into bite-sized pieces) are ideal for this dish. You can substitute with chicken thighs for extra juiciness.
  • Carrots – Thinly sliced for quick cooking and a sweet, tender bite.
  • Broccoli – Fresh broccoli florets, cooked until tender-crisp for added crunch.
  • Garlic – Minced for that aromatic, savory base that flavors the sauce.
  • Vegetable Oil – Used for frying the chicken and vegetables to a perfect golden-brown crisp.

For Honey Garlic Sauce

  • Chicken Broth – Low-sodium chicken broth helps create a savory, well-balanced sauce. You can substitute with water if preferred.
  • Soy Sauce – Adds saltiness and depth of flavor, we recommend low-sodium soy sauce to control the sodium content.
  • Honey – Provides a sweet contrast to the savory soy sauce and balances the flavors perfectly.
  • Cornstarch – Used to thicken the sauce and give it a smooth, glossy texture.
  • Salt and Pepper – To season the chicken and vegetables to taste.

Honey Garlic Chicken Stir Fry

Prep Time 10 minutes
Cook Time 20 minutes
Total Time 30 minutes
Servings 4
Calories 265
This flavorful honey garlic chicken stir fry features tender chicken and vegetables in a sweet and savory sauce, perfect for a quick and satisfying meal.

Ingredients

  • 1 tbsp + 1 tsp vegetable oil (divided)
  • 1 cup thinly sliced peeled carrots
  • 2 cups broccoli florets
  • 1 lb boneless, skinless chicken breasts (cut into 1-inch pieces)
  • 4 cloves garlic (minced)
  • ¼ cup low sodium chicken broth (or water)
  • ¼ cup soy sauce
  • 3 tbsp honey
  • 2 tsp cornstarch
  • Salt and pepper to taste

Instructions 

  • In a large pan, heat 1 teaspoon of vegetable oil over medium heat. Add the broccoli and carrots, cooking for about 4 minutes or until the vegetables are tender. Once done, remove the vegetables and set them aside on a plate, covering them to keep warm.
  • Wipe the pan clean with a paper towel and increase the heat to high. Add the remaining tablespoon of oil to the pan.
  • Season the chicken pieces with salt and pepper. Add them to the pan in a single layer (you may need to do this in batches). Cook for 3-4 minutes on each side, or until the chicken is golden brown and fully cooked.
  • Add the minced garlic to the pan and sauté for 30 seconds.
  • In a small bowl, whisk together the chicken broth, honey, and soy sauce.
  • In another bowl, mix the cornstarch with 1 tablespoon of cold water to create a slurry.
  • Pour the soy sauce mixture over the chicken and vegetables. Cook for 30 seconds, then stir in the cornstarch mixture and bring to a boil. Let it cook for another minute or until the sauce starts to thicken.
  • Serve immediately, preferably with rice.

Notes

  • To ensure even cooking, cut your vegetables into uniform sizes.
  • Slice the carrots thinly to help them cook faster.
  • Use low-sodium chicken broth and soy sauce to control the dish’s sodium content.
Calories: 265kcal
Course: Mains
Cuisine: Asian
Keyword: Garlic Chicken Stir Fry

  1. Can I use frozen vegetables instead of fresh?

Yes! Frozen vegetables work just as well as fresh. Just make sure to thaw them out and drain any excess moisture before adding them to the stir fry. It’s a quick shortcut for a hassle-free dinner!

  1. Can I swap the chicken for another protein?

Absolutely! This recipe is super versatile. You can easily swap the chicken for shrimp, beef, pork, or even tofu. Just adjust the cooking time based on what you’re using!

  1. Can I make the sauce ahead of time?

Yes! You can mix up the sauce a few days in advance and store it in the fridge. When it’s time to cook, just pour it over your cooked chicken and veggies—super easy and time-saving!

  1. Is low-sodium soy sauce necessary?

If you want to control the salt level, low-sodium soy sauce is a great choice. But if regular soy sauce is what you have, it works just fine too. Just be mindful of the added salt when seasoning the chicken.

  1. How can I make the sauce thicker?

To thicken the sauce, simply mix a bit of cornstarch with cold water and stir it in. Then bring it to a simmer, and voilà! A glossy, thick sauce that sticks perfectly to your chicken and veggies.

Grilled Huli Huli Chicken

Prepare to meet your new go-to chicken recipe!

In just 30 minutes, you can whip up a sweet and savory masterpiece with this juicy, grilled chicken, marinated in a tropical blend of pineapple juice, soy sauce, and a hint of ginger.

It’s quick, it’s easy, and it’s so flavorful you’ll be making it on repeat.

Perfect for busy nights or weekend BBQs—trust me, this will become your new favorite chicken recipe in no time!

For Grilled Huli Huli Chicken

  • Chicken Thighs – Boneless, skinless thighs work best for a juicy result, but chicken breasts can also be used if you prefer white meat.
  • Pineapple Juice – Adds a tropical, sweet-tart flavor to the marinade that perfectly balances the savory elements.
  • Soy Sauce – Gives the marinade that deep umami flavor and a bit of saltiness.
  • Brown Sugar – Adds sweetness that caramelizes on the grill, giving the chicken a nice glaze.
  • Ketchup – Provides some acidity and tang, contributing to the balance of flavors in the marinade.
  • Chicken Broth – Adds depth and helps thin out the marinade, making it perfect for soaking the chicken.
  • Fresh Ginger – Offers a warm, aromatic kick that complements the sweetness of the pineapple juice and brown sugar.
  • Minced Garlic – Adds a savory base to the marinade, enhancing all the other flavors.
  • Green Onions – For a fresh, mild onion flavor, used as a garnish.

Grilled Huli Huli Chicken Recipe

Prep Time 10 minutes
Cook Time 20 minutes
Total Time 30 minutes
Servings 10 servings
Calories 290
This Grilled Huli Huli Chicken is a crowd-pleasing recipe with a deliciously tangy marinade that’s simple to make and packed with flavor! It’s perfect for any occasion, and you’ll want to make it again and again!

Ingredients

  • 4 pounds boneless, skinless chicken thighs (chicken breasts can also be used)
  • 1 cup unsweetened pineapple juice
  • ½ cup soy sauce
  • ½ cup brown sugar
  • cup ketchup
  • ¼ cup chicken broth
  • 2 tsp freshly grated ginger
  • tsp minced garlic
  • Sliced green onions for garnish

Instructions 

  • In a medium bowl, combine pineapple juice, soy sauce, brown sugar, ketchup, chicken broth, grated ginger, and minced garlic. Stir until the sugar dissolves. Set aside 1 cup of the sauce for basting the chicken later.
  • Place the chicken thighs in a large ziplock bag and pour the marinade over them. Seal the bag and refrigerate for at least 3 hours, or overnight for deeper flavor.
  • Preheat the grill to medium heat. Grill the marinated chicken, covered, for 6-8 minutes per side, or until the chicken is fully cooked and no longer pink in the center. During the last 5 minutes of grilling, occasionally baste the chicken with the reserved marinade.
  • Once cooked, remove from the grill and garnish with sliced green onions, if desired. Serve hot and enjoy!

Notes

  • For a bit of extra flavor, try adding a little extra ginger or garlic to the marinade.
  • This dish pairs well with rice or a fresh salad for a complete meal.
Calories: 290kcal
Course: Main Course
Cuisine: Hawaiian
Keyword: Grilled Huli Huli Chicken Recipe

  1. Can I use chicken breasts instead of thighs?
    Yes, you can absolutely swap out chicken thighs for breasts! Chicken breasts are leaner, but they’ll still work great. Just be sure not to overcook them, as they can dry out quicker than thighs.
  2. How long should I marinate the chicken?
    For the best flavor, marinate the chicken for at least 3 hours, but overnight is even better. The longer it sits, the more those amazing tropical flavors can soak in.
  3. Can I bake the chicken instead of grilling it?
    Definitely! Preheat your oven to 375°F (190°C) and bake the chicken for about 25-30 minutes, or until it’s cooked through and reaches 165°F (74°C). If you want a bit of char, pop it under the broiler for the last couple of minutes.
  4. How do I prevent the marinade from burning on the grill?
    To avoid burning, grill the chicken on medium heat and make sure to turn it frequently. Also, baste the chicken with the reserved marinade during the last 5 minutes of cooking for a perfectly caramelized finish.
  5. Can I freeze the marinated chicken for later?
    Absolutely! Marinate the chicken, then freeze it in a ziplock bag or airtight container for up to two months. When you’re ready, just thaw it in the fridge overnight, and you’re all set to grill!

BBQ Chicken Stuffed Sweet Potatoes

Weeknight dinners don’t get any easier (or more delicious!) than these BBQ Chicken Stuffed Sweet Potatoes.

With tender, juicy chicken cooked in a smoky BBQ sauce, topped with fresh red onions and cilantro, all packed inside a sweet potato, this meal is a flavor-packed, healthy hit that requires minimal effort.

Naturally gluten-free, paleo, and Whole30-approved, it’s the perfect dish to satisfy your cravings without compromising on taste or nutrition.

In just an hour, you’ll have a wholesome, filling dinner that the whole family will love!

For BBQ Chicken Stuffed Sweet Potatoes

  • Sweet Potatoes – These are the perfect base for stuffing with the BBQ chicken. They bake up tender and naturally sweet.
  • Chicken Breasts – The lean protein that’s shredded and mixed with BBQ sauce for flavor-packed stuffing.
  • Avocado Oil (or Olive Oil) – Used for sautéing the chicken to keep it juicy and tender.
  • Chicken Broth – Helps cook the chicken and adds moisture to keep it from drying out.
  • BBQ Sauce – The star ingredient that brings all the flavor! Feel free to use your favorite BBQ sauce for a personalized taste.
  • Red Onion – Adds a bit of sweetness and crunch as a topping for the stuffed potatoes.
  • Cilantro – For a fresh, herbaceous finish that adds color and a pop of flavor.
  • Salt and Pepper – To season and enhance the natural flavors of the ingredients.

Optional Toppings:

  • You can also add shredded cheese, sour cream, or extra BBQ sauce for more flavor and richness!

BBQ Chicken Stuffed Sweet Potatoes

Prep Time 10 minutes
Cook Time 1 hour
Total Time 1 hour 10 minutes
Servings 4 servings
Calories 328
These BBQ Chicken Stuffed Sweet Potatoes are an easy, healthy, and delicious meal. Packed with shredded BBQ chicken, red onion, and fresh cilantro, this dish is both satisfying and flavorful.

Ingredients

  • 4 sweet potatoes
  • 3 medium chicken breasts
  • 2 tbsp avocado oil (or olive oil)
  • ¾ cup chicken broth
  • 8 oz BBQ sauce (or more, to taste)
  • ½ cup sliced red onion
  • cup chopped cilantro
  • Salt and pepper, to taste

Instructions 

  • Preheat your oven to 400°F (200°C).
  • Prepare the sweet potatoes: Wash them thoroughly and poke each one 5-6 times with a fork or knife. Place them on a lined baking sheet and bake for about 60 minutes, or until tender. Adjust the cooking time based on the size of the potatoes.
  • Cook the chicken: While the sweet potatoes bake, heat the avocado oil in a large sauté pan over medium heat. Season the chicken breasts with salt and pepper, and cook for about 5 minutes on one side. Flip the chicken, add the chicken broth, cover the pan, and cook for an additional 7-10 minutes, or until the chicken reaches an internal temperature of 165°F (75°C).
  • Shred the chicken: Remove the chicken from the pan and shred using two forks or a stand mixer. Place the shredded chicken into a bowl and stir in the BBQ sauce, coating it evenly.
  • Assemble the stuffed sweet potatoes: Once the sweet potatoes are done, slice them in half lengthwise. Fill each with the BBQ chicken mixture, then top with sliced red onion and chopped cilantro.
Calories: 328kcal
Course: Main Course
Cuisine: American
Keyword: BBQ Chicken Stuffed Sweet Potatoes

  1. Can I use pre-cooked chicken to save time?
    Definitely! Pre-cooked or rotisserie chicken works great. Just shred it and toss it with your BBQ sauce for a quick and easy filling.
  2. How can I cook sweet potatoes faster?
    You can microwave the sweet potatoes to speed things up! Simply prick them with a fork and microwave on high for 5-7 minutes, or until tender.
  3. Can I prepare the ingredients in advance?
    Yes! You can bake the sweet potatoes and cook the chicken the day before. Then, just assemble and reheat when you’re ready to eat.
  4. What toppings can I add to these stuffed sweet potatoes?
    Feel free to get creative! Add shredded cheese, a dollop of sour cream, extra BBQ sauce, or even some sliced avocado for added flavor.
  5. What if my BBQ sauce makes the chicken too saucy?
    No worries! If you prefer a less saucy filling, just reduce the amount of BBQ sauce, or mix in a bit of mayonnaise to create a thicker consistency.

Looking for a hearty, one-pot meal that delivers BIG flavor with minimal effort?

This Chicken Stew is exactly what you need! With juicy, crispy-skinned chicken, tender vegetables, and a rich, gravy-like sauce, this dish is the ultimate comfort food.

It’s simple, satisfying, and perfect for dunking with crusty bread. Get ready for a meal that’ll make you feel like a kitchen pro – even on the busiest days!

For the Stew

  • Chicken – Bone-in, skin-on chicken thighs and drumsticks work best for a rich, juicy stew, but you can use chicken breasts if preferred.
  • Olive Oil – For browning the chicken and sautéing the vegetables.
  • Salt & Pepper – Essential for seasoning the chicken and vegetables.
  • Onions – Halved and cut into wedges, providing a sweet, savory base flavor.
  • Garlic – Minced, adding depth and aroma to the sauce.
  • Carrots – Cut into thick and thin pieces for a nice texture contrast.
  • Celery – Chopped into chunks, adding an earthy flavor.
  • Baby Potatoes – Halved or quartered, giving a hearty bite to the stew.

For the Sauce

  • Flour – Used to thicken the sauce and give it a smooth texture.
  • Chicken Broth – Low-sodium is recommended for a healthier stew base.
  • Tomato Paste – Provides deep, concentrated tomato flavor.
  • Worcestershire Sauce – Adds a savory, umami depth to the stew.
  • Thyme – Fresh sprigs or dried thyme add a warm, earthy flavor.
  • Bay Leaves – For added fragrance and flavor during the slow cook.

Optional for Serving

  • Fresh Thyme or Parsley – Chopped, for garnish.
  • Warm Crusty Bread – Perfect for dipping in the savory sauce.

Chicken Stew

Prep Time 10 minutes
Cook Time 1 hour 30 minutes
Total Time 1 hour 40 minutes
Servings 6 servings
Calories 685
This slow-cooked chicken stew features ultra-tender chicken with crispy skin, all smothered in a rich, gravy-like sauce. Filled with hearty vegetables like carrots, celery, onions, and potatoes, it’s a filling dish that doesn’t need a side.

Ingredients

  • 1 tbsp olive oil
  • 1.5 kg / 3 lb bone-in, skin-on chicken thighs and drumsticks (6 to 8 pieces)
  • Salt and pepper to taste
  • 2 onions, halved and cut into wedges
  • 2 garlic cloves, minced
  • 3 large carrots, thick end cut into 1.5 cm (3/5") pieces, thin end cut into 2.5 cm (1") pieces
  • 4 celery stalks, cut into 2 cm (4/5") chunks
  • ½ cup (125 ml) white water
  • 3 tbsp (35 g) flour
  • 3 cups (750 ml) low-sodium chicken broth
  • 2 tbsp tomato paste
  • 2 tsp Worcestershire sauce
  • 3 sprigs fresh thyme (or 1 tsp dried thyme)
  • 2 bay leaves (dried or fresh)
  • 600 g / 1.2 lb baby potatoes, halved (quarter large ones)

For serving (optional):

  • Fresh thyme or parsley (chopped)
  • Warm crusty bread

Instructions 

  • Preheat the oven to 180°C (350°F).
  • Brown the chicken: Heat olive oil in a large pot over high heat. Brown the chicken on both sides until golden, seasoning with salt and pepper. Remove chicken and set aside (work in batches if your pot is small).
  • Cook the vegetables: If there’s excess oil in the pot, discard some. Add the onions and garlic, cooking for 2 minutes until the onions are translucent.
  • Add carrots and celery: Stir in the carrots and celery, cooking for 1 minute.
  • Thicken the sauce: Sprinkle flour over the vegetables and stir to combine.
  • Add liquids and seasonings: Pour in the chicken broth, tomato paste, Worcestershire sauce, thyme, and bay leaves. Stir to dissolve the tomato paste.
  • Add chicken and simmer: Place the chicken back into the pot, ensuring the skin stays above the liquid as much as possible. Bring to a simmer, then cover and bake for 45 minutes.
  • Add potatoes: Remove the pot from the oven, uncover it, and add the potatoes. Push them into the liquid and rearrange the chicken to keep the skin exposed for maximum crispiness.
  • Finish baking: Return the pot to the oven, uncovered, for another 40 minutes or until the chicken skin is deep golden and crispy, the potatoes are tender, and the sauce has thickened.
  • Taste and adjust: Taste the sauce and adjust the salt and pepper to your preference.
  • Serve: Serve the stew with warm crusty bread for dipping, or go all-in with garlic bread. Optionally, garnish with fresh thyme or parsley.

Notes

  • If you don’t have a large ovenproof pot, follow the recipe up to step 7 on the stovetop, then transfer everything to a baking dish and continue from there.
  • Nutrition per serving (6 servings, assuming all sauce is consumed): Approximately 640 calories (based on discarding 2 tbsp of fat). 
Calories: 685kcal
Course: Main Course
Cuisine: Western
Keyword: Chicken Stew

  1. Can I use chicken breasts instead of thighs?
    Yes! While chicken thighs are ideal for this stew because they stay juicy and tender, you can easily swap them out for chicken breasts if you prefer white meat. Just be careful not to overcook them to avoid dryness!
  2. Do I have to brown the chicken before adding it to the stew?
    Technically, no! If you’re short on time, you can skip the browning step. The stew will still taste great, though browning adds extra depth of flavor. If you’re in a rush, just toss everything in the pot and get cooking!
  3. Can I add other veggies to the stew?
    Definitely! This stew is super versatile. Feel free to throw in some extra veggies like bell peppers, green beans, or even squash. Just cut them into similar-sized pieces so they cook evenly with the other ingredients.
  4. What if the stew turns out too thin?
    No problem! If your stew is a bit watery, just use a simple trick to thicken it. You can mash some of the potatoes in the stew to help thicken the sauce, or use a little flour or cornstarch to create a slurry and add it in. Just stir and simmer until it thickens to your liking.
  5. Can I make this stew ahead of time?
    Yes, absolutely! In fact, this stew tastes even better the next day. Just let it cool, store it in the fridge, and reheat when you’re ready to serve. If it thickens too much while sitting, just add a splash of water or broth to loosen it up.

Chicken and Mushroom Wild Rice Soup

If you’re on the hunt for a cozy, heartwarming meal that’s both simple to make and packed with flavor, this Chicken and Mushroom Wild Rice Soup is your new go-to.

With tender chunks of chicken, earthy mushrooms, and the nutty crunch of wild rice, this creamy soup is the ultimate comfort food for those chilly nights.

And the best part? It’s super easy to make, can be tossed into a slow cooker, and even freezes like a dream for those busy days when you need a quick, satisfying meal!

For Chicken and Mushroom Wild Rice Soup

  • Butter – Used for sautéing the vegetables and creating a flavorful base.
  • Onion – Adds savory depth to the soup.
  • Celery – Provides freshness and a mild crunch.
  • Carrots – Adds a slight sweetness and color.
  • Mushrooms – Brings an earthy flavor that complements the other ingredients.
  • Flour – Helps thicken the soup and creates a roux with the butter.
  • Chicken Broth – The base liquid for the soup, giving it a savory flavor.
  • Cooked Wild Rice – Adds texture and a nutty flavor to the soup.
  • Boneless Skinless Chicken Breasts – Tender, lean protein that makes the soup hearty.
  • Salt – Enhances the overall flavor.
  • Curry Powder – A hint of spice that brings warmth and complexity.
  • Mustard Powder – Adds a tangy note to balance the richness.
  • Dried Parsley – Adds a subtle herbaceous flavor.
  • Ground Black Pepper – A dash of heat to season the soup.
  • Slivered Almonds – Adds a bit of crunch and a nutty flavor.
  • Dry Sherry – Adds depth and a slightly sweet, nutty undertone.
  • Half-and-Half – Makes the soup rich and creamy.

Chicken and Mushroom Wild Rice Soup

Prep Time 20 minutes
Cook Time 2 hours 10 minutes
Total Time 2 hours 30 minutes
Servings 8
Calories 530
This comforting soup, originally shared by a fellow Minnesota farm wife, is rich in flavor and easy to make. It can be prepared in a slow cooker and freezes beautifully for later enjoyment.

Ingredients

  • ½ cup butter
  • 1 onion, finely chopped
  • ½ cup celery, chopped
  • ½ cup carrots, sliced
  • ½ lb fresh mushrooms, sliced
  • ¾ cup all-purpose flour
  • 6 cups chicken broth
  • 2 cups  cooked wild rice
  • 1 lb boneless, skinless chicken breasts, cooked and cubed
  • ½ tsp salt
  • ½ tsp curry powder
  • ½ tsp mustard powder
  • ½ tsp dried parsley
  • ½ tsp ground black pepper
  • 1 cup slivered almonds
  • 3 tsp dry sherry
  • 2 cups half-and-half

Instructions 

  • Prepare ingredients: Start by gathering all your ingredients together.
  • Cook vegetables: In a large saucepan, melt the butter over medium heat. Add the chopped onion, celery, and carrots, and sauté for about 5 minutes. Add the sliced mushrooms and sauté for an additional 2 minutes.
  • Make the roux: Stir in the flour, mixing well to combine with the vegetables.
  • Add broth: Gradually pour in the chicken broth while stirring continuously to avoid lumps. Bring the mixture to a gentle boil, then reduce the heat to low and allow it to simmer.
  • Add rice and chicken: Stir in the cooked wild rice, cubed chicken, salt, curry powder, mustard powder, parsley, black pepper, almonds, and dry sherry.
  • Finish soup: Let the soup heat through, then pour in the half-and-half. Allow it to simmer for 1-2 hours, stirring occasionally. Be sure to keep the soup from boiling to prevent the roux from breaking.
  • Serve and enjoy!
Calories: 530kcal
Course: Soup
Cuisine: American
Keyword: Chicken and Mushroom Wild Rice Soup

  1. Can I use rotisserie chicken instead of cooking chicken breasts?

Absolutely! Rotisserie chicken is a great shortcut. Simply shred it and add it to the soup in the last 15 minutes of cooking. It’ll save you time and still give you that delicious flavor!

  1. Do I really need to sauté the vegetables first?

Sautéing the vegetables helps release their flavors and gives the soup a richer taste. But if you’re in a rush, you can skip this step and add the veggies directly to the broth. You’ll still get a tasty result!

  1. Can I make this soup in a slow cooker?

Yes! Just sauté the vegetables and chicken, then transfer them to the slow cooker with the broth and wild rice. Cook on low for 5-6 hours, or high for 2-3 hours. Add the half-and-half in the last 30 minutes for a creamy finish.

  1. How do I thicken the soup without using flour?

If you want to skip the flour, try puréeing a portion of the soup and stirring it back in. You’ll get that creamy texture without the need for flour!

  1. Can I freeze this soup for later?

Definitely! Just make sure to freeze the soup before adding the half-and-half. When reheating, stir in the half-and-half at the end to keep the soup creamy and smooth.

Weeknight Skillet Sazon Chicken Tenders – A Flavor Bomb in 15 Minutes!

When you’re short on time but still craving a meal packed with flavor, these Skillet Sazon Chicken Tenders are your new best friend.

In just 15 minutes, you can whip up a tender, golden-brown chicken dish drenched in a savory, aromatic sauce that’s bound to wow the whole family.

With just a few pantry ingredients and a little magic from homemade sazon, this quick and easy recipe is perfect for any busy weeknight!

For Skillet Sazon Chicken Tenders

  • Chicken Tenders – I use 1.25 lbs of chicken tenders for this dish, but you can also use boneless skinless chicken breasts, cut into strips, if preferred.
  • Dry Sazon Seasoning – This is where all the flavor comes from. You can use store-bought or make your own sazon mix.
  • Kosher Salt – Just enough to season the chicken to taste.
  • Olive Oil – For frying the chicken and creating a nice golden crust.
  • Scallions – Adds a fresh, slightly oniony flavor to the sauce.
  • Garlic – For that savory depth of flavor.
  • Tomato – Adds richness and some natural sweetness to the sauce.
  • Chicken Broth – To bring everything together into a saucy, flavorful base.

For Skillet Sazon Sauce

  • Chicken Broth – Reduced sodium for a balanced flavor. You can substitute vegetable broth if preferred.
  • Salt – For seasoning the sauce to taste.

Skillet Sazon Chicken Tenders – Quick & Easy Weeknight Dinner

Prep Time 5 minutes
Cook Time 15 minutes
Total Time 20 minutes
Servings 4 servings
Calories 206
This easy, flavorful, and kid-friendly chicken recipe is perfect for busy nights. Ready in just 15 minutes, it's a simple yet delicious meal the whole family will love.

Ingredients

  • 1.25 lbs (8) chicken tenders
  • tsp dry sazon seasoning (or use homemade sazon)
  • Kosher salt, to taste
  • 2 tsp olive oil, divided
  • ½ cup diced scallions
  • 3 cloves garlic, crushed
  • 1 medium tomato, diced
  • cup reduced sodium chicken broth (check for Whole30 and gluten-free compliance)

Instructions 

  • Season the chicken tenders with dry sazon seasoning and a pinch of salt.
  • In a large nonstick skillet, heat 1 tsp of olive oil over medium-high heat. Add the chicken tenders and cook for 4 minutes. Flip the tenders and cook for an additional 3–4 minutes until golden brown. Remove the chicken from the pan and set aside.
  • Add the remaining 1 tsp of olive oil to the skillet and sauté the diced scallions over medium heat for 2–3 minutes.
  • Stir in the crushed garlic and cook for another minute. Add the diced tomato, season with salt, and cook for 3–4 minutes until the tomato softens and the mixture thickens.
  • Pour in the chicken broth, stirring to combine. Return the cooked chicken to the skillet, cover, and simmer for 1–2 minutes to allow the sauce to thicken and coat the chicken.
  • Serve the chicken with the tomato sauce and enjoy!
Calories: 206kcal
Course: Dinner
Cuisine: Latin
Keyword: Skillet Sazon Chicken Tenders

  1. Can I use store-bought sazon seasoning instead of homemade?
    Sure! If you don’t have homemade sazon on hand, store-bought works just fine. Use about 1 tablespoon of sazon for the chicken, and you’re good to go!
  2. Can I use boneless chicken breasts instead of chicken tenders?
    Absolutely! Just slice the chicken breasts into strips or bite-sized pieces for even cooking. Same delicious result!
  3. Do I need to use reduced-sodium chicken broth?
    Not at all! If you have regular chicken broth, feel free to use it. Just be mindful of how much extra salt you add to the recipe.
  4. Can I add veggies to this dish?
    Yes! Feel free to throw in veggies like bell peppers, zucchini, or even spinach. Add them when you’re sautéing the scallions and garlic to let them soften and blend into the sauce.
  5. How can I make this dish spicier?
    If you like a little heat, add some cayenne pepper or red pepper flakes to the seasoning mix or sauté them with the garlic. Adjust the spice to your liking!

Craving Comfort with Bold Flavor?

If you’re in the mood for a rich, creamy chicken tikka masala that delivers all the vibrant flavors you love, this recipe has got you covered.

Perfect for those nights when you need something quick, satisfying, and full of spice, this tikka masala sauce is everything you crave after a long day or a night out.

It’s simple to make, bursting with flavor, and great for batch cooking—plus, it freezes like a dream!

Ready to indulge in the ultimate comfort food? Let’s get cooking!

For Chicken Tikka Masala

  • Chicken – Skinless, boneless chicken breasts or thighs work great. Use whichever you prefer – both are tender and juicy when cooked in this sauce.
  • Ghee – This clarified butter gives a rich, authentic flavor to the sauce. It’s a must for the traditional taste!
  • Onion – A finely chopped onion creates the base for the sauce, adding sweetness and depth.
  • Garlic – Fresh garlic is key to enhancing the aromatic flavor of the dish.
  • Ground Cumin – A warm, earthy spice that’s essential in curry flavors.
  • Ground Ginger – Adds a zesty kick to balance out the spices.
  • Cayenne Pepper – For a touch of heat; adjust this to your spice tolerance.
  • Ground Cinnamon – Gives the sauce warmth and a slightly sweet undertone.
  • Ground Turmeric – This vibrant spice adds both color and a mild, earthy flavor.
  • Tomato Sauce – Forms the base of the sauce with its tangy sweetness.
  • Heavy Cream – Makes the sauce rich, creamy, and luxurious.
  • White Sugar – A bit of sweetness to balance the savory spices.
  • Paprika – Adds a smoky depth and rich color to the sauce.
  • Vegetable Oil – For frying the chicken to a golden crisp.
  • Curry Powder – Adds extra depth of flavor when cooking the chicken.

For the Sauce:

  • Soy Sauce – Adds a salty, umami-rich flavor to the sauce.
  • Brown Sugar – Balances the savory flavors with a touch of sweetness.
  • Cornstarch – Used to thicken the sauce and give it a nice velvety texture.

Curry Stand Chicken Tikka Masala Sauce

Prep Time 15 minutes
Cook Time 1 hour 5 minutes
Total Time 1 hour 20 minutes
Servings 6
Calories 330
This is the ultimate comfort food – the rich, nuclear-orange tikka masala sauce that hits the spot after a night out. It’s simple, flavorful, and perfect for making in big batches since it freezes well.

Ingredients

  • 2 tbsp ghee (clarified butter)
  • 1 onion, finely chopped
  • 4 garlic cloves, minced
  • 1 tbsp ground cumin
  • 1 tsp salt (or more to taste, optional)
  • 1 tsp ground ginger
  • 1 tsp cayenne pepper
  • ½ tsp ground cinnamon
  • ¼ tsp ground turmeric
  • 1 can (14-ounce) tomato sauce
  • 1 cup heavy whipping cream
  • 1 tbsp white sugar (or more to taste, optional)
  • 2 tsp paprika
  • 1 tbsp vegetable oil
  • 4 boneless, skinless chicken breasts, cut into bite-size pieces
  • ½ tsp curry powder

Instructions 

Prepare the ingredients.

  • Gather all your ingredients and have them ready.

Cook the onions and spices.

  • In a large skillet, heat the ghee over medium heat. Add the chopped onion and cook, stirring occasionally, for about 5 minutes until soft and translucent. Add the minced garlic and cook for another minute until fragrant.

Add the spices.

  • Stir in the cumin, salt, ground ginger, cayenne pepper, cinnamon, and turmeric. Continue cooking for 2 minutes, allowing the spices to become fragrant and the flavors to meld together.

Simmer the sauce.

  • Pour in the tomato sauce, bringing the mixture to a boil. Once boiling, reduce the heat and let it simmer for 10 minutes to deepen the flavor.

Add the cream and sweeten.

  • Stir in the heavy cream, sugar, and paprika. Bring the sauce back to a simmer and cook for another 10-15 minutes, stirring frequently, until the sauce thickens to your liking.

Cook the chicken.

  • In a separate skillet, heat the vegetable oil over medium heat. Add the chicken pieces and sprinkle with curry powder. Cook the chicken for about 3 minutes, stirring often, until lightly browned but still pink in the middle.

Combine the chicken and sauce.

  • Transfer the seared chicken and its juices into the simmering sauce. Let it cook together for another 30 minutes, or until the chicken is fully cooked and tender. Adjust the salt and sugar to taste.

Serve and enjoy!

  • Serve the chicken tikka masala over rice and enjoy your flavorful, comforting meal!
Calories: 330kcal
Course: Main Course
Cuisine: Indian
Keyword: Curry Stand Chicken Tikka Masala Sauce

1. Can I skip marinating the chicken?

You sure can! Marinating the chicken brings extra flavor and tenderness, but if you’re short on time, you can skip it and still end up with a tasty dish. Just make sure to cook the chicken thoroughly before adding it to the sauce.

2. Can I use a lighter alternative to heavy cream?

Absolutely! If you want to lighten things up, swap heavy cream for coconut milk or a blend of milk and yogurt. It will still give you that creamy texture, but with a slightly different flavor—perfect for a lighter, yet indulgent, meal.

3. How can I adjust the spice level?

To dial down the heat, simply reduce the cayenne pepper. If you want to crank it up, feel free to add more, or toss in some fresh chilies for an extra kick. It’s all about what works for your tastebuds!

4. Can I prep the sauce in advance?

Yes, you can! Make the sauce ahead of time and store it in the fridge for up to 3 days. When you’re ready, just heat it up and cook your chicken. It’s a great time-saver for busy days!

5. Can I freeze the sauce?

Definitely! This sauce freezes beautifully, so feel free to make a big batch and store it for later. When you’re ready to use it, just thaw and reheat—it’s like having a homemade ready-to-go meal at your fingertips!