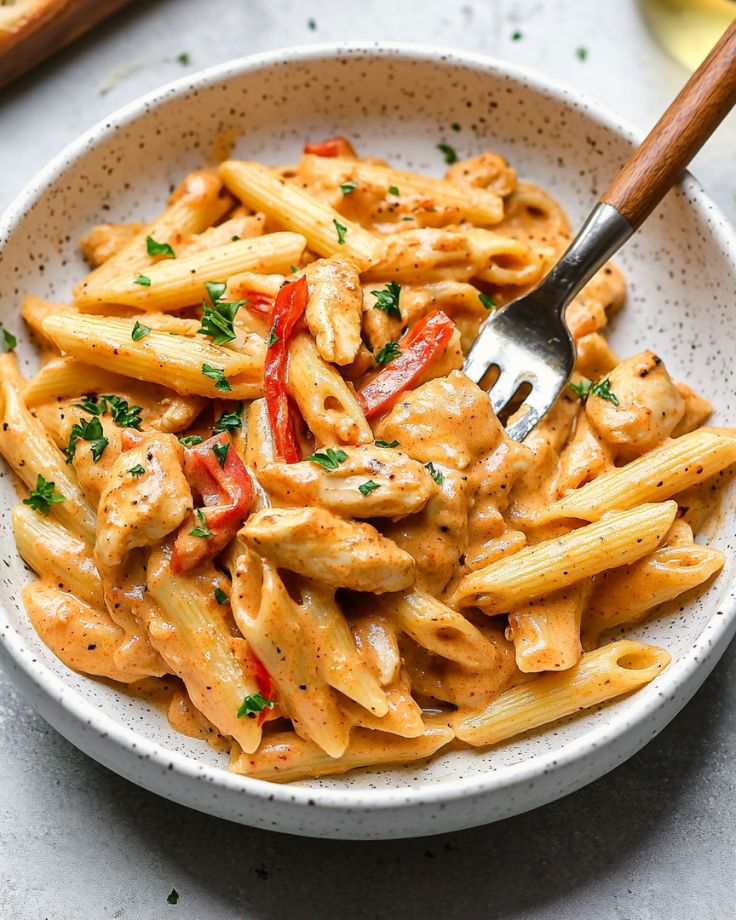
Author

Designer

Browsing

Huli Huli Chicken

Looking for a mouthwatering dish that will steal the spotlight at your next cookout?

This Huli Huli Chicken is a perfect balance of sweet and savory, with a smoky grilled finish that will have everyone coming back for more.

It’s simple to make, bursting with flavor, and guaranteed to impress!

For Huli Huli Chicken

  • Chicken Thighs – I recommend using boneless, skinless chicken thighs for a juicier, more flavorful result. You can substitute with chicken breasts if you prefer.
  • Brown Sugar – This is where the sweetness comes from, giving the marinade its rich flavor.
  • Ketchup – Adds tanginess and helps thicken the marinade.
  • Reduced-Sodium Soy Sauce – Provides a savory, umami flavor while keeping the salt content lower.
  • Sherry or Chicken Broth – A bit of liquid to balance the flavors and add depth.
  • Fresh Ginger – Offers a warm, zesty kick to the marinade.
  • Garlic – Essential for a savory and aromatic boost to the marinade.

For Grilling

  • Vegetable Oil – For greasing the grill and preventing the chicken from sticking.

Huli Huli Chicken

Prep Time 15 minutes
Cook Time 15 minutes
Total Time 30 minutes
Servings 12 servings
Calories 391
This Huli Huli Chicken is a flavor-packed grilled dish with a sweet and savory marinade. It’s easy to prepare, requiring just 15 minutes of prep and cook time.

Ingredients

  • 1 cup packed brown sugar
  • ¾ cup ketchup
  • ¾ cup reduced-sodium soy sauce
  • cup sherry or chicken broth
  • tsp  minced fresh ginger
  • tsp minced garlic
  • 24 boneless, skinless chicken thighs (about 6 pounds)

Instructions 

  • In a small bowl, whisk together the brown sugar, ketchup, soy sauce, sherry (or chicken broth), ginger, and garlic. Set aside 1 1/3 cups of the mixture for basting, then cover and refrigerate.
  • Divide the remaining marinade between two large shallow dishes. Place 12 chicken thighs in each dish, turning them to coat well. Cover and refrigerate for 8 hours or overnight to marinate.
  • When ready to cook, drain the chicken and discard the marinade.
  • Preheat the grill to medium heat and oil the rack. Grill the chicken, covered, for 6-8 minutes on each side or until the internal temperature reaches 170°F. During the last 5 minutes of cooking, baste the chicken with the reserved marinade.
Calories: 391kcal
Course: Main Course
Cuisine: Hawaiian
Keyword: Huli Chicken

  1. Can I marinate the chicken overnight?

Yes! Marinating the chicken overnight is actually a great way to maximize flavor. The longer it marinates, the better it tastes, so feel free to prep it ahead of time and let the chicken soak in all those delicious flavors.

  1. Can I use chicken breasts instead of thighs?

Definitely! While chicken thighs are juicier and more flavorful, chicken breasts can work well too. Just be sure to cook them a bit more carefully to avoid dryness. You may want to butterfly them for even cooking and better marinade absorption.

  1. How can I avoid burning the marinade on the grill?

The trick is to reserve some of the marinade before using it on the chicken. Baste the chicken with the reserved marinade during the last few minutes of grilling to avoid burning while still getting that delicious flavor.

  1. Can I make the marinade in advance?

Absolutely! You can prepare the marinade up to a few days in advance. Just store it in the fridge and give it a good stir before using it. This helps save time when you’re ready to cook and enhances the flavors.

  1. How do I know when the chicken is perfectly cooked?

Use a meat thermometer to check the internal temperature of the chicken. It should reach 170°F (74°C) to be fully cooked through, ensuring it’s juicy and tender without overcooking.

Craving something quick and packed with flavor?

This Chicken Fried Rice recipe is a total game-changer! In just 20 minutes, you can have a sizzling, one-pan dish that’s bursting with tender chicken, veggies, and all the savory goodness of takeout—without the long wait or the greasy containers.

Forget delivery, this is the kind of meal you’ll want to make again and again!

For Chicken Fried Rice

  • Chicken – Boneless, skinless chicken breasts, diced into ½-inch pieces. You can also use thighs if you prefer dark meat.
  • Sesame Oil – Adds a nutty flavor to the dish.
  • Canola or Vegetable Oil – For cooking the chicken and vegetables.
  • Frozen Peas and Carrots – Use straight from the freezer for convenience.
  • Green Onions – Provides freshness and a mild onion flavor.
  • Garlic – Adds a savory depth of flavor to the dish.
  • Eggs – Lightly beaten, scrambled for texture.
  • Cooked Rice – White rice is ideal, but brown rice can also work. For a shortcut, use pre-cooked rice pouches.
  • Soy Sauce – A savory, umami-packed addition. Use low-sodium for a healthier version.
  • Salt and Pepper – To taste, for additional seasoning.

Homemade Chicken Fried Rice (Better Than Takeout)

Prep Time 5 minutes
Cook Time 15 minutes
Total Time 20 minutes
Servings 5
Calories 423
This quick and easy, one-pan recipe comes together in just 20 minutes and is far superior to takeout! Once you try this homemade version, you won’t want to settle for those flimsy takeout containers again.

Ingredients

  • 2 tbsp sesame oil
  • 2 tbsp canola or vegetable oil
  • ¾ to 1 pound boneless, skinless chicken breasts, cut into ½-inch cubes
  • cups frozen peas and diced carrots blend (no need to thaw, use directly from the freezer)
  • 3 green onions, trimmed and thinly sliced
  • 2  to 3 garlic cloves, minced
  • 3 large eggs, lightly beaten
  • 4 cups cooked rice (white long-grain or brown rice works; for a shortcut, use two 8.8-ounce pouches of ready-to-serve rice)
  • 3-4 tbsp low-sodium soy sauce
  • Salt and pepper, to taste (optional)

Instructions 

Cook the Chicken:

  • Heat the sesame oil and canola oil in a large non-stick skillet or wok over medium-high heat. Add the chicken pieces and cook for 3-5 minutes, flipping occasionally until evenly browned. The exact cooking time will depend on the thickness of your chicken pieces.

Set Aside the Chicken:

  • Remove the cooked chicken from the skillet with a slotted spoon, leaving the oils and any remaining juices behind. Place the chicken on a plate and set it aside.

Cook the Vegetables:

  • In the same skillet, add the frozen peas and carrots along with the sliced green onions. Stir-fry for about 2 minutes until the vegetables soften.

Add Garlic and Scramble the Eggs:

  • Add the minced garlic to the skillet and cook for 1 minute, stirring occasionally. Push the vegetables to one side of the skillet and pour the beaten eggs onto the other side. Scramble the eggs, stirring as needed until fully cooked.

Combine Everything:

  • Add the cooked chicken back into the skillet, then add the cooked rice. Drizzle with soy sauce and add salt and pepper to taste, if desired. Stir everything together and cook for another 2 minutes to ensure everything is well-mixed and heated through.
Calories: 423kcal
Course: Main Course
Cuisine: Asian (specifically Chinese-inspired)
Keyword: Chicken Fried Rice

Storage Tips:

This dish is best enjoyed fresh, but leftovers can be stored in an airtight container in the fridge for up to 5 days or frozen for up to 4 months. When reheating, do so gently to preserve flavor and texture.

  1. Can I use leftover rice for fried rice?

Absolutely! In fact, leftover rice is perfect for fried rice. It keeps the grains separate and avoids the mushiness that can happen with fresh rice. If you’re in a pinch, spread freshly cooked rice on a baking sheet and chill it for 30 minutes to mimic that leftover texture!

  1. What kind of rice works best for fried rice?

Long-grain white rice is your best bet for fried rice, but brown rice works too if you’re looking for something heartier. The key is to let the rice cool before frying it so it doesn’t get soggy in the pan.

  1. Can I use pre-cooked chicken or rotisserie chicken?

Yes, using pre-cooked or rotisserie chicken is a major time-saver! Just chop it up and toss it in with the rice and veggies when you’re ready. It’s an easy way to get that delicious chicken flavor without the extra cooking time.

  1. How do I make this spicier?

If you love a bit of heat, try adding some chopped fresh chili or a drizzle of hot sauce. You can also toss in a bit of sriracha or chili flakes to give it an extra kick.

  1. Can I add other vegetables to the fried rice?

Definitely! Customize your fried rice with whatever vegetables you have on hand. Bell peppers, corn, peas, or mushrooms all work beautifully. Just make sure to chop them into small pieces and sauté them before adding the rice for a perfectly balanced dish.

Creamy Cajun Chicken Pasta

Looking for a quick, flavor-packed dinner? This creamy Cajun chicken pasta is ready in under 30 minutes!

With a rich, spicy sauce and tender chicken, it’s the ultimate comfort meal for busy nights.

You can easily customize it—swap the chicken for shrimp or add your favorite veggies.

This is one of those recipes you’ll find yourself making over and over again!

For Creamy Cajun Chicken Pasta

  • Penne Pasta – I like penne for this recipe, but feel free to use any pasta you prefer, like linguine or spaghetti.
  • Cajun Seasoning – The key to the spicy, flavorful kick. You can use your favorite Cajun seasoning (I recommend “Slap Ya Mama”).
  • Salt and Pepper – For balancing the flavor and seasoning the chicken and sauce.
  • Boneless Skinless Chicken Breast – I prefer chicken breast for this dish, cut into bite-sized pieces, but you could also swap for shrimp.
  • Butter – Used for sautéing the chicken and vegetables. The rich flavor it adds is a must!
  • Yellow Onion – Adds a subtle sweetness and depth to the dish.
  • Bell Peppers – Red bell peppers work great, adding color and sweetness to the dish.
  • Heavy Cream – This creates the rich, creamy base for the sauce.
  • Smoked Paprika – A mild, smoky spice that enhances the flavor of the Cajun seasoning.
  • Dried Basil – Adds a fragrant herbal note to the sauce.
  • Garlic Powder – Gives a background depth to the sauce.
  • Parmesan Cheese – Freshly grated Parmesan adds a sharp, creamy finish to the dish.

Creamy Cajun Chicken Pasta

Prep Time 10 minutes
Cook Time 20 minutes
Total Time 30 minutes
Servings 6 servings
Calories 567
Craving a delicious weeknight meal? This creamy Cajun chicken pasta is a quick, flavorful dish that comes together in under 30 minutes. You can easily swap out the chicken for shrimp or add in your favorite veggies for variety.

Ingredients

  • 8 oz (227 g) penne pasta, cooked and drained according to package instructions
  • 4 tsp Cajun seasoning, divided
  • ½ tsp salt, divided
  • ½ tsp black pepper, divided
  • lbs (680 g) boneless, skinless chicken breast, cut into 1-inch pieces
  • 3 tbsp salted butter, divided
  • ½ yellow onion, diced
  • 2 bell peppers, sliced (red is a great choice)
  • cups (355 ml) heavy cream
  • ¾ tsp smoked paprika
  • ½ tsp dried basil
  • ¼ tsp garlic powder
  • cup fresh grated Parmesan cheese

Instructions 

  • Start by cooking the pasta according to the package instructions. Drain and set aside.
  • n a large zip-top bag, combine 3 teaspoons of Cajun seasoning, ¼ teaspoon salt, and ¼ teaspoon pepper. Add the chopped chicken to the bag, seal it, and shake until the chicken is well coated. Set aside.
  • Heat 2 tablespoons of butter in a large pan over medium heat. Once melted, add the seasoned chicken and cook until browned and fully cooked through (you may need to do this in batches). Remove the chicken from the pan and set it aside.
  • Add the remaining 1 tablespoon of butter to the pan. Once melted, add the diced onion and bell peppers. Cook, stirring frequently, until the vegetables begin to soften, about 3-5 minutes.
  • Pour in the heavy cream, followed by the smoked paprika, dried basil, garlic powder, remaining Cajun seasoning, and ¼ teaspoon salt and pepper. Bring the mixture to a boil, then lower the heat and let it simmer until the sauce thickens.
  • Return the cooked chicken to the pan and stir in the Parmesan cheese. Add the cooked pasta and toss everything together until the cheese melts and the pasta is coated with the creamy sauce.
  • Serve hot, and optionally top with fresh parsley for a pop of color.

Notes

  • Pasta: While penne works great here, feel free to use any pasta shape you prefer, such as linguine.
  • Seasoning: For the best Cajun flavor, I recommend using "Slap Ya Mama" Cajun seasoning.
  • Storing: Store leftovers in an airtight container in the fridge for up to 3 days. Keep in mind the sauce may not be as creamy when reheated.
Calories: 567kcal
Course: Main Dish
Cuisine: American
Keyword: Cajun Chicken Pasta

  1. Can I use pre-cooked chicken?

Yes, using pre-cooked chicken is a great way to save time! Simply add it into the sauce during the final few minutes to warm through.

  1. What if I don’t have Cajun seasoning?

No worries! You can easily make a substitute using a mix of paprika, garlic powder, onion powder, thyme, oregano, and a pinch of cayenne for heat.

  1. Can I use a different type of pasta?

Of course! While I love penne, any type of pasta will work here, whether it’s linguine, fusilli, or even spaghetti. Just cook it according to the package instructions.

  1. How can I make it spicier?

To bring more heat, add a little extra cayenne pepper or a dash of hot sauce to the sauce. Adjust to suit your taste!

  1. Can I make this dish dairy-free?

Yes, you can! Swap the heavy cream for a non-dairy alternative like coconut milk or almond milk. Use dairy-free cheese or nutritional yeast in place of Parmesan to keep it creamy.

Oven-Baked Chicken Breast

If you’re looking for a foolproof way to make chicken breast juicy, tender, and packed with flavor—this Oven-Baked Chicken Breast recipe is a total game-changer!

With just a few simple ingredients, you’ll create a beautifully golden crust that locks in moisture, leaving you with the juiciest chicken ever.

Ready in just 23 minutes, this recipe is your new weeknight hero!

Trust me, the whole family will love it.

For Oven-Baked Chicken Breast

  • Chicken Breasts – Use boneless, skinless chicken breasts (150 – 180g / 5 – 6 oz each). These are perfect for a quick and easy dinner.
  • Olive Oil – Drizzle on the chicken to help the seasoning stick and promote a crispy golden crust.

For Seasoning

  • Brown Sugar – A touch of sweetness that helps create a semi-sauce while the chicken bakes, keeping it juicy.
  • Paprika – Adds a subtle smokiness and color to the chicken.
  • Dried Oregano or Thyme – Choose your favorite herb for extra flavor.
  • Garlic Powder – A bit of garlic flavor without the fresh garlic.
  • Salt and Pepper – Essential for balancing out the flavors and seasoning the chicken perfectly.

Optional Garnish

  • Fresh Parsley – Finely chopped for a burst of color and freshness.

Oven-Baked Chicken Breast Recipe

Prep Time 5 minutes
Cook Time 18 minutes
Total Time 23 minutes
Servings 4
Calories 287
This easy and flavorful Oven-Baked Chicken Breast recipe results in juicy, tender chicken with a golden, crispy crust. Ready in just 23 minutes, it's the perfect quick dinner for busy nights. Customize it with your favorite herbs and enjoy it with a delicious side!

Ingredients

  • 4 chicken breasts (150 – 180g / 5 – 6 oz each)
  • 2 tsp olive oil

Seasoning

  • tbsp brown sugar
  • 1 tsp paprika
  • 1 tsp dried oregano (or thyme, or any herb of your choice)
  • ¼ tsp garlic powder
  • ½ tsp salt
  • ½ tsp pepper

Optional Garnish

  • Finely chopped parsley

Instructions 

  • Preheat your oven to 425°F (220°C), or 200°C if using a fan oven.
  • To ensure even cooking, lightly pound the chicken breasts to 1.5 cm (0.6 inches) thick at the thickest part. You can use a rolling pin, meat mallet, or even your fist for this step.
  • In a small bowl, mix together the seasoning ingredients (brown sugar, paprika, oregano, garlic powder, salt, and pepper).
  • Line a baking tray with foil and parchment paper for easy cleanup. Place the chicken breasts upside down on the tray. Drizzle one teaspoon of olive oil over each breast, then rub it in using your fingers. Sprinkle the seasoning mixture evenly over the chicken.
  • Flip the chicken breasts and drizzle with the remaining olive oil. Rub in the oil and season the other side of the chicken.
  • Bake for 18 minutes or until the surface is golden and the internal temperature reaches 165°F (75°C). You can use a meat thermometer to check the doneness.
  • Remove the chicken from the oven and transfer it to serving plates. Let it rest for 3 – 5 minutes before serving.
  • Optionally, garnish with freshly chopped parsley and enjoy with a side dish like garlic butter rice or a vegetable of your choice.

Notes

  • For larger chicken breasts (around 250g / 8 oz or more), you can slice them in half horizontally to create two thinner pieces. This eliminates the need for pounding. Just ensure they are no thicker than 1.5 cm at the thickest part.
  • This recipe can also be made with boneless, skinless chicken thighs. For smaller thighs, cook for 25 minutes, and for larger thighs, bake for 30 minutes.
Calories: 287kcal
Course: Mains
Cuisine: Western
Keyword: Chicken Breast Recipe

  1. How can I make sure my chicken breasts are juicy and tender?
    To keep your chicken juicy, don’t overcook it! A meat thermometer is your best friend. Aim for an internal temperature of 165°F (75°C). Pull the chicken out at 160°F (71°C) and let it rest—this keeps it tender without drying it out.
  2. Why should I pound the chicken before cooking?
    Pounding the chicken breasts to an even thickness ensures they cook uniformly, preventing some parts from drying out. It also helps to make the chicken nice and tender—plus, it cooks faster!
  3. Can I use frozen chicken breasts for this recipe?
    While it’s always best to use thawed chicken for even cooking, if you’re in a pinch, you can use frozen chicken. Just make sure to thaw it fully in the fridge beforehand to avoid uneven cooking.
  4. How can I add extra flavor to the chicken?
    For more flavor, try marinating the chicken for at least 30 minutes before cooking. A simple mix of olive oil, lemon juice, garlic, and your favorite herbs will do wonders. Also, don’t skimp on the seasoning before baking—it makes a big difference!
  5. What if my chicken isn’t browning like I want it to?
    If the chicken isn’t getting that perfect golden brown, pop it under the broiler for an extra 1-2 minutes at the end. Just keep an eye on it to avoid burning! If you need extra color, brush the chicken with a little olive oil or melted butter before baking.

One-Pan Tomato & Spinach Chicken Pasta

Craving a quick and flavorful dinner?
This One-Pan Tomato & Spinach Chicken Pasta is your perfect solution!

Tender chicken, fresh spinach, and pasta all cooked in a rich, savory sauce.
It comes together effortlessly in just 40 minutes—perfect for busy nights.

With ingredients like chicken broth,
this dish delivers restaurant-quality flavors without the hassle.

One skillet, minimal cleanup, and maximum taste—what’s not to love?
Your family will be asking for this meal again and again!

For One-Pan Tomato & Spinach Chicken Pasta

  • Chicken – I use boneless, skinless chicken breasts cut into bite-sized pieces for tenderness and quick cooking.
  • Olive Oil – For sautéing the chicken and onions, adding a rich flavor.
  • Onion – Adds sweetness and depth to the dish. Cooked until tender.
  • Diced Tomatoes – Canned tomatoes with basil, garlic, and oregano provide a base for the sauce and add fresh, tangy flavor.
  • Swanson® Chicken Broth – A savory, rich liquid that helps create the flavorful sauce.
  • Penne Pasta – The perfect pasta for this dish; it absorbs the sauce wonderfully.
  • Water – To help cook the pasta and balance the consistency of the sauce.
  • Baby Spinach – Added at the end for a burst of freshness and color.

For the Sauce:

  • Tomatoes – These create a fresh and tangy base for the sauce.
  • Chicken Broth – Adds depth and a savory flavor to the sauce.

One-Pan Tomato & Spinach Chicken Pasta

Prep Time 10 minutes
Cook Time 30 minutes
Total Time 40 minutes
Servings 2
Calories 526
This simple yet delicious recipe combines savory chicken, fresh spinach, and pasta in a rich, flavorful sauce—all made in just one skillet! With ingredients like Swanson Chicken Broth, and diced tomatoes, you’ll enjoy a restaurant-quality dish in 40 minutes.

Ingredients

  • 10 oz boneless skinless chicken breasts, cut into 1-inch pieces
  • 1 tbsp olive oil
  • 1 medium onion, chopped
  • ¼ cup chicken broth
  • 1 can (14.5 oz) diced tomatoes with basil, garlic, and oregano (undrained)
  • 1 cup Swanson® Chicken Broth
  • 4 oz uncooked penne pasta
  • ¾ cup water
  • 4 cups baby spinach

Instructions 

  • Season the chicken as desired.
  • Heat the olive oil in a 12-inch skillet over medium-high heat. Add the chicken and cook, stirring often, until browned. Once browned, remove the chicken from the skillet and set aside.
  • In the same skillet, add the chopped onion and cook until it softens, about 3-4 minutes.
  • Stir in the diced tomatoes, Swanson Chicken Broth, uncooked penne, and water. Bring the mixture to a boil.
  • Reduce the heat to medium and cook for about 10 minutes, stirring occasionally, until the penne is tender.
  • Return the chicken to the skillet, stirring it in, and cook for an additional 2 minutes until the chicken is fully cooked through.
  • Add the baby spinach and cook for 1 more minute until the spinach wilts.
Calories: 526kcal
Course: Main Course
Cuisine: Italian
Keyword: Tomato & Spinach Chicken Pasta

  1. Can I use frozen spinach instead of fresh?

Yes, you can absolutely use frozen spinach! Just make sure it’s fully thawed and drained to avoid extra moisture in the dish.

  1. What if I don’t have chicken broth?

If you don’t have chicken broth, you can substitute it with vegetable broth or even water, although vegetable broth will provide more flavor. Adjust the seasoning as needed.

  1. Can I use a different type of pasta?

Definitely! While penne works great, you can use any short pasta like fusilli, farfalle, or rotini. All will hold the sauce beautifully!

  1. How can I make this dish spicier?

To add some heat, toss in red pepper flakes or a dash of hot sauce. Adjust to your preferred spice level for a tasty kick.

  1. Can I prepare this dish in advance?

Yes! You can cook the chicken and pasta ahead of time. Store them separately in the fridge, and when ready to eat, combine them with the sauce and spinach, then heat it all together.

Skillet Lemon Parmesan Chicken with Zucchini and Squash

If you’re craving a healthy, flavorful dinner that’s quick and easy, this Skillet Lemon Parmesan Chicken with Zucchini and Squash is your new go-to.

This bright, zesty dish combines tender chicken and fresh veggies with the irresistible combo of lemon and parmesan—perfect for busy weeknights when you want something satisfying without spending hours in the kitchen.

Ready in just 30 minutes, it’s the kind of meal that will have everyone asking for seconds! Plus, it’s all made in one pan, so cleanup is a breeze.

Let’s get cooking!

For Skillet Lemon Parmesan Chicken:

  • Chicken – I use boneless, skinless chicken breasts, diced into bite-sized pieces. You can also use thighs if you prefer darker meat.
  • Olive Oil – Used for cooking the chicken and veggies, helps keep everything moist and flavorful.
  • Butter – Adds richness and helps the chicken brown nicely. You can substitute with more olive oil if desired.
  • Salt and Freshly Ground Black Pepper – For seasoning the chicken and veggies to enhance the flavors.
  • Italian Seasoning – A blend of herbs that brings a wonderful savory flavor to the chicken.
  • Garlic Powder – Adds a mild, warm garlic flavor.
  • Onion Powder – Complements the garlic powder for an extra layer of savory taste.
  • Lemon Zest – Fresh lemon zest brings a bright and aromatic citrus flavor to the chicken.
  • Zucchini – Sliced into half-moons, it adds a mild sweetness and texture to the dish.
  • Yellow Squash – Similar to zucchini, it’s slightly sweeter and adds color and texture.
  • Parmesan – Finely shredded, adds a nutty and savory depth to the dish.
  • Fresh Parsley – Chopped, it adds a pop of freshness and color.
  • Lemon Juice – Freshly squeezed, to brighten up the flavors and tie everything together.

For Skillet Lemon Parmesan Chicken Sauce:

  • Lemon Juice – Freshly squeezed, to enhance the citrusy flavor in the dish.
  • Parmesan – Adds a creamy, savory richness to the sauce and melts beautifully over the chicken and veggies.

Skillet Lemon Parmesan Chicken with Zucchini and Squash

Prep Time 15 minutes
Cook Time 15 minutes
Total Time 30 minutes
Servings 4
Calories 332
This easy, flavorful, one-pan dish is perfect for the whole family! With a bright and zesty lemon flavor, it’s a hearty and healthy meal that makes great leftovers. Here’s how to make it:

Ingredients

  • lbs boneless skinless chicken breasts, cut into bite-sized pieces
  • 2 tbsp olive oil, divided
  • 2 tbsp butter, divided (or use more olive oil)
  • Salt and freshly ground black pepper, to taste
  • 3 tsp Italian seasoning, divided
  • 1 tsp garlic powder*, divided
  • ½ tsp onion powder
  • 1 tsp lemon zest, plus extra for serving
  • 10 oz zucchini (2 small), sliced and halved if wide
  • 10 oz yellow squash (2 small), sliced and halved if wide
  • cup finely shredded parmesan cheese (or more to taste
  • 2 tbsp chopped fresh parsley
  • 2 tbsp fresh lemon juice

Instructions 

Cook Chicken:

  • Heat 1 Tbsp olive oil in a 12-inch non-stick skillet over medium-high heat. Pat the chicken pieces dry with paper towels and season them generously with salt, pepper, 2 tsp Italian seasoning, 1/2 tsp garlic powder, onion powder, and lemon zest. Toss to coat.
    Add 1 Tbsp butter to the skillet and let it melt with the olive oil. Add the chicken and cook for about 3 minutes on one side, then flip and cook for another 3 minutes, or until the center of the chicken reaches 165°F. Transfer the chicken to a plate and cover with foil to keep warm.

Cook Vegetables:

  • n the same skillet, heat the remaining 1 Tbsp olive oil and 1 Tbsp butter over medium-high heat. Add the zucchini and squash, season with salt, 1 tsp Italian seasoning, and 1/2 tsp garlic powder. Cook, tossing occasionally, until the veggies are just tender, about 4 minutes.

Combine & Serve:

  • Return the cooked chicken to the skillet with the zucchini and squash. Drizzle with fresh lemon juice and toss to combine. Sprinkle with parmesan cheese and fresh parsley. Serve warm, topped with extra parmesan and lemon zest if desired. This dish is especially tasty served over cooked orzo.

Notes

*You can substitute 1 Tbsp minced fresh garlic. Add half of it to the chicken while cooking and the other half when cooking the zucchini and squash.
Calories: 332kcal
Course: Main Course
Cuisine: American
Keyword: Skillet Lemon Parmesan Chicken

  1. Can I use chicken thighs instead of breasts?

Absolutely! Chicken thighs are perfect for this recipe if you prefer darker meat. They stay juicy and tender, adding a rich flavor to the dish.

  1. What if I don’t have Italian seasoning?

No worries! You can make your own mix by using dried basil, oregano, and thyme. It’ll still give you that herby, savory flavor.

  1. Can I use frozen vegetables?

Fresh is always best for texture and flavor, but if you’re in a pinch, frozen veggies work too. Just make sure to thaw and drain them well to avoid excess moisture.

  1. Do I have to use fresh lemon zest and juice?

Fresh lemon zest and juice bring a vibrant kick to the dish. If you don’t have fresh lemons, bottled juice will do—just be aware the flavor might not be as bright.

  1. Can I prep this dish ahead of time?

Yes! You can cook the chicken and veggies in advance and store them separately in the fridge. When you’re ready, just reheat and assemble for a super easy meal.

Juicy, Tender Chicken in Just 15 Minutes – Yes, Please!

Looking for a quick yet flavor-packed dinner?

These healthier chicken tenders are cooked to perfection in just 15 minutes, and the secret lies in the simple, garlicky sauce that makes them unbelievably juicy.

With pantry staples like paprika, butter, and Italian seasoning, this dish is a fast favorite that’s bound to become your go-to weeknight meal.

The best part? You only need one skillet and minimal prep—get ready to impress without the stress!

For Chicken Tenders

  • Chicken Tenderloins – These juicy, tender pieces of chicken cook quickly and are perfect for this recipe.
  • Olive Oil – Used to help cook the chicken and add richness.
  • Butter – Adds a touch of flavor and helps make the chicken extra tender.
  • Paprika – Brings a mild smokiness and color to the dish.
  • Salt & Pepper – Basic seasonings to enhance the natural flavors of the chicken.
  • Garlic – Adds a fragrant, savory element to the sauce.
  • Italian Seasoning – Gives the chicken an aromatic, herby finish.
  • Fresh Parsley – For a fresh, colorful garnish to brighten the dish.

For the Sauce

  • Water – Used to deglaze the pan and lift all the flavor from the bottom of the skillet.

Healthier Chicken Tenders Recipe

Prep Time 5 minutes
Cook Time 7 hours 55 minutes
Servings 3
Calories 292
These healthier chicken tenders are cooked in a delicious, simple sauce. The chicken is incredibly tender, juicy, and packed with flavor. A quick and easy meal that’s sure to satisfy!

Ingredients

  • 1 tbsp olive oil
  • 2 tbsp butter, divided
  • 1 pound (450g) chicken tenderloins (mini chicken fillets)
  • 2 tsp paprika
  • ½ tsp salt
  • ¼ tsp ground black pepper
  • 4 cloves garlic, minced or crushed
  • 1 tsp Italian seasoning
  • 1 tsp fresh parsley, chopped (for garnish)

Instructions 

  • Heat a skillet over medium heat and add olive oil along with 1 tablespoon of butter. Allow the butter to melt.
  • Add the chicken tenders to the pan and season with paprika, salt, and pepper. Cook for 3 minutes on each side, making sure to season each side while cooking.
  • Once the chicken is cooked, create a space in the pan, melt the remaining tablespoon of butter, and add the garlic. Cook for about 30 seconds, or until the garlic becomes fragrant.
  • Sprinkle in the Italian seasoning and cook for an additional minute
  • Add 2 tablespoons of water to the pan to deglaze, scraping up any flavorful bits stuck to the bottom of the pan.
  • Garnish with fresh parsley or basil leaves and serve warm.

Notes

  • Garlic cooks very quickly—keep an eye on it, as burnt garlic can ruin the dish.
  • Avoid overcooking the chicken. It cooks fast and can become dry and tough if overdone. Ensure the internal temperature reaches 165°F (74°C).
  • For a flavorful sauce, deglaze the pan with water to capture all those tasty bits left behind.
Calories: 292kcal
Course: Main Dish
Cuisine: American
Keyword: Chicken Tenders Recipe

  1. Can I use chicken breasts instead of tenderloins?
    Absolutely! If you don’t have chicken tenderloins on hand, just slice boneless, skinless chicken breasts into strips. The cooking time may be a little longer, but they’ll still turn out delicious!
  2. How do I make sure the chicken stays juicy?
    Great question! To keep the chicken juicy, avoid overcooking it. Once it hits 165°F (74°C) internally, it’s good to go. You can also marinate the chicken in buttermilk for an extra layer of tenderness and flavor!
  3. Can I bake the chicken tenders instead of frying them?
    Yes, you can bake them! Just bread the chicken tenders as directed, then place them on a baking sheet and bake at 400°F (200°C) for 15-20 minutes, or until golden and crispy. It’s a healthier, hands-off alternative!
  4. What if I don’t have Italian seasoning?
    No worries! You can substitute Italian seasoning with a mix of dried basil, oregano, and thyme. You’ll still get that herby goodness!
  5. Can I make this recipe ahead of time?
    Absolutely! You can prepare the chicken tenders ahead of time, bread them, and store them in the fridge for up to 24 hours. When you’re ready, just cook them as usual for a quick and easy dinner!

The Ultimate Crispy Fried Chicken – Better Than Fast Food! 

Craving that ultra-crispy, golden-brown fried chicken with juicy, flavorful meat inside—without the hassle of takeout?

This recipe unlocks the perfect blend of crunch, seasoning, and tenderness, all made easily in your own kitchen.

No more drive-thru disappointments or overpriced trendy spots—this is homemade fried chicken that beats them all.

With a game-changing spice blend, ultra-crispy coating, and foolproof frying technique, this recipe delivers everything you love about fried chicken—without the grease-soaked regrets.

Perfect for family dinners, game nights, or meal prep, this will be your go-to fried chicken recipe for life.

Grab your favorite dipping sauce, because once you try this, there’s no going back!

Let’s fry up some magic.

For Crispy Fried Chicken

  • Chicken – Bone-in pieces like drumsticks and thighs work best for juicy, flavorful fried chicken.
  • Kosher Salt – Used for dry brining the chicken to enhance moisture and flavor.
  • Smoked Paprika – Adds a smoky depth and beautiful color to the seasoning.
  • White Pepper & Black Pepper – A combination of both for layered heat and spice.
  • Garlic Powder & Ground Ginger – Essential aromatics that bring bold flavor to the chicken.
  • Celery Salt & Ground Mustard – Helps round out the seasoning with a slightly tangy, savory touch.
  • Dried Thyme, Basil & Oregano – A mix of herbs that gives the chicken a subtle earthy taste.

For the Crispy Coating

  • All-Purpose Flour – The base of the coating for a crunchy crust.
  • Cornstarch – Lightens the flour mixture and makes the crust extra crispy.
  • Buttermilk – Helps tenderize the chicken and adds a slight tang for deeper flavor.
  • Egg Whites – Creates a sticky coating that holds onto the flour mixture for a crispy finish.

For Frying

  • Peanut or Vegetable Oil – High-heat oils that are perfect for deep frying, giving the chicken a crispy, golden-brown finish.

Crispy & Juicy Fried Chicken

Prep Time 45 minutes
Cook Time 45 minutes
Total Time 1 hour 30 minutes
Servings 4
Calories 1053
A game-changing crispy fried chicken recipe—golden, crunchy, and loaded with flavor! With the perfect spice blend and foolproof frying technique, this beats any fast-food fried chicken.

Ingredients

For the Chicken

  • 8 bone-in chicken pieces (drumsticks and thighs)
  • 1 tbsp + 1 ½ tsp kosher salt, divided
  • 1 tbsp + 1 ½ tsp smoked paprika
  • 1 tbsp  ground white pepper
  • tsp garlic powder
  • tsp ground ginger
  • tsp celery salt
  • tsp freshly ground black pepper
  • tsp ground mustard
  • 1 tsp dried thyme
  • 1 tsp dried basil
  • ½ tsp dried oregano

For the Coating

  • cups all-purpose flour
  • 1 tbsp cornstarch

For the Buttermilk Mixture

  • 1 cup buttermilk
  • 2  large egg whites

For Frying

  • 2 quarts peanut or vegetable oil

Instructions 

For the Chicken

  • Pat the chicken dry with paper towels.
  • Season with 1 tbsp salt and let sit for at least 30 minutes (or overnight for deeper flavor).

Make the Seasoning Blend

  • In a bowl, mix smoked paprika, white pepper, garlic powder, ground ginger, celery salt, black pepper, ground mustard, thyme, basil, and oregano.
  • Divide the seasoning mix into two equal parts—one for seasoning the chicken and one for the flour coating.

Prepare the Coating

  • In a large bowl, combine flour, cornstarch, and half of the seasoning mix.
  • In another separate bowl, whisk together buttermilk, egg whites  and the remaining salt.

Dredge the Chicken

  • Dip each chicken piece into the buttermilk mixture.
  • Coat thoroughly in the seasoned flour mixture, pressing to adhere well.
  • Let the coated chicken rest for 15 minutes—this helps the breading stick.

Fry to Perfection

  • Heat oil to 350°F (175°C) in a deep Dutch oven or heavy pot.
  • Fry chicken in batches, cooking each piece 12-15 minutes, until golden brown and the internal temperature reaches 165°F.
  • Drain the chicken on a wire rack over a paper towel-lined baking sheet to keep it crispy.

Notes

Pro Tips for the Best Fried Chicken
  • Dry brine the chicken before frying for extra juiciness.
  • Use cornstarch in the flour for an ultra-crispy crust.
  • Let the breading rest before frying—it helps the coating stick better.
  • Maintain oil temperature at 350°F for perfect frying.
Calories: 1053kcal
Course: Main Course
Cuisine: American, Southern
Keyword: Fried Chicken

Common Questions & Answers for the Best Fried Chicken

  1. How do I make my fried chicken super crispy?

It’s all about the coating! Use a mix of flour and cornstarch for extra crunch, and let the breaded chicken rest for 15 minutes before frying—this helps the crust stick better. Oh, and keep that oil at a steady 350°F (175°C)!

  1. Why does my breading fall off when frying?

The trick? Pat the chicken dry before breading and don’t skip the resting step. When frying, avoid overcrowding the pot—give those pieces some space so they can crisp up beautifully!

  1. Can I make this in an air fryer?

Yep! Coat the chicken lightly with oil and air fry at 375°F (190°C) for 25–30 minutes, flipping halfway. It won’t be exactly the same as deep frying, but it’ll still be crispy and delicious!

  1. What oil should I use for frying, and can I reuse it?

Stick with neutral, high-smoke point oils like peanut, vegetable, or canola. You can reuse the oil—just strain it through a fine mesh sieve and store it in a sealed container for next time.

  1. How do I keep fried chicken crispy for longer?

DO NOT place it on paper towels! Instead, set the fried chicken on a wire rack over a baking sheet to drain. If you’re making a big batch, keep it warm in a 200°F (90°C) oven while frying the rest.

How to Store & Reheat

  • Storage: Keep in an airtight container in the fridge for up to 3 days.
  • Reheating: Place in an oven at 375°F for 10-15 minutes to maintain crispiness.

What to Serve With Fried Chicken

  • Classic Mashed Potatoes
  • Creamy Mac & Cheese
  • Butter Bath Corn
  • Fluffy Buttermilk Biscuits

Now, enjoy the crispiest, juiciest homemade fried chicken—because nothing beats homemade!

Creamy Pepperoncini Chicken – A 30-Minute Flavor Bomb!

Busy weeknights call for easy, one-pan meals that don’t skimp on flavor—
and this Creamy Pepperoncini Chicken delivers BIG TIME!

Juicy, golden chicken, sautéed peppers, and a velvety Parmesan sauce come together in just 30 minutes.

But the real game-changer? Briny, slightly spicy pepperoncini peppers
that add the perfect tangy kick to balance out the creamy goodness.

Serve it over pasta, rice, or with crusty bread to soak up every last drop.

One bite, and you’ll be hooked! 

For Creamy Pepperoncini Chicken

  • Chicken – Use boneless, skinless chicken breasts, sliced into strips for quick cooking.
  • Olive Oil – Helps achieve a golden sear on the chicken.
  • Bell Pepper – Adds a pop of color and a slightly sweet, crisp texture.
  • Yellow Onion – Brings depth of flavor to the dish.
  • Pepperoncini Peppers – The star ingredient! These briny, slightly spicy peppers add a tangy kick.
  • Italian Seasoning – A blend of herbs that enhances the savory flavors.

For the Creamy Parmesan Sauce

  • Chicken Broth – Provides a flavorful base for the sauce.
  • Heavy Cream – Creates a rich and silky texture without being too heavy.
  • Parmesan Cheese – Melts into the sauce for a nutty, salty depth of flavor.
  • Salt & Black Pepper – Enhances the taste and balances the dish.

One-Pan Creamy Pepperoncini Chicken Recipe

Prep Time 11 minutes
Cook Time 20 minutes
Total Time 30 minutes
Servings 4
Calories 507
This creamy, tangy, and slightly spicy chicken skillet dinner comes together in just 30 minutes! The combination of briny pepperoncini peppers, tender chicken, and a rich Parmesan cream sauce makes this an irresistible dish.

Ingredients

  • 1 medium red bell pepper, thinly sliced (about 1 cup)
  • ½ medium yellow onion, diced (about ¾ cup)
  • 10 whole pepperoncini peppers (or ½ cup sliced)
  • 10 oz Parmesan cheese, finely grated (about ½ cup freshly grated or ⅓ cup pre-grated), plus extra for serving
  • lbs boneless, skinless chicken breasts (about 3), cut into ½-inch-thick slices
  • tsp kosher salt, divided
  • ¼ tsp freshly ground black pepper
  • 3 tbsp olive oil, divided
  • 2 tsp Italian seasoning
  • ½ cup low-sodium chicken broth
  • ½ cup heavy cream

Instructions 

Prep the Ingredients:

  • Slice the red bell pepper into thin strips.
  • Dice the yellow onion.
  • Slice the pepperoncini peppers into rings (or measure out pre-sliced ones).
  • Grate the Parmesan cheese if using a block.
  • Cut the chicken breasts into ½-inch-thick slices across the grain.

Season the Chicken:

  • In a large bowl, toss the chicken slices with ¾ teaspoon kosher salt and ¼ teaspoon black pepper.

Cook the Chicken:

  • Heat 2 tablespoons of olive oil in a large skillet over medium-high heat.
  • Add half of the chicken in a single layer and cook until browned and fully cooked, about 6 minutes total.
  • Transfer to a plate and repeat with the remaining chicken.

Sauté the Vegetables:

  • Add the remaining 1 tablespoon of olive oil to the skillet.
  • Stir in the bell pepper, onion, remaining ½ teaspoon kosher salt, and Italian seasoning.
  • Cook until the vegetables begin to brown, about 2 minutes.

Deglaze the Pan:

  • Pour in the chicken broth and scrape up the browned bits from the bottom of the skillet.
  • Cook until the broth reduces by half, about 2 minutes.

Make the Creamy Sauce:

  • Stir in the Parmesan cheese and heavy cream.
  • Bring the mixture to a simmer and let it cook until slightly thickened and the peppers are tender, about 3 minutes.

Combine & Serve:

  • Return the cooked chicken and any juices to the skillet.
  • Add the sliced pepperoncini and toss everything together until well coated in the sauce.
  • Serve hot with extra Parmesan cheese on top if desired.
Calories: 507kcal
Course: Main Course
Cuisine: Italian-inspired
Keyword: Pepperoncini Chicken Recipe

1. Can I make this less spicy?

Absolutely! If you want a milder dish, use fewer pepperoncini peppers or swap them for mild banana peppers. You can also rinse the pepperoncini before adding them to reduce the briny heat.

2. Can I use chicken thighs instead of chicken breasts?

Yes! Chicken thighs are a fantastic alternative—they’re juicier and add even more flavor. Just adjust the cooking time slightly, as thighs take a bit longer to cook through.

3. What’s the best way to store and reheat leftovers?

Store leftovers in an airtight container in the fridge for up to 3 days. When reheating, add a splash of chicken broth or cream to keep the sauce smooth. Microwave in short bursts or warm it on the stovetop over low heat.

4. What can I serve this with?

This creamy, tangy chicken is perfect over pasta, rice, or mashed potatoes. For a lighter option, try serving it with a side of roasted veggies or a crisp green salad.

5. Can I make this ahead of time?

Yes, but it’s best fresh! If making ahead, cook the chicken and sauce separately, then combine and reheat before serving. The sauce may thicken in the fridge, so add a little broth or cream to loosen it up when reheating.

One-Pot Cheesy Chicken, Broccoli & Rice Casserole

Fast, comforting, and ridiculously easy—this one-pot wonder is the ultimate weeknight dinner hero!

Juicy chicken, tender broccoli, and creamy, cheesy rice all come together in just 30 minutes with minimal effort (and dishes!).

Made with simple, everyday ingredients, this is a meal the whole family will love.

Big flavors, easy cleanup, and guaranteed comfort in every bite.

Let’s get cooking! 

For the Chicken & Rice

  • Chicken – Boneless, skinless chicken breasts, cut into small cubes for quick cooking.
  • Olive Oil – Used to sauté the chicken and onion, adding flavor.
  • Onion – Adds a subtle sweetness and depth to the dish.
  • Garlic – Essential for that extra boost of flavor.
  • Rice – Long-grain rice works best; it stays fluffy and absorbs flavors well.
  • Chicken Broth – Low-sodium broth keeps the rice moist and adds richness.
  • Cream of Chicken Soup – Makes the dish extra creamy and comforting.

For the Add-ins & Toppings

  • Broccoli – Fresh florets add a pop of color and nutrients.
  • Cheddar Cheese – Melts into the dish, making it extra cheesy and delicious.
  • Fresh Parsley – A final garnish for a fresh, vibrant finish.

One-Pot Cheesy Chicken, Broccoli, and Rice Casserole

Prep Time 10 minutes
Cook Time 20 minutes
Total Time 29 minutes
Servings 5
Calories 299
This quick and easy one-pot casserole is packed with cheesy goodness, tender chicken, and fresh broccoli—perfect for a comforting meal in just 30 minutes!

Ingredients

  • 1 tbsp olive oil
  • 1 small onion, chopped
  • 2 chicken breasts, cut into small cubes
  • ¼ tsp salt
  • ¼ tsp black pepper
  • 4 cloves garlic, minced
  • ¾ cup uncooked rice (long-grain recommended)
  • 1 can (10 oz) cream of chicken soup
  • 2 cups  low-sodium chicken broth (more if needed)
  • 2 cups  broccoli florets
  • 1 cup cheddar cheese, shredded
  • 1 tbsp fresh parsley, chopped (for garnish)

Instructions 

Cook the chicken and onion:

  • Heat olive oil in a large, oven-safe skillet over medium heat.
  • Add chopped onion and cubed chicken. Cook for about 5 minutes until the chicken is browned and no longer pink.
  • Season with salt and pepper. Stir in minced garlic and cook for another 30 seconds until fragrant.

Add rice and liquids:

  • Stir in the uncooked rice, cream of chicken soup, and 2 cups of chicken broth.
  • Bring to a boil, then reduce heat, cover, and let simmer for about 15 minutes, stirring occasionally, until the rice is tender.
  • If needed, add more broth to ensure the rice is fully cooked. Adjust seasoning to taste.

ncorporate broccoli and cheese:

  • Stir in broccoli and half of the shredded cheese. Cook for another 2 minutes until the broccoli is slightly softened.
  • Sprinkle the remaining cheese on top.

Melt the cheese:

  • Place the skillet under the broiler for 2-3 minutes, or until the cheese melts and turns golden brown.

Serve and enjoy:

  • Garnish with fresh parsley and serve warm.

Notes

  • Make-ahead option: Prepare up to Step 2, cover, and refrigerate overnight. When ready to cook, follow the remaining steps.
  • Using frozen broccoli? Thaw and pat dry before adding.
  • Add variety: Try mushrooms, bell peppers, or cauliflower for extra veggies.
  • Best rice to use: Long-grain rice like Basmati works best. If using brown rice, allow extra cooking time and more liquid. Quick-cooking rice can speed up the process.
  • Storage: Store leftovers in an airtight container in the fridge for up to 3 days.
Calories: 299kcal
Course: Main Course
Cuisine: American
Keyword: Chicken, Broccoli, and Rice Casserole

Can I use rotisserie or pre-cooked chicken?

Yes! Using pre-cooked or rotisserie chicken is a great time-saver. Just add it in when you stir in the broccoli and cheese so it heats through without overcooking.

Can I swap white rice for brown rice?

You can, but brown rice takes longer to cook and needs more liquid. Be sure to add extra broth and allow for a longer simmering time until the rice is tender.

What can I use instead of cream of chicken soup?

If you don’t have a can on hand, make a quick homemade version by whisking butter, flour, chicken broth, and milk together until thickened.

Can I use frozen broccoli instead of fresh?

Yes! Just thaw and pat it dry before adding to prevent extra moisture from making the casserole watery.

How do I make this gluten-free?

Easy! Use a gluten-free alternative for the flour if needed, and double-check that your chicken broth and cream of chicken soup are gluten-free.