Author

Designer

Browsing

Creamy Chicken & Mushroom Wild Rice Soup

If comfort had a flavor, this soup would be it.

Packed with tender chicken, earthy mushrooms, and nutty wild rice, all swimming in a rich, velvety broth, this Creamy Chicken & Mushroom Wild Rice Soup is your answer to chilly nights and cozy cravings.

Bonus? It’s easy, freezer-friendly, and slow cooker-approved—because who doesn’t love a meal that practically cooks itself?

Whether you’re meal-prepping or just need something soul-warming, this one’s a keeper.

Grab a spoon and let the magic happen!

For the Soup Base

  • Butter – Adds richness and depth to the soup.
  • Onion – Finely chopped for a flavorful base.
  • Celery & Carrots – Classic aromatics that enhance the broth.
  • Mushrooms – Fresh, sliced mushrooms add an earthy, umami flavor.
  • All-Purpose Flour – Helps thicken the soup for a creamy consistency.
  • Chicken Broth – Provides a rich, savory base for the soup.

For the Filling

  • Cooked Wild Rice – Nutty and slightly chewy, adding great texture.
  • Boneless, Skinless Chicken Breasts – Cooked and cubed for a hearty protein boost.
  • Slivered Almonds – Adds a subtle crunch and nutty flavor.

For Seasoning & Flavor

  • Salt & Black Pepper – Enhances the overall taste.
  • Curry Powder – Adds a warm, slightly spiced depth.
  • Mustard Powder – Brings a hint of tangy complexity.
  • Dried Parsley – A touch of herbal freshness.
  • Dry Sherry – A splash for extra depth and richness.

For the Creamy Finish

  • Half-and-Half – Creates the velvety, creamy texture without being too heavy.

Creamy Chicken and Mushroom Wild Rice Soup

Prep Time 20 minutes
Cook Time 2 hours 10 minutes
Total Time 2 hours 30 minutes
Servings 8
Calories 530
A comforting and hearty soup, perfect for chilly days. This creamy chicken and mushroom wild rice soup is easy to prepare, can be made in a slow cooker, and freezes well for future meals.

Ingredients

  • ½ cup butter
  • 1 onion, finely chopped
  • ½ cup celery, chopped
  • ½ cup carrots, sliced
  • ½ pound fresh mushrooms, sliced
  • ¾ cup all-purpose flour
  • 6 cups chicken broth
  • 2 cups cooked wild rice
  • 1 pound boneless, skinless chicken breasts, cooked and cubed
  • ½ tsp salt
  • ½ tsp curry powder
  • ½ tsp mustard powder
  • ½ tsp dried parsley
  • ½ tsp ground black pepper
  • 1 cup slivered almonds
  • 3 tbsp dry sherry
  • 2 cups half-and-half

Instructions 

Sauté Vegetables:

  • In a large saucepan over medium heat, melt the butter.
  • Add the onion, celery, and carrots, sautéing for about 5 minutes.
  • Stir in the mushrooms and cook for an additional 2 minutes.

Make the Base:

  • Sprinkle in the flour and stir well to coat the vegetables.
  • Slowly pour in the chicken broth, stirring continuously to avoid lumps.
  • Bring the mixture to a gentle boil, then reduce the heat to low.

Combine Ingredients:

  • Stir in the cooked wild rice, cubed chicken, salt, curry powder, mustard powder, parsley, black pepper, almonds, and sherry.
  • Let the soup warm through.

Add Creaminess:

  • Pour in the half-and-half, stirring gently to incorporate.
  • Simmer on low for 1 to 2 hours, stirring occasionally.
  • Important: Do not allow the soup to boil, as this may cause the creamy base to separate.

Serve & Enjoy:

  • Ladle the soup into bowls and serve warm.
  • Garnish with fresh parsley or additional almonds if desired.
Calories: 530kcal
Course: Main Course, Soup
Cuisine: American
Keyword: Chicken and Mushroom Wild Rice Soup

1. Can I use pre-cooked chicken and rice?

Yes! Rotisserie chicken and pre-cooked wild rice make this recipe even easier. Just add them in at the final simmering stage, and you’ve got a shortcut to creamy, cozy goodness!

2. How do I boost the flavor if it tastes bland?

Make sure you’ve seasoned well—a pinch more salt can make a world of difference! Try adding a dash of garlic powder, thyme, or a squeeze of lemon to brighten things up. And don’t skip sautéing the veggies until they’re golden—it adds major depth!

3. Can I make this soup dairy-free?

Absolutely! Swap the half-and-half for coconut milk, almond milk, or cashew cream for a dairy-free alternative. You’ll still get that rich, creamy texture without the dairy.

4. Can I make this in a slow cooker?

Yes! Sauté the veggies first (it’s worth it for the flavor), then transfer everything except the half-and-half to the slow cooker. Cook on low for 6-8 hours or high for 3-4 hours, then stir in the half-and-half during the last 30 minutes.

5. How do I store and reheat leftovers?

Let the soup cool, then store it in an airtight container—it keeps in the fridge for up to 4 days or the freezer for up to 3 months. When reheating, do it slowly over low heat, stirring occasionally to keep it creamy. Avoid boiling to prevent the dairy from separating.

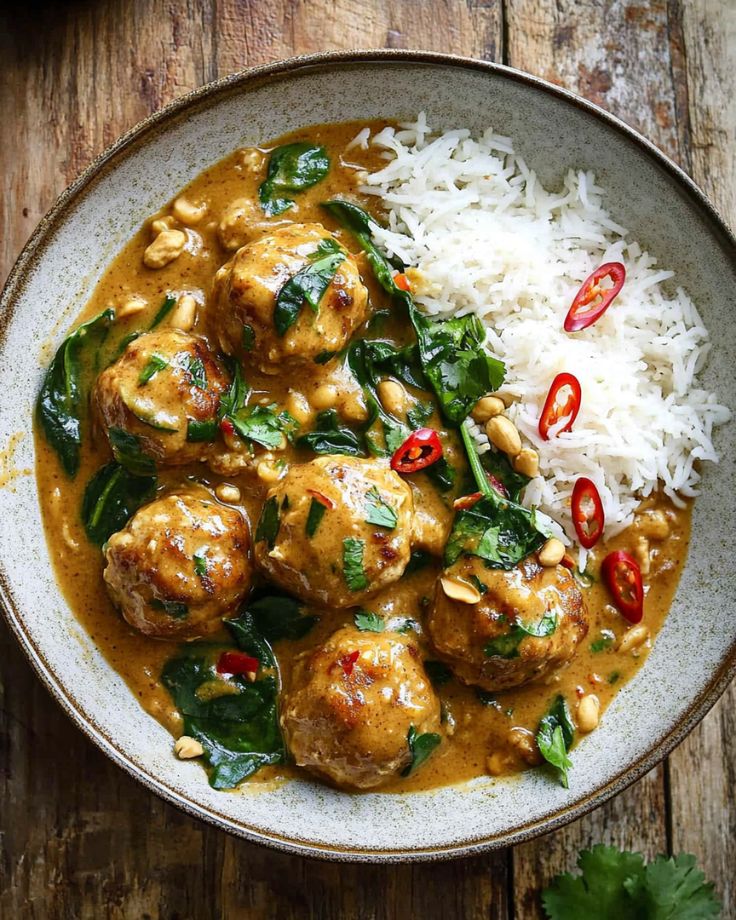
One-Pan Ginger Chicken Meatballs with Peanut Sauce

Big flavor, minimal effort! These ginger chicken meatballs are simmered in a rich, creamy Thai-inspired peanut sauce, creating a dish that’s bold, comforting, and packed with protein.

With just one skillet and simple ingredients, this is the perfect weeknight meal—quick, easy, and full of vibrant flavors.

Bonus? It’s great for meal prep and pairs beautifully with rice, quinoa, or spiralized veggies.

One bite, and you’ll be hooked!

For the Meatballs

  • Ground Chicken – Use 93% lean ground chicken (or substitute with ground turkey).
  • Egg – Helps bind the meatballs together.
  • Panko Breadcrumbs – Keeps the meatballs light and tender (substitute with coconut flour for a gluten-free option).
  • Green Onion – Adds a mild onion flavor and freshness.
  • Cilantro – Brings in a bright, fresh taste.
  • Jalapeño – Adds a bit of heat, but not overpowering.
  • Garlic and Ginger – The key aromatics that give the meatballs bold flavor.
  • Cayenne Pepper – Adds a touch of spice.
  • Salt and Black Pepper – Enhances the flavors.
  • Toasted Sesame Oil – Gives the meatballs a nutty depth (can substitute with avocado, coconut, or olive oil).

For the Peanut Sauce

  • Coconut Milk – Provides a creamy, rich base for the sauce.
  • Peanut Butter – The star ingredient that gives the sauce its signature flavor.
  • Soy Sauce – Adds a savory umami depth (use coconut aminos for a gluten-free alternative).
  • Chili Paste or Sriracha – Gives the sauce a spicy kick.

Add-Ins

  • Carrots – Thinly sliced for added texture and sweetness.
  • Red Bell Pepper – Adds crunch and natural sweetness.
  • Frozen Peas or Edamame – Brings color and extra protein.

For Garnish

  • Honey-Roasted Peanuts – Adds a sweet, nutty crunch.
  • Scallions – For a fresh, mild onion finish.
  • Fresh Cilantro – Enhances the dish with a bright, herby touch.

Hot Sauce – Optional, for extra heat.

One-Pan Ginger Chicken Meatballs with Peanut Sauce

Prep Time 30 minutes
Cook Time 30 minutes
Total Time 1 hour
Servings 4
Calories 530
Enjoy these delicious ginger chicken meatballs coated in a creamy Thai-inspired peanut sauce. This easy, one-pan dish is loaded with vegetables and perfect for meal prep! Serve with brown rice, quinoa, cauliflower rice, or spiralized veggie noodles for a wholesome meal.

Ingredients

For the Meatballs:

  • 1 lb 93% lean ground chicken (or ground turkey)
  • 1 egg
  • ½ cup panko breadcrumbs (or 2 tbsp coconut flour for a gluten-free option)
  • ¼ cup green onion, finely chopped
  • ¼ cup cilantro, finely diced
  • 1 jalapeño, seeded and finely diced
  • 3 cloves garlic, minced
  • 1 tbsp freshly grated ginger
  • 1 tsp cayenne pepper
  • ½ tsp salt
  • Freshly ground black pepper, to taste
  • 1 tbsp  toasted sesame oil (or avocado, coconut, or olive oil)

For the Peanut Sauce:

  • 1 can (15 oz) light coconut milk
  • ½ cup creamy natural peanut butter (just peanuts + salt)
  • 2 tbsp gluten-free soy sauce (or coconut aminos)
  • 1 tbsp chili paste or sriracha

Add-Ins:

  • 2 large carrots, thinly sliced
  • 1 red bell pepper, julienned
  • cup frozen peas (or edamame)

For Garnish:

  • Chopped honey-roasted peanuts
  • Diced scallions
  • Fresh cilantro
  • Hot sauce (optional)

Instructions 

  • Make the Meatballs: In a large bowl, combine ground chicken, egg, breadcrumbs, green onion, cilantro, jalapeño, garlic, ginger, cayenne, salt, and black pepper. Mix well and form into 16 golf ball-sized meatballs.
  • Cook the Meatballs: Heat a large deep skillet over medium-high heat and add sesame oil. Brown the meatballs on all sides for about 5-6 minutes. Work in batches if necessary to avoid overcrowding. Transfer browned meatballs to a plate and set aside.
  • Prepare the Sauce: Reduce heat to medium-low. In the same skillet, whisk together coconut milk, peanut butter, soy sauce, and chili paste until smooth.
  • Simmer: Add the sliced carrots to the sauce, then return the meatballs to the skillet. Bring to a gentle simmer, cover, and cook on low heat for 15 minutes.
  • Simmer: Add the sliced carrots to the sauce, then return the meatballs to the skillet. Bring to a gentle simmer, cover, and cook on low heat for 15 minutes.
  • Serve & Enjoy: Pair with brown rice, quinoa, or spiralized zucchini or sweet potatoes. Garnish with chopped honey-roasted peanuts, scallions, and fresh cilantro. Add hot sauce if desired.

Notes

  • Make it Gluten-Free: Use coconut flour instead of panko and coconut aminos instead of soy sauce.
  • Storage: Refrigerate leftovers in an airtight container for up to 4 days. Freeze for up to 3 months.
  • Customize: Swap out veggies or adjust spice levels to your taste!
Calories: 530kcal
Course: Main Course
Cuisine: Thai-Inspired
Keyword: Ginger Chicken Meatballs

Can I use ground turkey instead of chicken?
Absolutely! Ground turkey works just as well as chicken. Stick to 93% lean so you still get that juicy, tender texture.

How do I keep the meatballs from getting dry?
Easy fix! The egg and breadcrumbs help keep them moist, but the real trick? Don’t overmix! Mix just until combined—your meatballs will thank you.

I don’t have panko breadcrumbs—what can I use instead?
No problem! Regular breadcrumbs work fine. If you’re gluten-free, swap them for 2 tablespoons of coconut flour instead.

Can I make this spicier?
Yes! Leave the seeds in the jalapeño, add extra cayenne, or double up on the chili paste in the peanut sauce. Customize the heat to your taste!

Can I prep this in advance?
Absolutely. Make the meatballs and sauce ahead of time, store them separately, then just reheat and combine when you’re ready to eat. Perfect for meal prep!

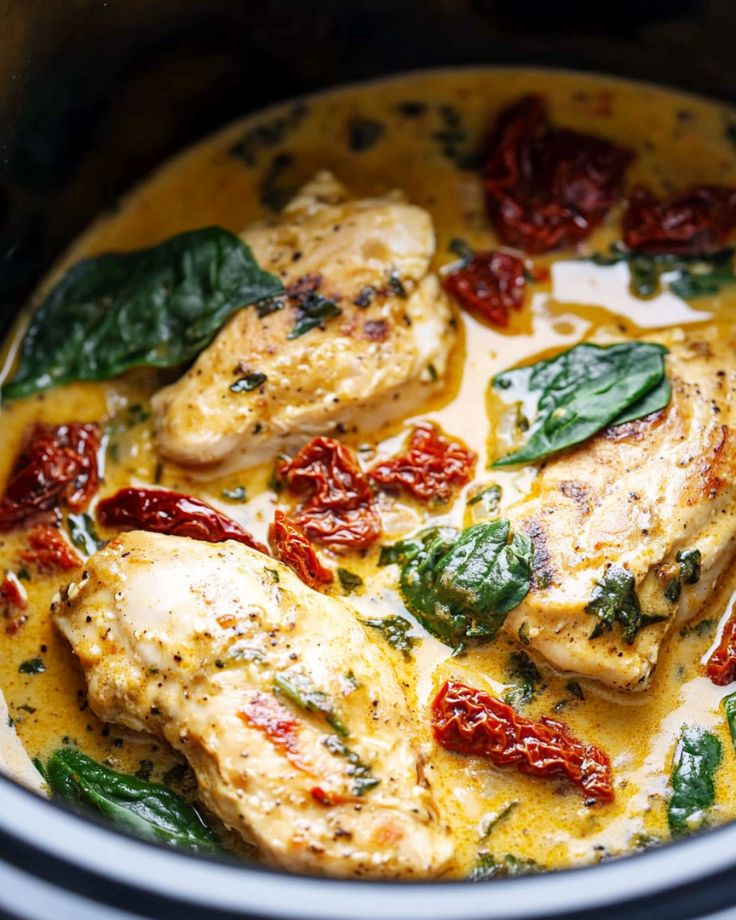
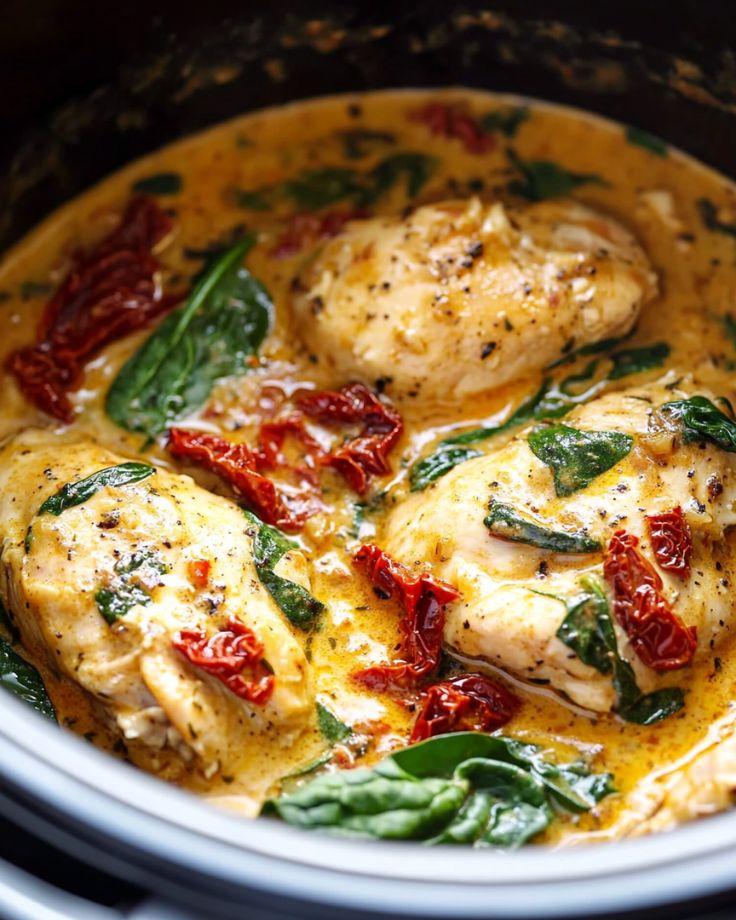
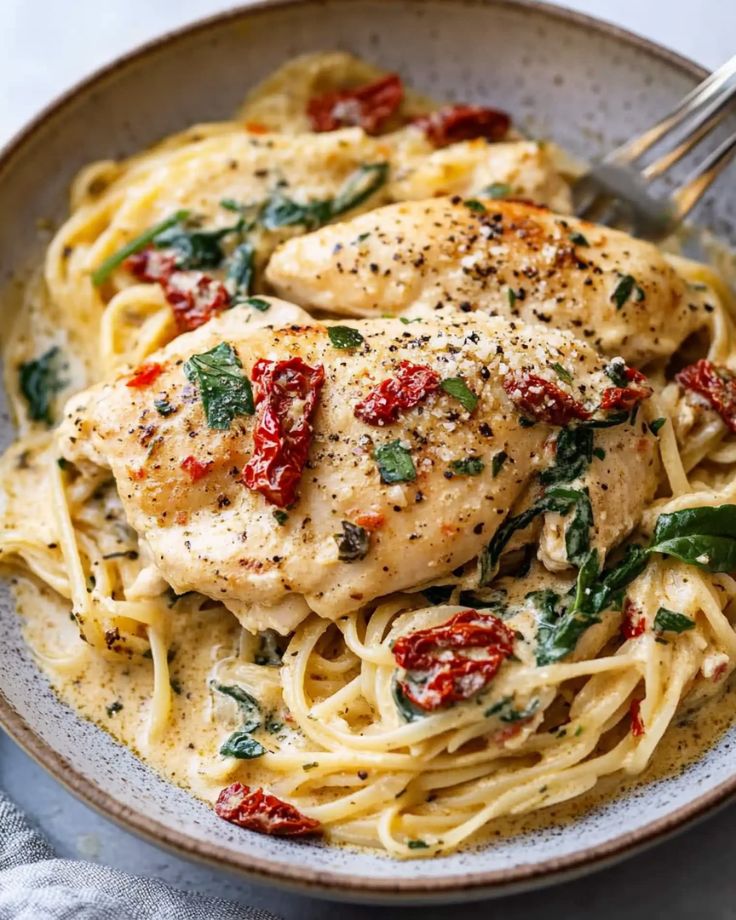
Slow Cooker Tuscan Chicken

Slow Cooker Tuscan Chicken is an effortless, flavor-packed dinner that’s rich, creamy, and absolutely irresistible!

With just 10 minutes of prep, your slow cooker transforms simple ingredients into a luxurious garlic Parmesan sauce with tender, juicy chicken.

Sun-dried tomatoes and spinach add the perfect pop of flavor, making every bite feel like a cozy, restaurant-quality meal.

Your family will love how satisfying this dish is, and you’ll love how easy it is to make—just set it, forget it, and enjoy!

For Tuscan Chicken

  • Chicken Breasts – Boneless, skinless, and seasoned for maximum flavor.
  • Italian Seasoning – A perfect blend of herbs that adds depth to the dish.
  • Onion Powder – Enhances the savory flavor without adding texture.
  • Garlic – Freshly minced garlic infuses the sauce with a rich, aromatic taste.
  • Sun-Dried Tomatoes – Adds a sweet, tangy burst of flavor to balance the creamy sauce.
  • Chicken Broth – Creates the base of the sauce and keeps the chicken moist.
  • Heavy Cream – Gives the dish its signature creamy texture.
  • Parmesan Cheese – Freshly grated for a nutty, salty richness in the sauce.

Spinach – Adds freshness and a pop of color to the final dish.

Slow Cooker Tuscan Chicken

Prep Time 10 minutes
Cook Time 3 hours
Total Time 3 hours 9 minutes
Servings 6
Calories 284
Slow Cooker Tuscan Chicken is an easy, creamy, and flavor-packed dish featuring tender chicken breasts simmered in a rich garlic Parmesan sauce with sun-dried tomatoes and spinach.

Ingredients

  • 4  boneless, skinless chicken breasts
  • 2 tsp Italian seasoning (homemade or store-bought)
  • ½ tsp onion powder
  • Kosher salt and black pepper, to taste
  • 2 cloves garlic, minced
  • ½ cup sun-dried tomatoes, drained and chopped
  • ½ cup chicken broth
  • 1 cup heavy cream
  • ½ cup grated Parmesan cheese
  • 1 cup baby spinach, chopped

Instructions 

Season the Chicken:

  • Generously season both sides of the chicken breasts with Italian seasoning, onion powder, salt, and pepper.

Prepare the Slow Cooker:

  • Lightly grease the inside of your slow cooker with nonstick spray. Place the seasoned chicken in a single layer at the bottom.

Make the Sauce:

  • In a mixing bowl, whisk together the chicken broth, heavy cream, minced garlic, sun-dried tomatoes, and Parmesan cheese.

Cook:

  • Pour the sauce over the chicken in the slow cooker. Cover and cook on high for 3 hours or low for 5 hours until the chicken is tender.

Add Spinach:

  • Just before serving, stir in the chopped spinach and cover for a few minutes until wilted.

Serve & Enjoy:

  •  Taste and adjust seasoning if needed. Serve over pasta, rice, or with crusty bread.

Notes

Cook Time: 3 hours (on high) or 5 hours (on low)
Calories: 284kcal
Course: Main Course
Cuisine: Italian-inspired
Keyword: Slow Cooker Tuscan Chicken

Can I add other vegetables to this dish?

Absolutely! Try adding bell peppers, mushrooms, or zucchini for extra flavor and texture. Just remember—softer veggies like zucchini should go in during the last hour so they don’t turn to mush.

Can I put frozen chicken in the slow cooker?

Technically, yes, but I don’t recommend it! Slow cookers take a while to heat up, and frozen chicken sits in the “danger zone” temperature for too long. For food safety, always use thawed chicken.

Can I use chicken thighs instead of breasts?

YES! In fact, chicken thighs stay juicier and more flavorful in slow cooking. They’re my go-to when I want extra tenderness in this dish.

My sauce is too thin—what do I do?

No worries! Just remove the lid and let it cook for another 15-30 minutes on high to help it thicken up. Or, if you’re in a rush, mix a teaspoon of cornstarch with a splash of water and stir it in!

What’s the best way to serve this?

So many options! Over pasta, rice, or even mashed potatoes—this creamy, dreamy sauce deserves to be soaked up. Want a low-carb option? Serve it over sautéed zucchini noodles or cauliflower rice.

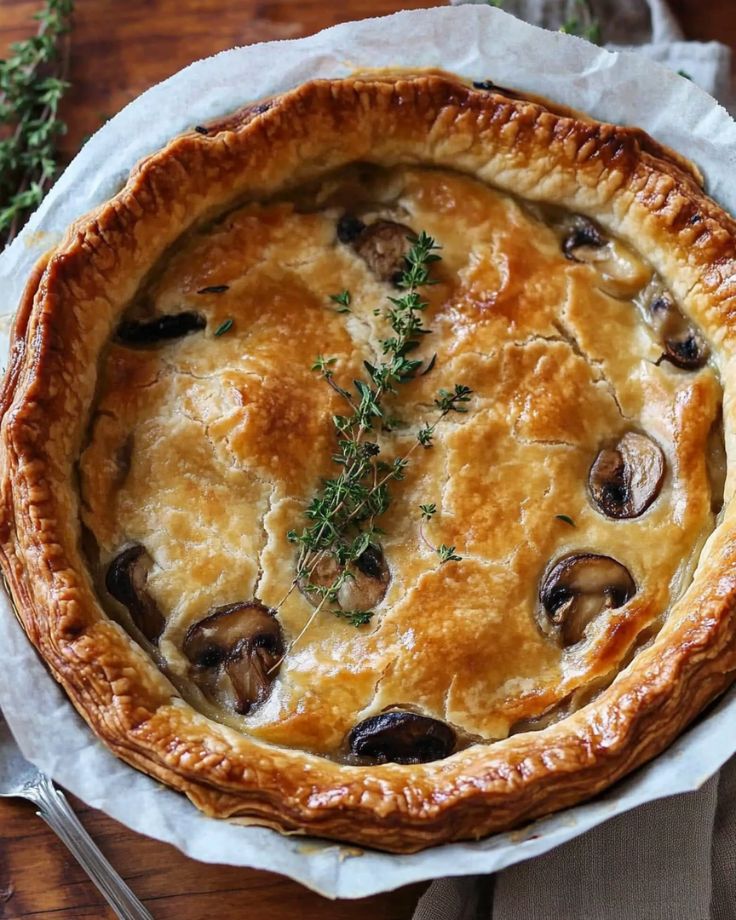
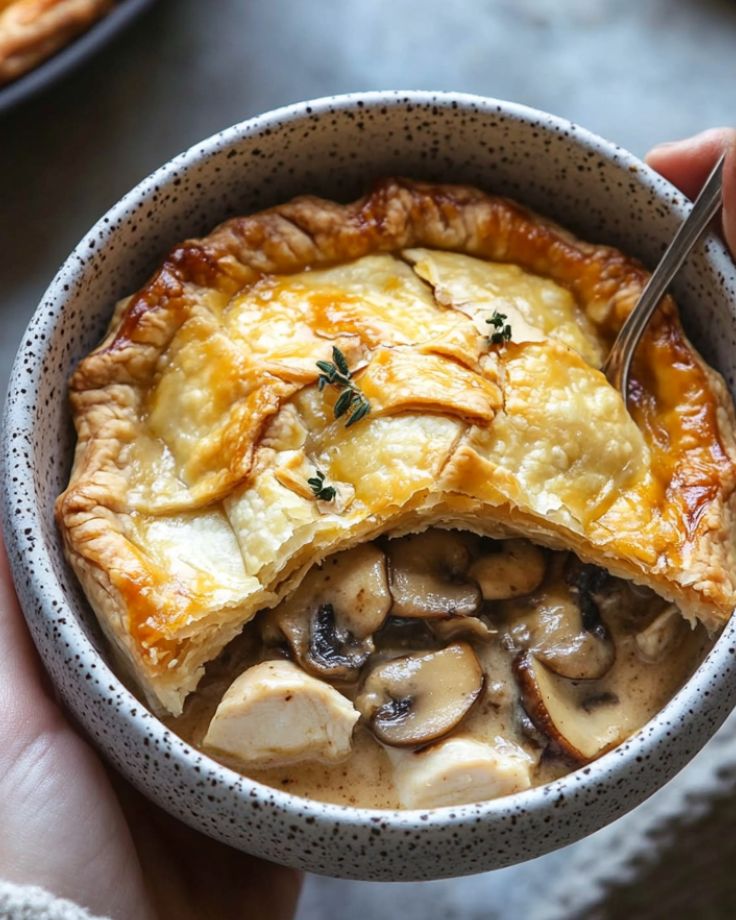
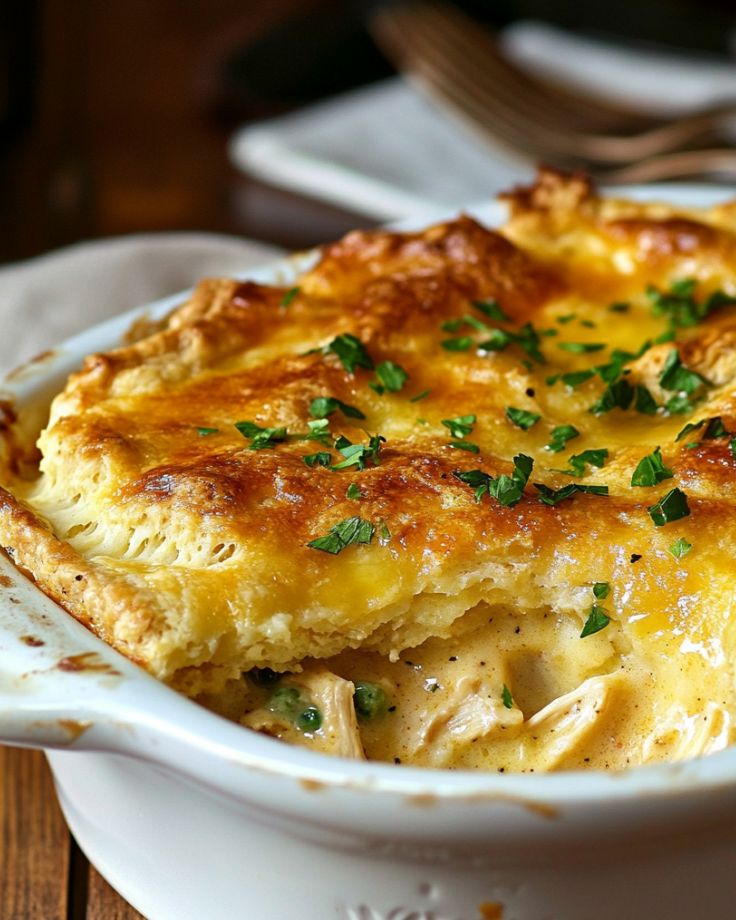
Golden, Flaky & Loaded with Comfort – The Ultimate Chicken & Mushroom Pie!

This Chicken and Mushroom Pie is the kind of meal that feels like a warm hug.

Buttery mushrooms, juicy chicken, and melty cheese—all tucked into golden, flaky puff pastry.

It’s rich, hearty, and surprisingly easy to make.

Best of all? It’s ready in under an hour, making it perfect for busy nights when you need maximum comfort with minimal effort.

One bite, and you’ll see why this pie is an absolute must in your recipe rotation! 

For Chicken and Mushroom Pie

  • Puff Pastry – Store-bought puff pastry keeps this recipe easy and fuss-free. Make sure it’s thawed before using.
  • Mushrooms – Buttery and flavorful, they add depth to the pie. Use any variety you like!
  • Butter – Used to sauté the mushrooms and make the creamy sauce.
  • Garlic – Enhances the savory flavor of the filling.
  • Cooked Chicken – Shredded or diced, this is a great way to use up leftover chicken or rotisserie chicken.
  • Cheddar Cheese – Melts into the filling, adding richness. Medium or sharp cheddar works best!
  • Egg – Whisked and brushed over the pastry for a golden, glossy finish.

For Homemade Cream of Chicken Sauce

  • Butter – Forms the base of the roux, making the sauce creamy and rich.
  • Flour – Helps thicken the sauce for a silky texture.
  • Chicken Broth – Adds deep, savory flavor.
  • Milk – Gives the sauce a creamy consistency.
  • Garlic Powder – Enhances the flavor with a mild garlicky touch.
  • Salt & Black Pepper – To season the sauce to perfection.

Chicken and Mushroom Pie

Prep Time 25 minutes
Cook Time 25 minutes
Total Time 50 minutes
Servings 6
Calories 777
A rich, comforting, and incredibly easy chicken and mushroom pie! This dish is packed with tender chicken  and buttery mushrooms, all wrapped in flaky puff pastry. It’s a cozy meal that comes together in under an hour!

Ingredients

For the Pie

  • 2 refrigerated puff pastry sheets, thawed and rolled out
  • 8 ounces mushrooms, sliced
  • 2 tbsp butter
  • 2 tsp minced garlic
  • 3 cups cooked chicken, shredded or diced
  • 1 cup cheddar cheese (medium or sharp)
  • 1 egg, whisked

For the Homemade Cream of Chicken

  • 6 tbsp butter
  • 3 tbsp flour
  • 1 cup chicken broth
  • 1 cup milk
  • ½ tsp garlic powder
  • ½ tsp salt
  • ¼ tsp black pepper

Instructions 

Preheat & Prep:

  • Preheat oven to 400°F (200°C).
  • Grease a round pie dish and gently press one puff pastry sheet into the dish. Set aside.

Make the Creamy Sauce:

  • In a medium saucepan over medium-high heat, melt 6 tablespoons of butter.
  • Stir in the flour and cook for 1 minute.
  • Gradually whisk in broth and milk, then add garlic powder, salt, and pepper.
  • Once thickened and smooth, remove from heat.

Prepare the Filling:

  • In a large skillet, melt 2 tablespoons butter over medium heat.
  • Add mushrooms and garlic, cooking for 2–3 minutes until fragrant and slightly browned.
  • Stir in the chicken. Cook for another minute.
  • Pour in the cream of chicken sauce and mix well. Stir in the cheese.

Assemble the Pie:

  • Pour the chicken and mushroom mixture into the pie dish.
  • Place the second puff pastry sheet on top (it doesn’t need to cover the edges completely, just align the corners).
  • Brush the top with whisked egg.

Bake & Serve:

  • Bake on the bottom rack for 25 minutes or until the crust is golden brown and puffed.
  • Let cool slightly before serving.

Notes

  • Cheese Choices: Medium or sharp cheddar works best, but any cheddar will do!
  • Shortcut: If you’re short on time, store-bought cream of chicken soup can replace the homemade version.
Calories: 777kcal
Course: Main Course
Cuisine: Comfort Food / Western
Keyword: Chicken and Mushroom Pie

Can I use store-bought puff pastry?

Yes! No need to stress over homemade pastry—store-bought puff pastry works perfectly. Just thaw it first so it’s easy to handle.

What kind of chicken is best?

Anything you have on hand! Rotisserie chicken, leftover roast chicken, or even turkey works great. Just shred or dice it and you’re good to go.

Do I need to cook the filling before baking?

Yes! Sautéing the mushrooms, garlic, and chicken before baking brings out maximum flavor. The filling will be rich, creamy, and delicious.

Can I make this ahead of time?

Absolutely! Prep the filling a day in advance, store it in the fridge, then assemble and bake when ready. Perfect for stress-free cooking!

What goes well with this pie?

It’s already a hearty meal, but if you want sides, try mashed potatoes, a fresh green salad, or steamed veggies to keep things balanced.

Now you’ve got all the tips you need for an easy, foolproof Chicken and Mushroom Pie! 🥧✨

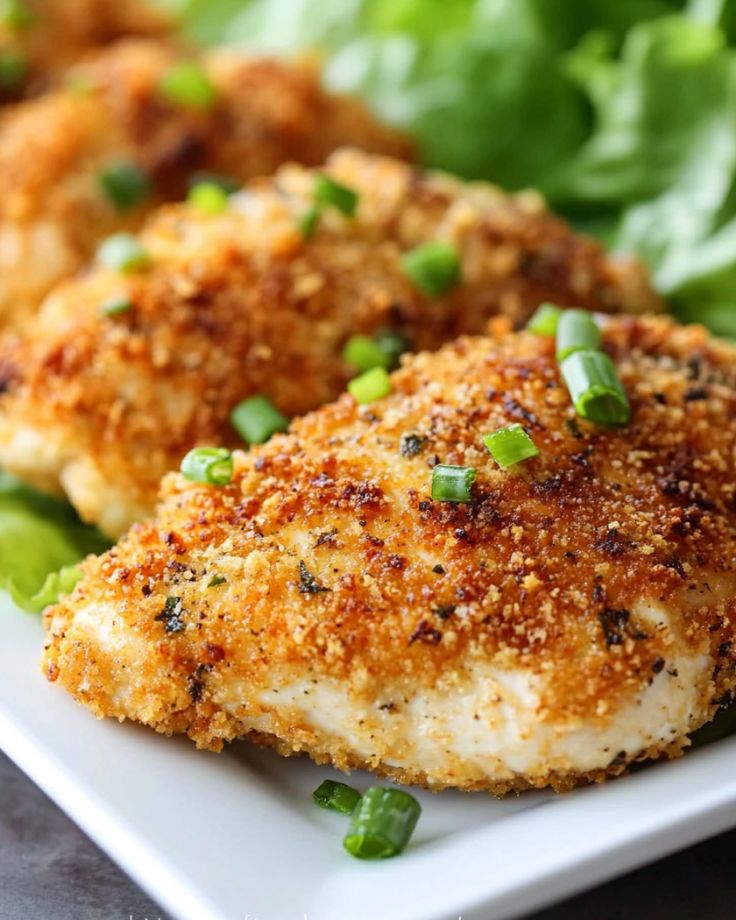
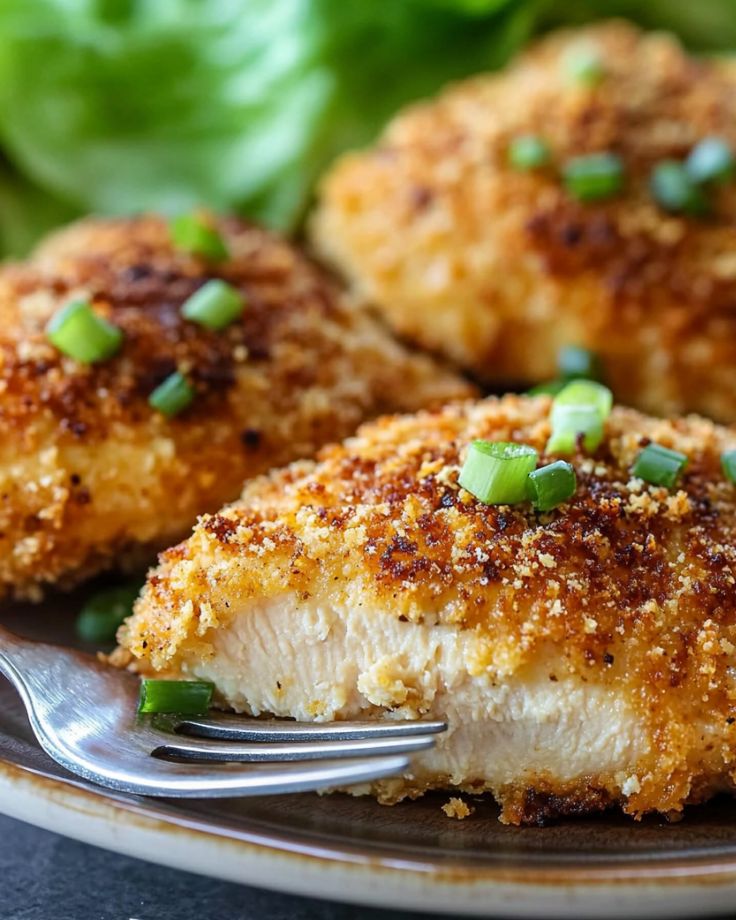
Crispy Parmesan Ranch Chicken

Craving a crispy, cheesy, and flavor-packed chicken dinner that’s ridiculously easy to make?

This Parmesan Ranch Chicken is coated in a crunchy, savory crust and baked to perfection—no frying required!

With just a few simple ingredients, this family-favorite dish delivers big flavor and effortless comfort in every bite.

Your family will love the bold tang of ranch seasoning, the richness of Parmesan, and the golden, crispy coating.

Just dip, coat, bake—and dinner is done!

For Crispy Parmesan Ranch Chicken

  • Chicken – Use boneless, skinless chicken breasts for a lean option. You can also use chicken thighs for extra juiciness.
  • Cornflakes – Crushed cornflakes create a crispy, golden crust that adds the perfect crunch.
  • Parmesan Cheese – Adds a rich, cheesy flavor that pairs beautifully with the ranch seasoning.
  • Ranch Dressing Mix – This seasoning blend infuses the chicken with bold, tangy, herby goodness.
  • Butter – Helps the coating stick to the chicken and enhances the flavor with a buttery richness.

Crispy Parmesan Ranch Chicken

Prep Time 10 minutes
Cook Time 45 minutes
Total Time 55 minutes
Servings 8
Calories 279
A quick and delicious baked chicken recipe with a crispy, flavorful coating.

Ingredients

  • ¾ cup crushed corn flakes
  • ¾ cup grated Parmesan cheese
  • 1 packet (1-ounce) ranch dressing mix
  • 8 4-ounce) boneless, skinless chicken breasts
  • ½ cup melted butter

Instructions 

Preheat & Prep:

  • Preheat the oven to 350°F (175°C).
  • Preheat the oven to 350°F (175°C).

Make the Coating:

  • In a bowl, combine the crushed corn flakes, Parmesan cheese, and ranch dressing mix.

Coat the Chicken:

  • Dip each chicken breast in the melted butter.
  • Roll in the corn flake mixture, ensuring even coverage.

Bake:

  • Place the coated chicken breasts in the prepared baking dish.
  • Bake for about 45 minutes, or until the chicken is fully cooked.
  • The internal temperature should reach 165°F (74°C) when checked with an instant-read thermometer.

Serve & Enjoy:

  • Let the chicken rest for a few minutes before serving.
  • Pair with your favorite sides like roasted veggies, mashed potatoes, or a fresh salad.
Calories: 279kcal
Course: Main Course
Cuisine: American
Keyword: Parmesan Ranch Chicken

1. Can I use something other than cornflakes for the coating?

Of course! If you don’t have cornflakes on hand, panko breadcrumbs are a great alternative for that crispy crunch. Regular breadcrumbs work too, but panko will give you the best texture.

2. How do I make sure the chicken cooks evenly?

Easy fix! Pound the chicken to an even thickness before coating it. This way, it cooks evenly without any dry or undercooked spots.

3. Can I make this recipe healthier?

Yep! Swap the butter for olive oil to cut down on saturated fat, and try using whole-wheat breadcrumbs instead of cornflakes for a little extra fiber.

4. Can I prep this ahead of time?

Absolutely! Coat the chicken earlier in the day, refrigerate it, and bake it when you’re ready. Just let it sit at room temp for a few minutes before baking so it cooks evenly.

5. My coating isn’t sticking—help!

No worries! Make sure to pat the chicken dry before dipping it in butter or oil. Press the coating firmly onto the chicken to help it stick better.

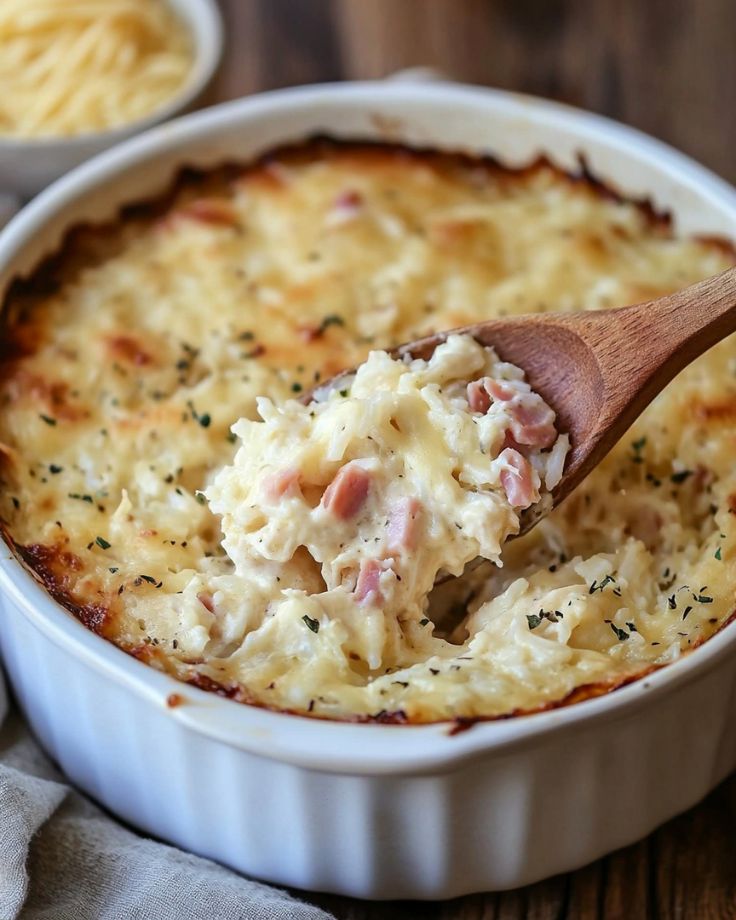
Chicken Cordon Bleu Casserole – Big Comfort, No Fuss!

Craving a quick and easy comfort meal that feels fancy but requires minimal effort?

This Chicken Cordon Bleu Casserole has all the creamy, cheesy, crispy goodness of the classic dish—without the hassle.

Juicy chicken, smoky ham, and melty Swiss cheese are baked in a rich, savory sauce with a golden breadcrumb topping.

It’s easy, freezer-friendly, and perfect for busy nights!

If you love fast prep, big flavors, and meals that make everyone ask for seconds, this one’s for you.

Let’s dive in!

For Chicken Cordon Bleu Casserole

  • Chicken – Use diced or shredded cooked chicken for an easy prep. Rotisserie chicken works great!
  • Ham – Diced ham or ham steak adds the classic cordon bleu flavor with a salty, smoky touch.
  • Swiss Cheese – Melts beautifully and brings the signature creamy, tangy taste.
  • Cheddar Cheese – Adds extra richness and depth to the dish.
  • Parmesan Cheese – A little bit goes a long way in boosting savory, nutty flavors.
  • Long Grain White Rice – Forms the base of this casserole. Be sure to rinse before cooking to prevent it from getting sticky.
  • Chicken Broth – Cooks the rice while adding extra flavor instead of plain water.
  • Cream of Chicken Soup – The secret to a smooth, creamy texture.
  • Sour Cream – Adds tanginess and makes the casserole ultra creamy.
  • Milk – Helps blend everything together into a rich sauce.
  • Dijon Mustard – A little bit adds a subtle zing that brings out the flavors.
  • Garlic & Onion – The base aromatics that add depth and warmth to the dish.
  • Thyme – A touch of this dried herb brings a mild earthy, savory note.
  • Olive Oil & Butter – Used for sautéing and adding extra richness.

For the Crispy Topping

  • Seasoned Breadcrumbs – Creates a golden, crispy crust on top.
  • Melted Butter – Helps the breadcrumbs toast to perfection.

Chicken Cordon Bleu Casserole

Prep Time 10 minutes
Cook Time 1 hour
Total Time 1 hour 10 minutes
Servings 6
Calories 566
A rich and creamy casserole featuring tender chicken, savory ham, melted Swiss cheese, and a crunchy breadcrumb topping. Perfect for meal prep and freezer-friendly!

Ingredients

Base Casserole

  • 2 tbsp butter
  • ½ cup yellow onion, diced
  • 3 cloves garlic, minced
  • 1 tbsp olive oil
  • 1 tsp dried thyme
  • ½ tsp  garlic powder
  • cups chicken broth
  • cups  white long-grain rice, uncooked
  • 10.75 oz cream of chicken soup
  • ½ cup sour cream
  • 1 cup milk
  • 2 tsp Dijon mustard
  • cup grated Parmesan cheese
  • 1 cup  cooked chicken, diced or shredded
  • 8 oz ham steak (or 1 cup diced ham)
  • 9 slices Swiss cheese

Topping

  • cup seasoned breadcrumbs
  • 1 tbsp melted butter

Instructions 

Prep Work

  • Rinse the Rice: Place the uncooked rice in a strainer and rinse under cool water for 1 minute to remove excess starch.
  • Shred Cheese: Set shredded cheese aside to bring it to room temperature for better melting. Avoid pre-packaged shredded cheese, as it contains anti-caking agents.
  • Prepare Chicken: If using raw chicken, dice and season with salt and pepper. Sauté in butter until golden and cooked through. Set aside.
  • Measure Ingredients: Have all ingredients prepped before cooking.

Cooking Instructions

  • Preheat oven to 375°F (190°C).
  • Sauté Onions: In a large pot, melt 2 tbsp butter over medium heat. Add diced onions and cook for 5 minutes until softened.
  • Add Garlic & Seasonings: Stir in garlic, thyme, and garlic powder. Cook for another minute.
  • Cook the Rice: Pour in olive oil, chicken broth, and rice. Stir to combine. Bring to a boil, then reduce heat to a simmer. Cover and cook for 15 minutes without stirring.
  • Let It Rest: Turn off heat and leave the lid on for 10 minutes. This allows any stuck rice to release from the pot.
  • Mix Ingredients: Stir in cream of chicken soup, sour cream, milk, Dijon mustard, cheddar cheese, Parmesan cheese, cooked chicken, and ham.
  • Assemble the Casserole: Transfer mixture to a lightly greased 9x13-inch casserole dish. Layer Swiss cheese slices on top. Cover and bake for 15 minutes.
  • Add Topping: Mix melted butter with breadcrumbs and sprinkle over the casserole. Bake uncovered for another 10 minutes until golden brown.
  • Let It Rest: Allow the casserole to sit for 5 minutes before serving.
Calories: 566kcal
Course: Main Course
Cuisine: American, French-inspired
Keyword: Chicken Cordon Bleu

Make-Ahead & Storage Tips

Make-Ahead Options

  • Refrigerate: Assemble the casserole up to 2 days in advance. Cover and refrigerate.
  • Freeze: Assemble and freeze for later use. Defrost overnight in the fridge before baking.

Reheating Instructions

  • From the Fridge: Let the casserole sit at room temperature for 30 minutes before baking. Cover and bake at 350°F (175°C) for 25-30 minutes.
  • From Frozen: Defrost overnight, then bake at 350°F (175°C) until heated through.

Leftovers

  • Store in an airtight container in the fridge for up to 3 days.
  • Freeze leftovers for up to 3 months. Reheat in the microwave or oven.

1. Can I use pre-cooked chicken and ham?

Yes! Using rotisserie chicken and pre-cooked ham makes this recipe even easier. Just dice or shred and mix them in—no extra cooking needed!

2. What if I don’t have Swiss cheese?

No problem! Try mozzarella, provolone, or even cheddar for a slightly different but still deliciously melty experience.

3. How do I make this gluten-free?

Simple swaps: use gluten-free breadcrumbs and check that your cream of chicken soup is gluten-free. That’s it!

4. Can I prep this ahead of time?

Absolutely! Assemble it up to 2 days ahead, cover, and refrigerate. When ready to bake, let it sit at room temp for 30 minutes before popping it in the oven.

5. What should I serve with this?

This casserole pairs perfectly with steamed veggies, a fresh salad, or even garlic bread. Want something heartier? Serve it over pasta or rice!

This is easy comfort food at its best—no stress, just creamy, cheesy goodness! 

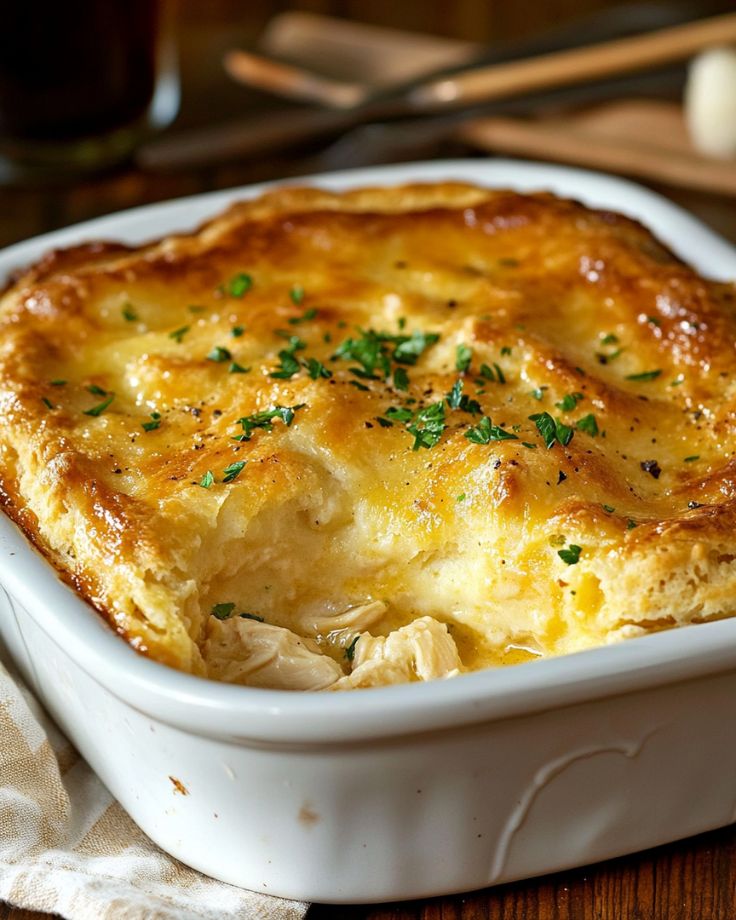
Magic Chicken Pie – The Easiest Cozy Comfort Food

Craving a warm, hearty meal that feels like a hug on a plate—but without all the fuss?

This Magic Chicken Pie is the ultimate set-it-and-forget-it dinner. No stirring, no complicated steps—just layer, bake, and let the oven do the work!

With tender shredded chicken, creamy sauce, gooey cheese, and a golden biscuit topping, every bite is pure comfort.

Perfect for busy weeknights, picky eaters, and anyone craving an easy one-pan dinner that delivers BIG on flavor.

Try it once, and you’ll be making it again and again!

For Magic Chicken Pie

  • Chicken – Use cooked and shredded chicken. Rotisserie chicken works great for convenience.
  • Bisquick Baking Mix – Creates a light, biscuit-like topping with minimal effort.
  • Milk – Combines with Bisquick to form a fluffy, golden crust.
  • Chicken Stock – Enhances the savory flavor of the dish and keeps it moist.
  • Cream of Chicken Soup – Adds a creamy, rich texture to the filling.
  • Butter – Melts at the bottom of the dish for a buttery, indulgent base.
  • Mixed Vegetables – Fresh or frozen veggies work well to add color and nutrition.
  • White Onion – Provides a mild, slightly sweet flavor that complements the filling.
  • Cheddar Cheese – A generous layer of melted cheese brings everything together!

Prep Time 10 minutes
Cook Time 50 minutes
Total Time 1 hour
Servings 8
Calories 345
This Magic Chicken Pie is the ultimate comfort food made easy! With layers of tender shredded chicken, creamy sauce, gooey cheese, and a golden biscuit topping, it’s a fuss-free meal perfect for busy nights.

Ingredients

  • 6 tbsp butter, cubed
  • 2 cups Bisquick baking mix
  • cups milk
  • cups chicken stock
  • 1 can (10.5 oz) cream of chicken soup
  • 2 cups cooked chicken, shredded
  • 2 cups fresh or frozen mixed vegetables
  • ½ white onion, chopped
  • 1 cup cheddar cheese, grated

Instructions 

  • Preheat the oven to 350°F.
  • Melt the butter by placing it in a 9x13-inch baking dish and putting it in the oven until fully melted. Remove the dish once melted.
  • Prepare the batter by whisking together the Bisquick baking mix and milk in a large bowl. Set aside.
  • Mix the soup base by whisking the chicken stock and cream of chicken soup in a separate bowl. Set aside.
  • Layer the ingredients in the baking dish without stirring:
    Evenly distribute the shredded chicken over the melted butter.
    Add the mixed vegetables over the chicken, followed by the chopped onion.
    Sprinkle grated cheddar cheese evenly on top.
    Pour the Bisquick batter over the layers.
    Finally, drizzle the soup mixture evenly over everything.
  • Bake for 45-50 minutes, or until the top is lightly golden brown.
  • Rest & Serve – Let the dish rest for 10 minutes before serving. Enjoy!
Calories: 345kcal
Course: Main Course
Cuisine: American Comfort Food
Keyword: Chicken Pie

  1. Can I use rotisserie chicken instead of cooking chicken from scratch?

Absolutely! Rotisserie chicken is a total time-saver. Just shred it up and you’re good to go. No extra cooking, no extra effort—just magic. 

  1. Do I need to thaw frozen vegetables before adding them?

Nope! Toss them in straight from the freezer. They’ll cook perfectly in the oven, keeping things easy and fuss-free.

  1. Can I make my own Bisquick mix instead of using store-bought?

Yes! If you don’t have Bisquick, mix 2 cups flour, 1 tbsp baking powder, ½ tsp salt, and 2 tbsp butter or shortening. Boom—homemade baking mix in minutes!

  1. Can I halve the recipe for a smaller batch?

You sure can! Just use an 8×8-inch baking dish and cut all the ingredients in half. Same magic, just in a smaller package.

  1. How do I store leftovers, and how long will they last?

Let it cool, then store in an airtight container in the fridge for up to 4 days. To reheat, pop it in the oven for best results or zap it in the microwave if you’re in a hurry.

Honey Garlic Chicken Tenders – Your New Weeknight Hero!

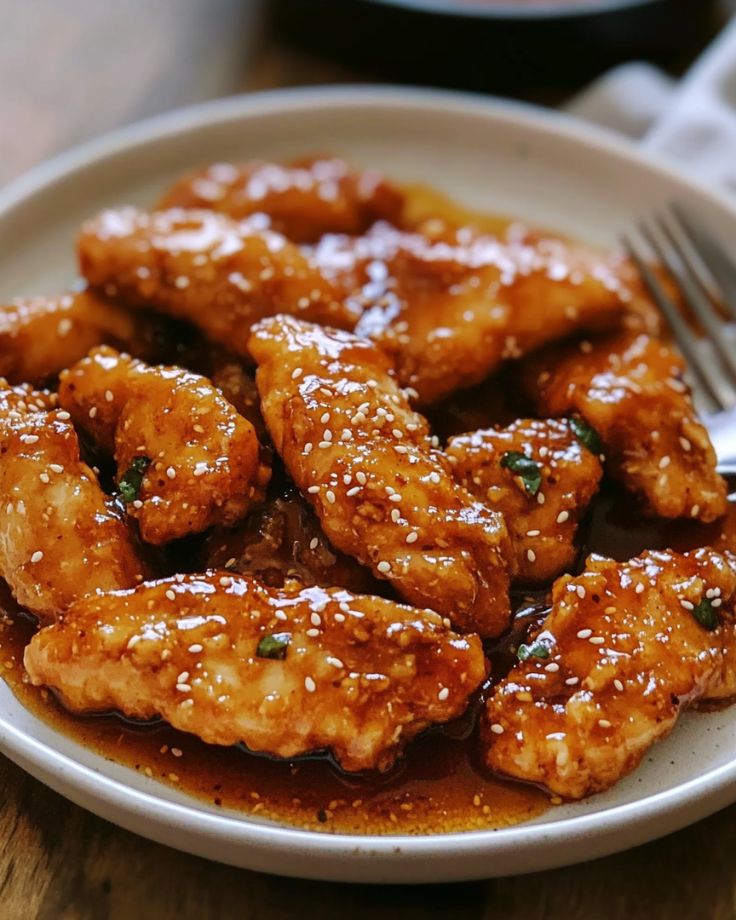
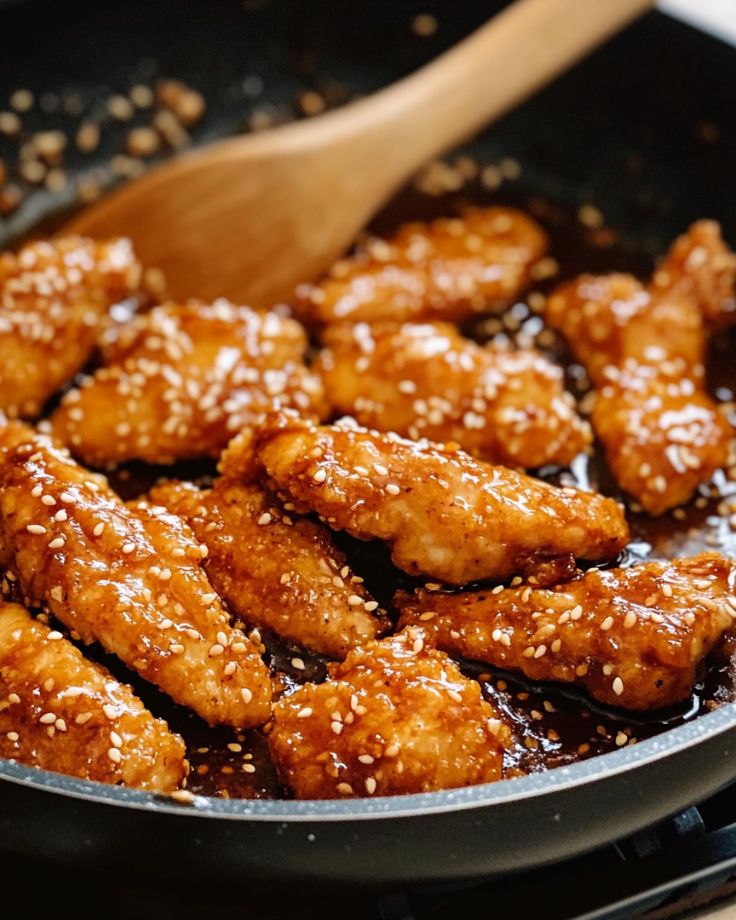
Crispy, golden chicken tenders coated in a sweet, garlicky, and irresistibly sticky sauce—this 20-minute meal is about to become your go-to dinner!

Made with simple pantry staples, this one-pan wonder is fast, easy, and packed with flavor.

Perfect for busy nights when you want big flavor with minimal effort.

Serve it over rice or noodles and watch it disappear! 

For Honey Garlic Chicken Tenders

  • Chicken Tenders – Juicy and quick-cooking, perfect for a crispy coating and soaking up the sauce.
  • Flour – Lightly coats the chicken to create a golden crust and helps the sauce cling better.
  • Salt & Black Pepper – Enhances the chicken’s natural flavors.
  • Unsalted Butter – Adds richness and helps achieve a beautiful sear.
  • Garlic – A key ingredient for bold, aromatic flavor.

For the Honey Garlic Sauce

  • Honey – Adds natural sweetness and creates that signature sticky glaze.
  • Soy Sauce – Balances the sweetness with umami depth. Use low-sodium or tamari for a gluten-free option.
  • Apple Cider Vinegar (or Lemon Juice) – A touch of acidity enhances the flavors and keeps the sauce from being too sweet.
  • Crushed Red Pepper Flakes (Optional) – Adds a subtle kick of heat for extra depth.

For Serving & Garnish

  • Fresh Parsley – Adds a pop of color and freshness.
  • Jasmine Rice, Noodles, or Cauliflower Rice – The perfect base to soak up the delicious sauce.

Honey Garlic Chicken Tenders

Prep Time 5 minutes
Cook Time 20 minutes
Total Time 25 minutes
Servings 4
Calories 353
A quick and flavorful dish, these Honey Garlic Chicken Tenders are perfect for busy weeknights. The sweet and savory sauce pairs beautifully with rice or noodles for a satisfying meal.

Ingredients

For the Chicken:

  • ¼ cup (30g) all-purpose flour (use gluten-free if needed)
  • ½ tsp salt
  • ½ tsp black pepper
  • pounds (650g) chicken tenderloins

For the Honey Garlic Sauce:

  • 4 tbsp unsalted butter, divided
  • 3 cloves garlic, minced
  • 3 tbsp honey
  • 2 tbsp low-sodium soy sauce (or tamari for gluten-free)
  • 1 tbsp apple cider vinegar or lemon juice
  • ½ tsp crushed red pepper flakes (optional)
  • ¼ cup water (for deglazing)

Instructions 

1. Prepare the Chicken

  • In a shallow dish, mix the flour with salt and pepper. Lightly coat each chicken tender in the flour mixture, shaking off any excess.

2. Cook the Chicken

  • Heat 2 tablespoons of butter in a large skillet over medium-high heat. Cook the chicken in batches, about 2-3 minutes per side, until golden brown and fully cooked (internal temperature should reach 165°F/74°C). Transfer to a plate and repeat with remaining chicken, adding more butter if needed.

3. Make the Sauce

  • Pour ¼ cup water into the skillet to deglaze, scraping up any browned bits from the pan. Let the liquid reduce slightly.
  • Add the minced garlic and cook for 30 seconds until fragrant.
  • Stir in honey, soy sauce, vinegar (or lemon juice), and red pepper flakes (if using). Let the sauce heat for 1-2 minutes, thickening slightly.

4. Combine & Serve

  • Return the chicken to the skillet, coating it in the sauce. Cook for another 1-2 minutes, flipping to ensure every piece is well-glazed.

5. Garnish & Enjoy

  • Sprinkle with fresh parsley and serve over jasmine rice, noodles, or cauliflower rice.
Calories: 353kcal
Course: Main Course
Cuisine: American, Asian-Inspired
Keyword: Garlic Chicken Tenders

1. Can I use chicken breasts instead of tenders?

Absolutely! Just slice the chicken breasts into thin strips so they cook quickly and stay juicy.

2. What’s the best gluten-free alternative to flour?

Cornstarch works great! It gives the chicken a light, crispy coating while keeping the sauce nice and glossy.

3. How can I make the sauce spicier?

Easy fix! Add more red pepper flakes, a dash of sriracha, or even a little chili paste for extra heat.

4. Can I prep the sauce ahead of time?

Yes! Mix the sauce ingredients and store them in the fridge for up to 3 days. Just heat it up before adding it to the chicken.

5. What should I serve with these tenders?

Rice, noodles, or even cauliflower rice are perfect for soaking up the sauce. Add a side of steamed veggies for a balanced meal!

Try these tips and enjoy the easiest, tastiest Honey Garlic Chicken Tenders ever! 

The Ultimate No-Fuss Chicken Dinner!

Craving a quick, easy, and ridiculously flavorful chicken recipe?

This Baked Brown Sugar Italian Chicken is your new go-to!

With just 3 simple ingredients and 30 minutes, you get juicy, caramelized chicken bursting with sweet and savory goodness.

No complicated steps, no long prep—just fast, foolproof, and family-approved.

Perfect for busy weeknights when you need dinner on the table fast

For Baked Brown Sugar Italian Chicken

  • Chicken – Use boneless, skinless chicken thighs for juicy results, or substitute with chicken breasts if preferred.
  • Brown Sugar – Adds a caramelized sweetness that balances the savory flavors.
  • Dry Italian Dressing Mix – A blend of herbs and spices that infuses the chicken with zesty, well-seasoned flavor.

Optional Additions

  • Fresh Herbs – Sprinkle with parsley, basil, oregano, or thyme for an extra pop of freshness.
  • Red Pepper Flakes – If you like a little heat, add a pinch for a mild kick.
  • Salt & Pepper – Season to taste before serving for an extra layer of flavor.

Baked Brown Sugar Italian Chicken

Prep Time 5 minutes
Cook Time 25 minutes
Total Time 30 minutes
Servings 4
Calories 242
A quick and flavorful chicken dish with just 3 simple ingredients! This juicy, tender chicken is coated in a sweet and savory brown sugar glaze, perfectly balanced with zesty Italian seasoning. Ready in 30 minutes, it’s a family favorite—ideal for busy weeknights and even picky eaters!

Ingredients

  • ½ cup light brown sugar (packed)
  • 1 packet dry Italian dressing mix (do not prepare as directed on the packet)
  • 4 boneless, skinless chicken thighs (or substitute chicken breasts)

Instructions 

Preheat Oven & Prepare Dish

  • Preheat oven to 425°F (218°C).
  • Lightly grease an 8×8 or 9×9-inch baking dish with cooking spray. (Avoid using a baking sheet, as the chicken will release juices during baking.)

Make the Seasoning Mix

  • In a small bowl, combine brown sugar and dry Italian dressing mix.

Coat the Chicken

  • Evenly coat both sides of the chicken pieces with the sugar-seasoning mixture.
  • Place coated chicken into the prepared baking dish. Sprinkle any remaining seasoning over the top.

Bake

  • Bake for 25 minutes, or until the internal temperature reaches 165°F (75°C). Use a digital thermometer for accuracy.

Optional Broil for Crispiness

  • For a slightly crispier top, broil for 1-2 minutes, but keep a close watch—high sugar content can burn quickly.

Rest & Serve

  • Let the chicken rest briefly before serving.
  • Garnish with fresh herbs (parsley, basil, oregano, or thyme) if desired.
  • Add salt, pepper, or red pepper flakes to taste.
Calories: 242kcal
Course: Main Course
Cuisine: Italian-American
Keyword: Baked Brown Sugar Italian Chicken

Serving Suggestions

This chicken pairs well with:
Rice or quinoa
A fresh green salad
Roasted vegetables
Garlic bread

Storage & Leftovers

  • Refrigerate: Store in an airtight container for up to 5 days.
  • Freeze: Keep in a freezer-safe bag for up to 3 months.
  • Reheat gently or enjoy cold in wraps, sandwiches, or salads.

Enjoy your easy, delicious Italian-style baked chicken

  1. Can I use chicken breasts instead of thighs?

Of course! Both work great. Chicken thighs stay juicier, but if you’re using breasts, try pounding them to an even thickness so they cook evenly.

  1. Do I need to line the baking dish with foil?

Highly recommended! The brown sugar glaze gets sticky, so using foil or parchment paper makes cleanup a breeze. No scrubbing required!

  1. Can I make this in a slow cooker?

Yes! Pop the seasoned chicken in the slow cooker and cook on low for 4-5 hours or high for 2-3 hours. Just know that you won’t get that same caramelized glaze as oven baking.

  1. What if I don’t have a dry Italian dressing mix?

No problem! You can DIY it by mixing: garlic powder, onion powder, oregano, basil, thyme, parsley, sugar, salt, and pepper. Boom! Homemade magic.

  1. How do I store and reheat leftovers?

Leftovers? Lucky you! Store them in an airtight container in the fridge for up to 5 days. Reheat in the oven at 350°F (175°C) for 10-15 minutes, or enjoy it cold in salads, wraps, or sandwiches.

Buffalo Chicken Chopped Salad

Craving the bold, spicy kick of buffalo wings but want something lighter, fresher, and just as satisfying?

This Buffalo Chicken Chopped Salad delivers all the heat, crunch, and creamy goodness—without the guilt!

   Fast & easy – ready in 30 minutes

   High protein & fiber – keeps you full and satisfied

   Customizable – grill, bake, or air fry the chicken!

Whether you’re meal-prepping, looking for a healthier game-day option, or just craving something bold and delicious, this salad is a total game-changer.

Let’s make it!

For Buffalo Chicken

  • Chicken – Boneless, skinless chicken breasts marinated in buffalo sauce for bold flavor.
  • Buffalo Sauce – Brings that signature spicy kick! Use your favorite store-bought brand or homemade.
  • Coconut Aminos – Adds a slight umami depth. (Substitute with soy sauce + water if needed.)
  • Salt & Pepper – Enhances the overall seasoning of the chicken.

For the Salad

  • Romaine Lettuce – Crisp, fresh, and perfect for holding all the toppings.
  • English Cucumber – Adds a cool crunch to balance the spice.
  • Carrots – A touch of natural sweetness and crunch.
  • Celery – A classic pairing with buffalo flavors!
  • Red Onion – A little sharpness to round out the flavors.

For the Toppings

  • Blue Cheese Crumbles – Creamy, tangy contrast to the spicy chicken.
  • Roasted Chickpeas – Crunchy, protein-packed topping for extra texture.

For the Dressing

  • Ranch Dressing – Creamy and cooling to balance the heat.
  • Buffalo Sauce – Mixed with ranch for an extra kick! (Adjust to taste.)

Buffalo Chicken Chopped Salad

Prep Time 15 minutes
Cook Time 15 minutes
Total Time 30 minutes
Servings 4
Calories 478
If you're a fan of buffalo wings, this salad is a must-try! It's packed with bold flavors, fresh ingredients, high protein, and fiber—all while being easy to prepare. We love grilling the buffalo-marinated chicken, but alternative cooking methods are included below.

Ingredients

  • ¼ cup buffalo sauce, divided
  • 2 tbsp coconut aminos (or 1 tbsp soy sauce + 1 tbsp water)
  • Salt and pepper, to taste
  • lb boneless, skinless chicken breasts
  • ½ cup ranch dressing of choice
  • 8 cups chopped romaine lettuce
  • 1 medium English cucumber, diced (~2 cups)
  • 2 medium carrots, peeled and diced (~1 cup)
  • 2 celery stalks, diced (~1 cup)
  • ¼ cup diced red onion
  • ½ cup blue cheese crumbles
  • ½ cup roasted chickpeas (such as Biena Sea Salt)

Instructions 

1. Marinate the Chicken

  • Preheat the grill to medium-high heat (or preheat a skillet over medium-high heat on the stove).
  • In a shallow bowl, whisk together 2 tablespoons buffalo sauce, coconut aminos, salt, and pepper.
  • Add the chicken, tossing to coat. Let it marinate while the grill heats.

2. Cook the Chicken

  • Grill: Place the marinated chicken over indirect heat and grill for 5-7 minutes per side, or until fully cooked (internal temperature of 165°F).
  • Stovetop: Heat a skillet and cook for the same time, flipping once. Cooking time may vary based on chicken thickness. (Alternative cooking methods below.)

3. Prepare the Dressing

  • In a small bowl, mix ranch dressing with the remaining 1-2 tablespoons buffalo sauce (adjust for heat preference). Refrigerate until ready to use.

4. Assemble the Salad

  • Once the chicken is cooked, let it cool slightly, then chop into bite-sized pieces. (This can be done ahead and stored in the fridge for up to 3 days.)
  • In a large bowl, combine romaine, cucumber, carrots, celery, red onion, blue cheese, and chicken.
  • Drizzle with the prepared dressing and toss well.

5. Serve

  • Divide into bowls and top each serving with 2 tablespoons of roasted chickpeas for extra crunch.
  • Enjoy immediately!
Calories: 478kcal
Course: Main Course, Salad
Cuisine: American
Keyword: Chicken Chopped Salad

Alternative Chicken Cooking Methods

If you don’t want to grill or pan-cook the chicken, try these methods:

Baking (Oven)

  • Preheat oven to 425°F.
  • Place marinated chicken on a baking sheet sprayed with cooking spray.
  • Bake for 16-18 minutes until cooked through (165°F internal temp).

Broiling

  • Position the oven rack 6 inches below the broiler.
  • Place chicken on a sprayed baking sheet and broil for 7-9 minutes per side (14-18 minutes total) until cooked through.

Air Frying

  • Preheat the air fryer to 375°F.
  • Spray the basket and arrange the chicken in a single layer.
  • Air fry for 6 minutes, flip, then cook another 6-7 minutes until done.

1. Can I prep this salad ahead of time?

Yes, this salad is great for meal prep. Cook and cube the chicken up to three days in advance and store it in an airtight container in the fridge.

Chop the vegetables a day ahead and keep them separate to maintain freshness. The dressing can be made ahead and stored in the fridge for up to a week. Assemble the salad just before serving for the best texture.

2. What’s the best way to cook the chicken?

If grilling isn’t an option, here are a few alternatives:

  • Stovetop: Sear over medium-high heat for five to seven minutes per side.
  • Oven-Baked: Bake at 425°F (218°C) for 16 to 18 minutes.
  • Air Fryer: Cook at 375°F (190°C) for six to seven minutes per side.

Each method results in juicy, flavorful chicken.

3. Can I swap or add ingredients?

Yes, this salad is easy to customize:

  • Swap blue cheese for feta if you prefer a milder taste.
  • Add avocado for creaminess or bell peppers for extra crunch.
  • Increase the protein by adding hard-boiled eggs or extra chickpeas.

Feel free to adjust it to your preferences.

4. What’s the best dressing for this salad?

A mix of ranch dressing and buffalo sauce provides a creamy and spicy balance. If you want an alternative:

  • Blue cheese dressing offers a tangy, bold flavor.
  • A Greek yogurt-based ranch is a lighter, healthier option.

Adjust the buffalo sauce amount to control the spice level.

5. How can I make this salad healthier?

Here are a few simple adjustments:

  • Use a Greek yogurt-based dressing instead of regular ranch.
  • Swap blue cheese for a lower-fat cheese or use a smaller amount.
  • Add more vegetables to increase fiber and nutrients.
  • Grill or bake the chicken instead of pan-frying to reduce added fats.